Mini Egg Cheesecake Cookie Bars Recipe
Mini Egg Cheesecake Cookie Bars are here to transform your dessert game! If you’re anything like me, the mere mention of creamy cheesecake and chewy cookie dough is enough to send your taste buds into a frenzy. But imagin extracte those two indulgent worlds colliding, then elevated by the delightful crunch and sweetness of those iconic chocolate eggs? That’s precisely what these Mini Egg Cheesecake Cookie Bars deliver. We’ve taken the best of both worlds – the rich, tangy bliss of cheesecake and the comforting, buttery goodness of a classic cookie – and swirled them together into a portable, shareable bar. What truly makes these Mini Egg Cheesecake Cookie Bars special is the unexpected burst of Cadbury Mini Eggs, creating a delightful textural contrast and a festive pop of color that’s perfect for spring celebrations or simply treating yourself. Get ready to discover your new favorite baked obsession!
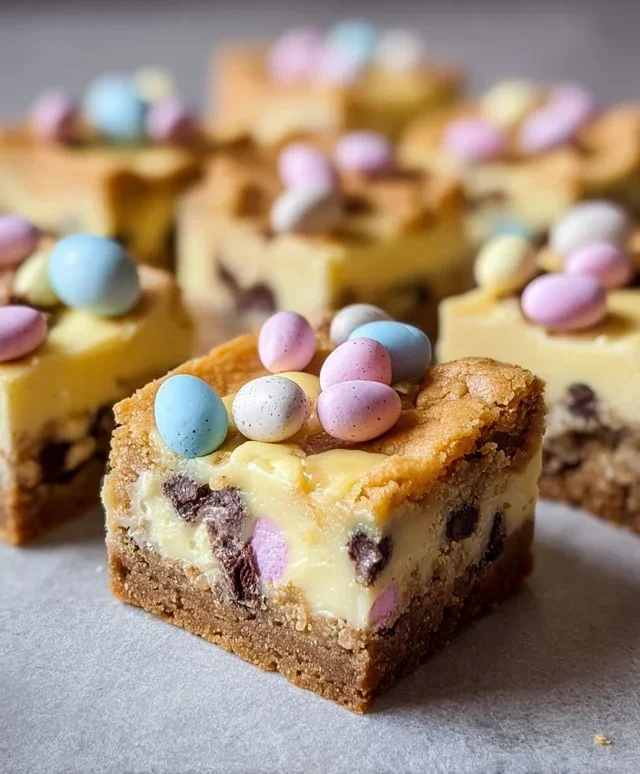
Mini Egg Cheesecake Cookie Bars
Get ready to experience pure joy in every bite! These Mini Egg Cheesecake Cookie Bars are the ultimate mashup of a soft, chewy chocolate chip cookie and a rich, creamy cheesecake, all studded with the delightful crunch and pastel charm of Cadbury Mini Eggs. They’re perfect for sharing (or not!), making an impressive dessert for any occasion, or simply treating yourself because you deserve it. The combination of textures and flavors is simply divine, with the sweet, slightly tangy cheesecake swirl cutting through the buttery, chocolate-laden cookie base.
Ingredients:
Instructions:
Step 1: Preparing the Cookie Base
Begin extract by preheating your oven to 350°F (175°C). While the oven heats up, prepare your baking pan. A 9×13 inch baking pan is ideal for these bars. Line it with parchment paper, leaving an overhang on the sides. This parchment “sling” will make it incredibly easy to lift the finished bars out of the pan for clean cutting. In a large mixing bowl, combine the melted butter with ¾ cup of light brown sugar and ½ cup of granulated sugar. Whisk these together until they are well combined and the mixture is smooth. This sugar mixture forms the foundation of our chewy cookie base, providing moisture and sweetness. Next, add in your 2 large eggs, one at a time, whisking well after each addition to ensure they are fully incorporated. Stir in 1 ½ teaspoons of vanilla extract for that classic cookie aroma and flavor. In a separate, medium-sized bowl, whisk together the 2 ¼ cups of flour, 1 teaspoon of baking soda, ½ teaspoon of baking powder, and ½ teaspoon of salt. This dry ingredient blend is crucial for the cookie’s structure and lift. Gradually add the dry ingredients to the wet ingredients, mixing on low speed or by hand until just combined. Be careful not to overmix at this stage, as it can lead to tough cookies. Finally, gently fold in 1 ½ cups of roughly chopped Cadbury mini eggs and 1 cup of chocolate chips. Reserve a few whole mini eggs if you’d like to press them onto the top before baking for extra decoration and a burst of color.
Step 2: Creating the Cream Cheese Swirl
Now, let’s get to the luscious cheesecake layer! In a medium bowl, beat the softened 8 oz. block of cream cheese with ⅓ cup of granulated sugar until it’s perfectly smooth and creamy. There should be no lumps. You can use a hand mixer for this or a sturdy whisk and some elbow grease. A softened cream cheese is essential for achieving a lump-free, decadent swirl. Once smooth, beat in 1 large egg and 1 teaspoon of vanilla extract until just combined. Again, avoid overmixing. The goal here is a rich, smooth cream cheese mixture that will beautifully complement the cookie dough.
Step 3: Assembling the Bars
Take about two-thirds of your cookie dough mixture and press it evenly into the bottom of your prepared 9×13 inch baking pan. Ensure it forms a solid, even layer, as this will be the base of your bars. You can use your hands or the bottom of a measuring cup to achieve a flat surface. Don’t worry if it’s not perfectly smooth; the cheesecake layer will help even things out. Now, carefully spoon the cream cheese mixture over the cookie dough base. Gently spread it out to cover the entire surface of the cookie dough. Don’t be too rough, as you don’t want to disturb the cookie layer too much.
Step 4: Creating the Swirl Effect
This is where the magic happens! Dollop the remaining one-third of the cookie dough mixture randomly over the cream cheese layer. It’s okay for the dollops to be of varying sizes. Now, take a knife or a skewer and gently swirl the cookie dough through the cream cheese layer. You can create elegant patterns or a more rustic, marbled effect – it’s entirely up to your artistic preference! Be careful not to over-swirl, as you still want distinct layers of cookie and cheesecake. If you reserved any whole Mini Eggs, now is the time to gently press them onto the surface of the bars for that extra decorative touch and a delightful surprise crunch.
Step 5: Baking and Cooling
Place the assembled bars into your preheated oven. Bake for approximately 30-35 minutes, or until the edges of the cookie dough are golden brown and set, and the cream cheese center is mostly set but still has a slight wobble. It will continue to firm up as it cools. Overbaking can lead to a dry cheesecake layer, so keep a close eye on them towards the end of the baking time. Once baked, remove the pan from the oven and let the bars cool completely in the pan on a wire rack. This cooling process is crucial for the bars to set properly, making them easy to cut. Once completely cool, use the parchment paper overhang to lift the entire slab out of the pan. Place it on a cutting board and cut into bars. For clean cuts, you can wipe your knife with a damp cloth between each slice. Enjoy these delightful Mini Egg Cheesecake Cookie Bars! They are best stored in an airtight container in the refrigerator.
Conclusion:
These Mini Egg Cheesecake Cookie Bars are an absolute showstopper, combining the best of creamy cheesecake and chewy chocolate chip cookie into one delightful bar. They’re surprisingly simple to make, perfect for any occasion, and guaranteed to disappear fast. The delightful crunch of the Mini Eggs adds a festive and textural surprise that elevates this dessert from great to extraordinary. I find them perfect for spring gatherings, Easter celebrations, or simply when you need a serious treat.
For serving, I love these chilled, cut into generous squares. They pair wonderfully with a cup of coffee or a glass of cold milk. If you’re feeling adventurous, consider a drizzle of white chocolate or a sprinkle of extra chopped Mini Eggs before serving for an extra touch of indulgence. Don’t be afraid to get creative with variations! You could swap the Mini Eggs for other seasonal candies, or add a swirl of raspberry jam into the cheesecake layer for a fruity twist.
I truly encourage you to give these Mini Egg Cheesecake Cookie Bars a try. They’re a fantastic way to impress your friends and family, and the joy of baking and sharing them is truly rewarding. Let me know how yours turn out!
Frequently Asked Questions:
Can I make these bars ahead of time?
Absolutely! These bars are perfect for making a day or two in advance. Store them in an airtight container in the refrigerator. They actually taste even better after the flavors have had a chance to meld together overnight!
What can I substitute for Cadbury Mini Eggs?
If you can’t find Cadbury Mini Eggs, or if they’re out of season, you have plenty of options! Chocolate chips (milk, dark, or white) are a classic choice. You could also use chopped candy bars like M&Ms, Reese’s Pieces, or even chopped up chocolate-covered pretzels for a salty-sweet element.
How should I store leftover cheesecake cookie bars?
Leftover Mini Egg Cheesecake Cookie Bars should be stored in an airtight container in the refrigerator. They will keep well for up to 3-4 days. For longer storage, you can wrap individual bars tightly and freeze them for up to a month.
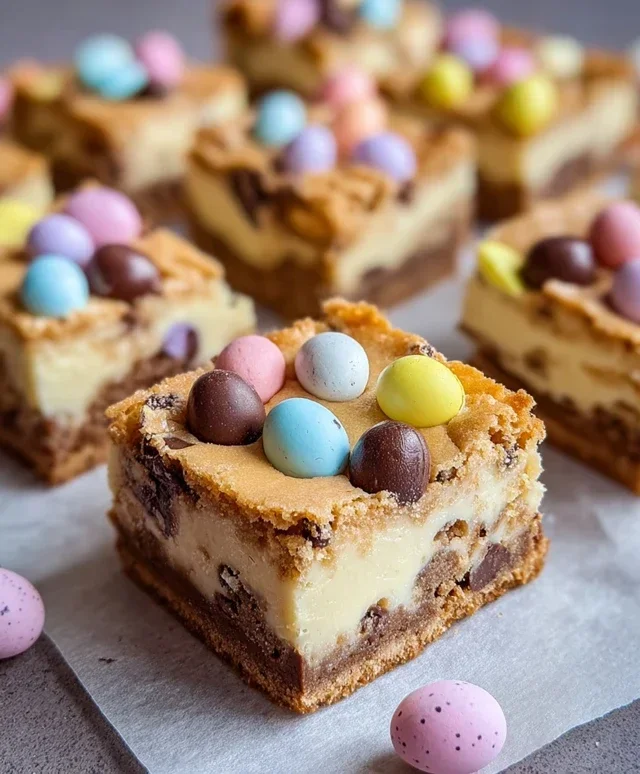
Mini Egg Cheesecake Cookie Bars
Decadent bars featuring a chewy chocolate chip cookie base topped with a creamy cheesecake layer, studded with Cadbury Mini Eggs.
Ingredients
-
1 cup butter, melted
-
¾ cup light brown sugar
-
½ cup sugar
-
2 large eggs
-
1 ½ tsp vanilla extract
-
2 ¼ cups flour
-
1 tsp baking soda
-
½ tsp baking powder
-
½ tsp salt
-
1 ½ cups Cadbury mini eggs
-
1 cup chocolate chips
-
1 (8 oz.) block of cream cheese, softened
-
⅓ cup sugar
-
1 large egg
-
1 tsp vanilla extract
Instructions
-
Step 1
Preheat oven to 350°F (175°C). Grease and flour a 9×13 inch baking pan. -
Step 2
In a large bowl, cream together melted butter, brown sugar, and ½ cup sugar until well combined. Beat in 2 eggs and 1 ½ tsp vanilla extract. -
Step 3
In a separate bowl, whisk together flour, baking soda, baking powder, and salt. Gradually add dry ingredients to wet ingredients, mixing until just combined. Stir in Mini Eggs and chocolate chips. -
Step 4
Press about two-thirds of the cookie dough into the bottom of the prepared pan. Bake for 10 minutes. -
Step 5
While the crust bakes, beat softened cream cheese with ⅓ cup sugar and 1 large egg until smooth. Stir in 1 tsp vanilla extract. -
Step 6
Spread the cream cheese mixture evenly over the par-baked cookie crust. Dollop the remaining cookie dough over the cream cheese layer and gently spread to cover. -
Step 7
Bake for another 15-20 minutes, or until the edges are golden brown and the center is set. -
Step 8
Let cool completely on a wire rack before cutting into bars.
Important Information
Nutrition Facts (Per Serving)
It is important to consider this information as approximate and not to use it as definitive health advice.
Allergy Information
Please check ingredients for potential allergens and consult a health professional if in doubt.