Perfect Grilled Pizza Recipe- Easy Delicious Steps
How to Make the Perfect Grilled Pizza has always been my secret weapon for an unforgettable outdoor meal. There’s something undeniably magical about transforming simple dough into a crispy, chewy, and flavor-packed masterpiece right on the grill. Forget soggy bottoms and lukewarm toppings; we’re talking about a truly elevated pizza experience that will have your friends and family beggin extractg for more. What makes grilled pizza so special? It’s the incredible char that develops on the crust, infusing every bite with a subtle smoky essence you just can’t replicate in a conventional oven. The intense, dry heat of the grill creates a perfectly blistered, airy crust that’s both tender on the inside and delightfully crisp on the outside. Plus, the speed at which it cooks means less time in the kitchen and more time enjoying the sunshine. Get ready to ditch the delivery menus and discover how to make the perfect grilled pizza that’s sure to become a summer (and fall!) staple.
How to Make the Perfect Grilled Pizza
There’s something incredibly satisfying about homemade pizza, and when you take that delicious creation outdoors and grill it, you unlock a whole new level of flavor and texture. The grill imparts a smoky char and a wonderfully crispy crust that’s hard to achieve in a conventional oven. Forget those floppy, bland store-bought crusts; grilled pizza is where it’s at! It might seem intimidating at first, but I promise, it’s simpler than you think, and the results are absolutely worth the effort. Let’s dive into how you can make the perfect grilled pizza right in your own backyard.
Ingredients:
Preparing Your Dough
The foundation of any great pizza is good dough. If you’re using store-bought dough, make sure to let it come to room temperature for at least 30 minutes to an hour before you plan to grill. This makes it much easier to stretch and handle. If you’re feeling ambitious and want to make your own dough from scratch, that’s fantastic! Just ensure it’s well-risen and ready to go. When it’s time to work with the dough, lightly dust your hands and a clean surface with cornmeal or flour. This prevents sticking and helps create that lovely crispy bottom.
Getting Your Grill Ready
This is a crucial step for success. You want your grill to be hot enough to sear the dough quickly, creating those desirable grill marks and preventing it from sticking. For most grills, this means preheating them to medium-high heat, around 400-450 degrees Fahrenheit (200-230 degrees Celsius). If you’re using a charcoal grill, make sure your coals are glowing hot and covered with a light layer of ash. Clean your grill grates thoroughly with a wire brush. Any stuck-on bits can transfer to your pizza and cause it to tear or burn unevenly. Once hot, give the grates a good oiling using a folded paper towel dipped in olive oil and held with tongs. This creates a non-stick surface and prevents dough from sticking.
Cooking Your Grilled Pizza
Now for the fun part! Let’s get that pizza on the grill.
1. Grill the First Side of the Dough: Take one ball of dough and gently stretch or roll it out to your desired pizza shape, roughly 10-12 inches in diameter. Don’t overwork the dough; you want it to be thin but not so thin that it tears. Carefully transfer the stretched dough directly onto the preheated, oiled grill grates. Grill for 2-4 minutes, or until the bottom is golden brown and you see nice char marks. Keep a close eye on it, as dough can burn quickly on a hot grill.
2. Flip and Prepare the Toppings: Using a wide spatula or pizza peel, carefully flip the dough over. You should have a beautifully charred side facing up. Now is the time to act quickly! Brush the grilled side of the dough with a thin layer of olive oil. This helps the sauce adhere and prevents the dough from drying out too much. Then, spread your pizza sauce evenly over the grilled side, leaving a small border for the crust. Sprinkle on your mozzarella and Parmesan cheeses.
3. Add Your Favorite Toppings: Now comes the best part – adding your toppings! Distribute your chosen ingredients over the cheese. Remember, less is often more when grilling pizza. Too many toppings can make the pizza soggy and weigh down the dough, preventing it from cooking evenly. Think about how they will cook on the grill; thinly sliced vegetables will cook faster than larger chunks. For delicate toppings like fresh basil, it’s often best to add them after the pizza has finished grilling.
4. Grill the Pizza Until Cooked Through: Close the grill lid and continue to cook for another 3-5 minutes. The goal here is to melt the cheese and cook the toppings through, while the bottom crust finishes getting perfectly crispy. You’re looking for bubbly, melted cheese and a crust that’s firm and golden brown on the bottom. Again, keep an eye on it – grill times can vary depending on your grill’s temperature and the thickness of your dough and toppings.
5. Remove and Serve: Once your pizza is cooked to perfection, carefully slide a spatula or pizza peel underneath it and remove it from the grill. Transfer it to a cutting board. Let it rest for a minute or two before slicing. This allows the cheese to set slightly, preventing everything from sliding off when you cut into it. Garnish with fresh herbs if desired, slice, and enjoy your incredible homemade grilled pizza! The smoky flavor and crispy crust are truly unbeatable.
Making grilled pizza is a fantastic way to elevate your outdoor cooking game and impress your friends and family. Experiment with different sauce combinations and toppings to find your perfect grilled pizza creation. Happy grilling!
Conclusion:
So there you have it – your ultimate guide to crafting the perfect grilled pizza! We’ve covered the essentials, from achieving that irresistible smoky char to ensuring a beautifully cooked crust. The beauty of this recipe lies in its simplicity and the incredible flavor it imparts. Grilling your pizza elevates it from a good meal to a truly spectacular one, offering a delightful contrast of crispy, chewy crust and perfectly melted toppings. It’s a fantastic way to entertain or simply enjoy a delicious homemade meal with a unique twist.
Serve your masterpiece piping hot! It’s fantastic on its own, or pair it with a fresh green salad for a complete meal. Consider a light vinaigrette to cut through the richness. For variations, the possibilities are endless! Experiment with different cheeses, fresh herbs, roasted vegetables, or even a sprinkle of red pepper flakes for a bit of heat. Don’t be afraid to get creative with your favorite toppings. I highly encourage you to give this grilled pizza recipe a try; you’ll be amazed at how rewarding and delicious it is!
Frequently Asked Questions:
Can I make the dough ahead of time?
Absolutely! Pizza dough often benefits from a long, slow fermentation. You can prepare your dough up to 2-3 days in advance and store it in the refrigerator. Let it come to room temperature for about an hour before you plan to grill it for easier handling.
What kind of grill is best for pizza?
Both charcoal and gas grills work wonderfully for making grilled pizza. A charcoal grill can provide a more intense smoky flavor, while a gas grill offers precise temperature control, which is very convenient. The key is to achieve consistent medium-high heat.
My dough is sticking to the grill. What can I do?
Ensure your grill grates are very clean and well-oiled. Before placing the dough, dust your pizza peel or the surface you’re transferring the dough from with cornmeal or semolina flour. This acts like tiny ball bearings and helps the dough slide off easily onto the hot grates.
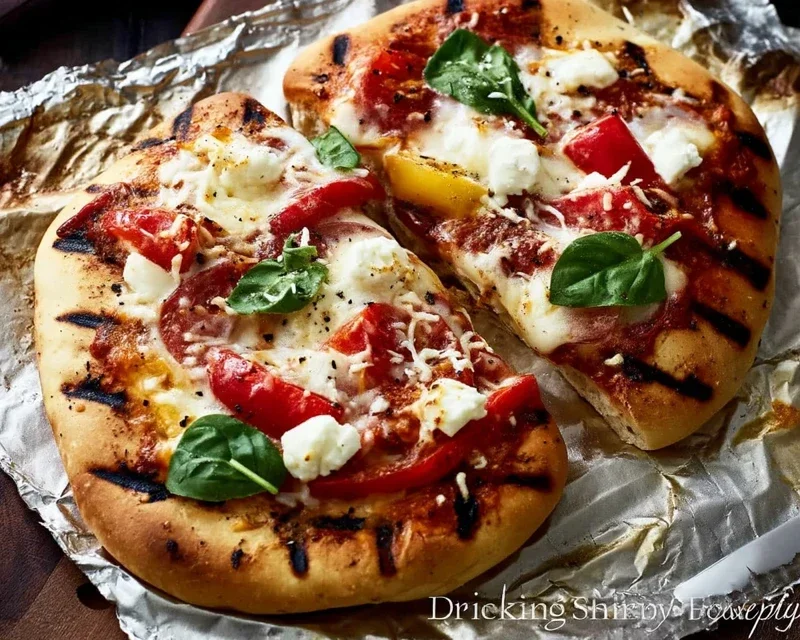
The Perfect Grilled Pizza
Achieve a crispy, smoky crust and perfectly melted toppings with this simple grilled pizza recipe.
Ingredients
-
1 ball pizza dough
-
1/2 cup tomato sauce
-
1 cup shredded mozzarella cheese
-
1/4 cup sliced bell peppers
-
1/4 cup sliced red onion
-
2 tablespoons olive oil
-
1 tablespoon grated Parmesan cheese
-
1 teaspoon dried oregano
Instructions
-
Step 1
Preheat your grill to medium-high heat. Lightly brush the grill grates with olive oil to prevent sticking. -
Step 2
Lightly flour a clean surface and stretch or roll out the pizza dough to your desired thickness and shape. -
Step 3
Carefully place the pizza dough directly onto the hot grill grates. Grill for 2-3 minutes per side, until golden brown and slightly puffed. -
Step 4
Remove the dough from the grill and place it on a flat surface. Spread the tomato sauce evenly over the grilled dough, leaving a small border for the crust. -
Step 5
Sprinkle the mozzarella cheese over the sauce, then add the sliced bell peppers and red onion. Drizzle with a little more olive oil and sprinkle with oregano and Parmesan cheese. -
Step 6
Return the topped pizza to the grill. Close the lid and cook for another 5-7 minutes, or until the cheese is melted and bubbly and the crust is cooked through. -
Step 7
Remove the grilled pizza from the grill, let it cool for a minute, then slice and serve.
Important Information
Nutrition Facts (Per Serving)
It is important to consider this information as approximate and not to use it as definitive health advice.
Allergy Information
Please check ingredients for potential allergens and consult a health professional if in doubt.