Mini Cannoli Cups – Easy Dessert Recipe
Mini cannoli cups are an absolute delight, offering all the classic charm of traditional cannoli in perfectly portioned, bite-sized packages. Who can resist the irresistible allure of crisp, golden shells cradling a luxuriously creamy, sweet ricotta filling? I know I certainly can’t! These little treats evoke the heartwarming traditions of Italian bakeries, bringin extractg a touch of authentic sweetness right into your own kitchen. What makes mini cannoli cups so incredibly special is their adaptability; while the classic ricotta filling is divine, they’re a fantastic canvas for your own creative flair. Imagin extracte them dusted with powdered sugar, drizzled with chocolate, or even infused with a hint of lemon zest. They’re perfect for parties, elegant desserts, or simply when you crave a touch of pure indulgence. Get ready to impress yourself and your loved ones with these delightful mini cannoli cups!
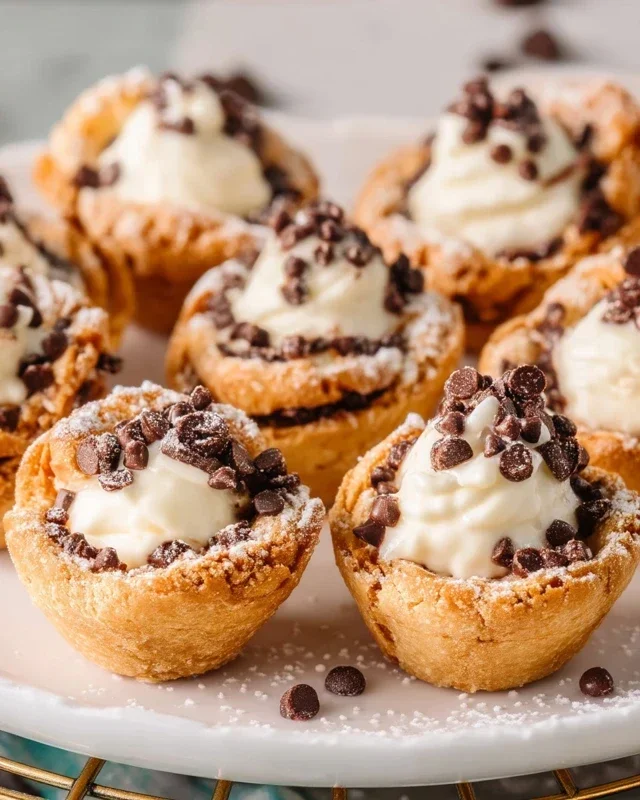
Mini Cannoli Cups
Craving the delightful crisp shell and sweet, creamy filling of a cannoli but want a simpler, bite-sized version? Look no further than these Mini Cannoli Cups! They capture all the classic flavors of traditional cannoli without the fuss of rolling and frying dough. We’ll use readily available refrigerated pie crusts to create perfectly shaped edible cups that are baked to a golden crisp. Then, we’ll whip up a luscious ricotta filling that’s a breeze to make. These mini delights are perfect for parties, a sweet afternoon treat, or whenever you need a little taste of Italy.
Ingredients:
Instructions:
First things first, let’s get our adorable cannoli cups baked. Preheat your oven to 375 degrees Fahrenheit (190 degrees Celsius). You’ll need a mini muffin tin for this recipe. Lightly grease the muffin tin to ensure your crusts don’t stick.
Preparing the Pie Crusts
Begin extract by unrolling your softened refrigerated pie crusts. If they are still a little firm, let them sit at room temperature for a few more minutes until they are pliable. Using a round cookie cutter that is slightly larger than the opening of your mini muffin tin cups – I find one that’s about 2.5 to 3 inches in diameter works wonderfully – cut out circles from the pie crust. You should aim to get about 12-15 circles from each pie crust, so from two crusts, you’ll have enough for about 24-30 mini cannoli cups, which is a great yield for sharing! Carefully press each circle of dough into the cavities of your prepared mini muffin tin. You want the dough to hug the sides and bottom of the cup, creating a little shell. Make sure there are no large tears or gaps, and gently press the dough up the sides.
Baking the Cups
Once your mini muffin tin is filled with the pie crust dough, it’s time to bake them until they are golden brown and crisp. Before you pop them into the oven, we’re going to add a touch of sweetness and spice to the outside of these shells. In a small bowl, combine the turbinado sugar and ground cinnamon. Sprinkle this mixture evenly over the tops of the unbaked pie crust cups. This not only adds a delightful flavor dimension but also gives them a beautiful, slightly crunchy finish. Bake for 10-12 minutes, or until the edges are golden brown and the bottoms are cooked through. Keep a close eye on them as ovens can vary, and you don’t want them to burn.
Cooling and Filling Preparation
After baking, remove the muffin tin from the oven and let the cannoli cups cool in the tin for about 5 minutes. This allows them to firm up a bit more. Then, carefully invert the muffin tin onto a wire rack to release the baked cups. If any seem a little stubborn, gently coax them out with a butter knife. Let the cups cool completely on the wire rack. While your cups are cooling, it’s time to make the luscious ricotta filling. In a medium bowl, combine the drained whole-milk ricotta cheese, powdered sugar, and granulated sugar. Using an electric mixer on medium speed, or a whisk if you’re feeling energetic, beat the mixture until it’s smooth and creamy.
Adding Flavor to the Filling
Now it’s time to add the aromatic touches that make cannoli so special. Stir in the finely grated orange or lemon zest and the vanilla extract. The zest adds a bright, zesty punch that perfectly complements the sweetness of the filling. Mix until everything is well combined and the filling is wonderfully fragrant. If you prefer a smoother filling, you can gently fold in the miniature semisweet chocolate chips or finely chopped pistachios at this stage. Be careful not to overmix once the chips or nuts are added, so they don’t break down too much.
Assembling the Mini Cannoli Cups
Once the baked cannoli cups are completely cool, you can begin extract assembling your delightful treats. You can spoon the filling directly into the cooled cups using a small spoon, or for a more professional look, you can transfer the filling into a piping bag fitted with a star or round tip and pipe the filling into each cup. Fill the cups generously, but don’t overfill them to the point where the filling spills out. Finally, for that signature cannoli touch, dust the tops of the filled mini cannoli cups with additional powdered sugar using a fine-mesh sieve. You can also sprinkle a few extra chocolate chips or pistachios on top for decoration. These are best enjoyed soon after filling to maintain the crispness of the shells. Enjoy your homemade Mini Cannoli Cups!

Conclusion:
I hope you’re as excited as I am to dive into these delightful Mini Cannoli Cups! This recipe is a winner because it brings all the classic, irresistible flavors of traditional cannoli to a fun, bite-sized package that’s perfect for any occasion. They’re surprisingly easy to whip up, making them accessible even for begin extractner bakers. The crispy, golden shells paired with the sweet, creamy ricotta filling are simply divine, and the customizable toppings add a personal touch that everyone will love.
These mini cannoli cups are incredibly versatile. They make a stunning dessert for parties, potlucks, or just a special treat for yourself and your loved ones. Imagin extracte them gracing your dessert table, each little cup a miniature masterpiece! For serving, I love to arrange them on a decorative platter, perhaps with a dusting of powdered sugar or a few fresh berries on the side. They’re fantastic on their own, but can also be part of a larger dessert spread.
Don’t be afraid to get creative with variations! While the classic is wonderful, you can infuse the ricotta filling with a touch of espresso powder for a mocha twist, add finely chopped pistachios or dried cranberries for texture and flavor, or even experiment with different extracts like almond or orange. The possibilities are endless, and the results are always delicious. I truly encourage you to give these Mini Cannoli Cups a try – they’re guaranteed to bring smiles and satisfy those sweet cravings!
Frequently Asked Questions:
Can I make the cannoli shells ahead of time?
Yes, absolutely! You can prepare the cannoli shells a day or two in advance and store them in an airtight container at room temperature. This is a great way to get ahead of your baking. Just be sure they are completely cooled before storing them.
How should I store the filled mini cannoli cups?
For the best texture, it’s recommended to fill the cannoli cups just before serving. However, if you need to store them for a few hours, place them in an airtight container in the refrigerator. Be aware that the shells might soften slightly.
Mini Cannoli Cups
Delightful miniature cannoli cups made with creamy ricotta filling and a sweet, spiced crust. A perfect no-fry dessert for any occasion.
Ingredients
-
1 container whole-milk ricotta cheese (15 oz., drained)
-
1/2 cup powdered sugar
-
2 tablespoons granulated sugar
-
1 teaspoon finely grated orange zest
-
1/2 teaspoon vanilla extract
-
1 box refrigerated pie crusts, softened as directed on box (2 count )
-
3 tablespoons turbinado sugar (raw sugar)
-
1 teaspoon ground cinnamon
-
1/4 cup miniature semisweet chocolate chips
-
additional powdered sugar, for dusting
Instructions
-
Step 1
Preheat oven to 375°F (190°C). Lightly grease a 12-cup muffin tin. -
Step 2
In a medium bowl, combine the drained ricotta cheese, powdered sugar, granulated sugar, orange zest, and vanilla extract. Stir until well combined and creamy. Stir in chocolate chips. -
Step 3
Unroll the refrigerated pie crusts. Using a 3-inch round cutter, cut out 6 circles from each crust, for a total of 12 circles. -
Step 4
Press each pie crust circle gently into the greased muffin tin cups, forming a shell. -
Step 5
In a small bowl, mix together the turbinado sugar and ground cinnamon. -
Step 6
Sprinkle the cinnamon-sugar mixture over the pie crusts in the muffin tin. -
Step 7
Bake for 10-12 minutes, or until the crusts are golden brown and slightly puffed. -
Step 8
Let the crusts cool in the muffin tin for a few minutes, then carefully remove them and place on a wire rack to cool completely. -
Step 9
Once cooled, fill each cannoli cup with the ricotta mixture. Dust with additional powdered sugar before serving.
Important Information
Nutrition Facts (Per Serving)
It is important to consider this information as approximate and not to use it as definitive health advice.
Allergy Information
Please check ingredients for potential allergens and consult a health professional if in doubt.