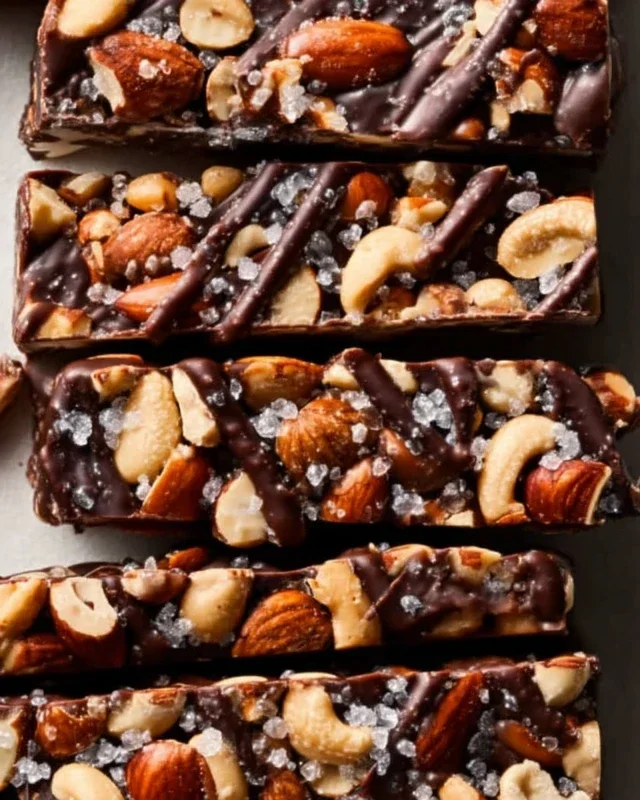
Dark Chocolate Sea Salt Nut Bars-Easy Recipe
Dark Chocolate and Sea Salt Nut Bars are more than just a snack; they’re a symphony of textures and flavors that dance on your palate. If you’re anything like me, you crave that perfect balance of sweet and salty, rich and crunchy. That’s precisely what these glorious bars deliver, and it’s no wonder they’ve become a fast favorite in my kitchen and yours. We all adore those moments when a simple bite can transport us, and the intense, slightly bitter notes of dark chocolate mingling with the satisfying crunch of roasted nuts, all punctuated by the sharp sparkle of sea salt, create just such an experience. These Dark Chocolate and Sea Salt Nut Bars aren’t just easy to make, they’re a testament to how simple, high-quality ingredients can create something truly extraordinary. Prepare yourself for pure, unadulterated bliss in every chewy, chocolatey, nutty mouthful of these divine Dark Chocolate and Sea Salt Nut Bars.
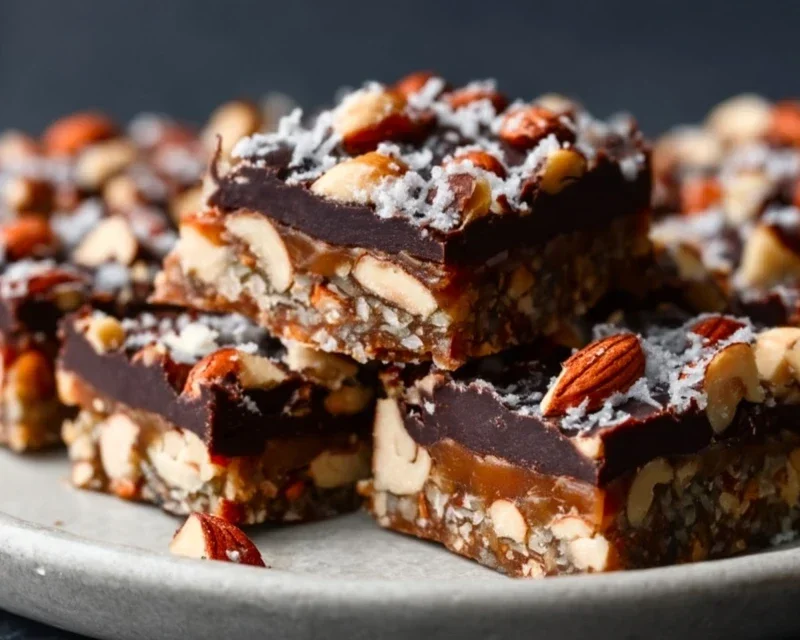
Dark Chocolate and Sea Salt Nut Bars
There’s something incredibly satisfying about a homemade treat that’s both delicious and relatively good for you. These Dark Chocolate and Sea Salt Nut Bars are exactly that. They’re packed with nutty goodness, a hint of sweetness from brown rice syrup, and that irresistible combination of dark chocolate and flaky sea salt. I love having these on hand for an afternoon pick-me-up, a quick breakfast on the go, or even a little something sweet after dinner. They’re incredibly simple to make, and you can easily customize the nuts to your liking. The contrasting textures – the chewy, nutty base against the crisp puffed rice and the smooth, melty chocolate – are truly delightful. Plus, the touch of sea salt elevates every bite, cutting through the richness of the chocolate and enhancing the nutty flavors.
Ingredients:
Preparing the Base
The foundation of these bars is all about getting those nuts perfectly prepared. I like to use a combination of nuts for a more complex flavor and texture, but feel free to go with your favorites. If you’re using whole nuts, it’s a good idea to give them a quick chop. You don’t want them to be too finely ground; a good rough chop will give you nice little pockets of nutty chegrape juicess in every bite. I usually aim for pieces that are roughly the size of a pea, though a little variation is perfectly fine. Think about the texture you enjoy most – some people prefer larger nut pieces, while others like them smaller. This is your bar, so make it yours! Once chopped, I’ll combine them with the puffed rice in a large bowl. The puffed rice adds a wonderful lightness and crunch that balances out the density of the nuts. It’s also important to make sure your puffed rice is fresh and crisp; stnon-alcoholic ale puffed rice can lead to a less satisfying texture.
Binding it All Together
Next, we’ll create the sticky binder that holds all these wonderful ingredients together. In a small saucepan over low heat, gently warm the brown rice syrup. You don’t want to boil it; we’re just aiming to make it pliable and easy to mix. Add the vanilla extract and the 1/2 teaspoon of sea salt to the warm syrup. Stir everything together until it’s well combined. The vanilla adds a subtle warmth and aroma, while the sea salt is crucial for balancing the sweetness and enhancing all the other flavors. This is a surprisingly important step for flavor development. Once the syrup mixture is smooth, pour it over the nut and puffed rice mixture in the bowl. Now, it’s time for some good old-fashioned mixing. Use a sturdy spatula or a wooden spoon to thoroughly coat all the nuts and puffed rice with the syrup. Ensure every piece is touched by the binder; this will guarantee your bars hold their shape. This step can take a minute or two of persistent stirring, but it’s worth it for a well-structured bar.
Forming the Bars
Once the nut mixture is evenly coated with the syrup, it’s time to press it into its final form. I like to use an 8×8 inch baking pan lined with parchment paper. The parchment paper is your best friend here, making it incredibly easy to lift the whole slab of bars out of the pan once they’re set. You can also grease the pan well, but parchment paper is a foolproof method for preventing sticking. Spoon the nut mixture into the prepared pan. Now, this is where you need to apply some pressure. Use the back of your spatula, a clean measuring cup, or even your hands (lightly greased if needed) to press the mixture down firmly and evenly into the pan. The goal is to create a compact layer. The firmer you press, the less likely your bars are to crum extractble when you cut them. Think of it like packing snow for a snowball – the tighter you pack, the more solid it becomes. Make sure the top surface is as smooth and flat as possible for an even finish.
The Chocolatey Crown
Now for my favorite part – the chocolate! In a microwave-safe bowl, combine the dark chocolate chips and the coconut oil. Coconut oil helps the chocolate melt smoothly and gives it a nice sheen. Microwave in 30-second intervals, stirring well after each interval, until the chocolate is completely melted and smooth. Be careful not to overheat the chocolate, as it can seize up. Once melted, stir until it’s luxuriously smooth. Pour this glorious melted chocolate over the pressed nut mixture in the pan. Use your spatula to spread it evenly across the entire surface, going right to the edges. For an extra touch of elegance and flavor, now is the perfect time to sprinkle the optional flaky sea salt over the melted chocolate. The little crystals of flaky salt will catch the light and provide bursts of briny goodness with every bite. This is the signature element that takes these bars from good to absolutely amazing.
Setting and Slicing
The final step is to let everything set. Place the pan in the refrigerator for at least 1-2 hours, or until the chocolate is firm and the bars are solid. The cold will help the chocolate harden and bind everything together beautifully. Once fully set, lift the entire slab out of the pan using the parchment paper. Place it on a cutting board and use a sharp knife to cut the slab into your desired bar size. I usually aim for about 12 bars, but you can cut them smaller or larger depending on your preference. If the chocolate is very hard, you might find it helpful to run your knife under hot water and dry it between cuts for a cleaner slice. Store your finished Dark Chocolate and Sea Salt Nut Bars in an airtight container in the refrigerator. They’ll stay fresh for about a week, though I doubt they’ll last that long! Enjoy your delicious, homemade creation.
Conclusion:
I truly hope you enjoyed exploring the world of these Dark Chocolate and Sea Salt Nut Bars! These bars are an absolute triumph of flavor and texture. The rich, bittersweet dark chocolate perfectly complements the salty crunch of the nuts, creating a sophisticated yet incredibly satisfying treat. They’re wonderfully versatile, making them ideal for an afternoon pick-me-up, a thoughtful homemade gift, or even a decadent dessert. I encourage you to get creative with them! Don’t hesitate to experiment with different nut combinations – walnuts, pecans, or even almonds would be fantastic. You could also add a pinch of chili powder for a little heat, or a swirl of caramel for extra indulgence. The possibilities are endless, and the joy of baking these from scratch is immense. Give them a try; you won’t be disappointed!
Frequently Asked Questions:
Can I make these bars vegan?
Absolutely! To make these Dark Chocolate and Sea Salt Nut Bars vegan, simply ensure you use a vegan dark chocolate (most high-quality dark chocolates are naturally vegan, but always check the label) and a plant-based binder if your recipe calls for one, such as maple syrup or agave nectar. This recipe is inherently very adaptable for a vegan diet.
How should I store the finished bars?
For the best freshness and to prevent the chocolate from melting, store your Dark Chocolate and Sea Salt Nut Bars in an airtight container in a cool, dry place. They should keep well at room temperature for about a week. If your kitchen is particularly warm, or you want them to last longer, refrigerating them is a great option. They’ll be delightfully firm and refreshing when chilled!
Can I substitute the nuts?
Yes, you can definitely substitute the nuts! This recipe is very forgiving. While the combination of mixed nuts offers a delightful variety, feel free to use your favorites. Pecans, walnuts, almonds, hazelnuts, or even macadamia nuts would all work wonderfully. You can even use a single type of nut if that’s what you prefer or have on hand.
Dark Chocolate and Sea Salt Nut Bars
Chewy and satisfying no-bake bars packed with nuts, puffed rice, and drizzled with dark chocolate and sea salt.
Ingredients
-
2 1/2 cups unsalted nuts of choice (7/8 cup cashews, 7/8 cup peanuts, 1 cup almonds)
-
1/2 cup puffed rice
-
1/4 cup brown rice syrup
-
1 1/2 teaspoon vanilla extract
-
1/2 teaspoon sea salt
-
1 cup dark chocolate chips
-
2 teaspoons coconut oil
-
Flaky salt for topping (optional)
Instructions
-
Step 1
Line an 8×8 inch baking pan with parchment paper. -
Step 2
In a large bowl, combine the mixed nuts and puffed rice. -
Step 3
In a small saucepan over low heat, gently warm the brown rice syrup and vanilla extract until just combined. Do not boil. -
Step 4
Pour the warm syrup mixture over the nuts and puffed rice. Add the 1/2 teaspoon sea salt and stir until everything is evenly coated. -
Step 5
Press the mixture firmly into the prepared baking pan. -
Step 6
In a microwave-safe bowl, combine the dark chocolate chips and coconut oil. Microwave in 30-second intervals, stirring in between, until melted and smooth. -
Step 7
Pour the melted chocolate over the nut mixture, spreading evenly. Sprinkle with flaky salt, if desired. -
Step 8
Refrigerate for at least 30 minutes, or until the chocolate is set. Cut into bars.
Important Information
Nutrition Facts (Per Serving)
It is important to consider this information as approximate and not to use it as definitive health advice.
Allergy Information
Please check ingredients for potential allergens and consult a health professional if in doubt.