Buster Bar Ice Cream Dessert Recipe- Easy Homemade Treat
Buster Bar Ice Cream Dessert is a nostalgic treat that brings back memories of summer days and childhood delights. If you’ve ever found yourself craving that perfect blend of creamy vanilla ice cream, rich chocolatey goodness, and a satisfying crunch, then this Buster Bar Ice cream dessert recipe is for you. It’s not just an ice cream; it’s an experience. What makes the Buster Bar so incredibly lovable? It’s the masterful combination of textures and flavors – the smooth, cool ice cream enveloped in a hard chocolate shell, often with a delightful nutty surprise. We’re talking about pure, unadulterated joy in every bite. This homemade version aims to capture that magic, bringin extractg the beloved Buster Bar Ice Cream Dessert right into your own kitchen. Get ready to whip up a batch that will have everyone asking for seconds (and maybe even thirds!).
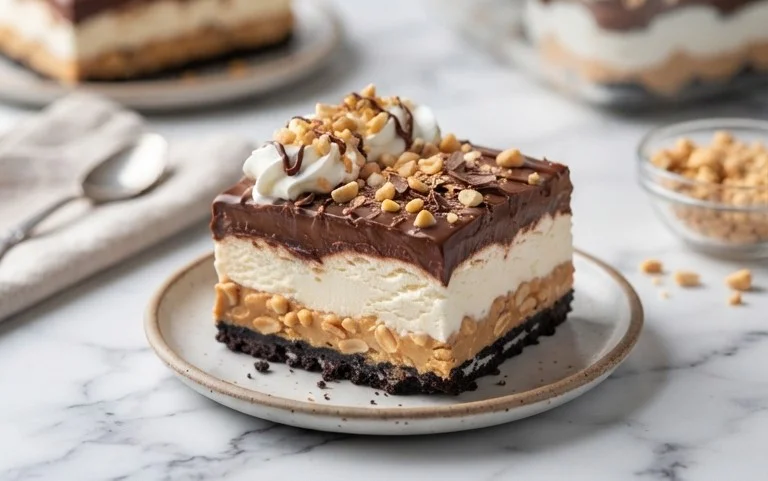
Buster Bar Ice Cream Dessert
There’s something undeniably nostalgic and utterly satisfying about a Buster Bar. That perfect harmony of crunchy cookie crust, creamy ice cream, salty peanuts, and a rich chocolate shell is a flavor combination that transcends trends. For years, I’ve been trying to recreate that magic at home, and after much experimentation, I’ve finally landed on a recipe that truly captures the essence of this beloved frozen treat. This Buster Bar Ice Cream Dessert isn’t just a dessert; it’s an experience. It’s the perfect centerpiece for a summer barbecue, a birthday celebration, or simply a way to treat yourself after a long week. The beauty of this recipe is that while it looks impressive, it’s surprisingly straightforward to make. So, gather your ingredients, put on your favorite playlist, and let’s get ready to create some frozen bliss.
Ingredients:
Crafting the Foundation: The Oreo Crust
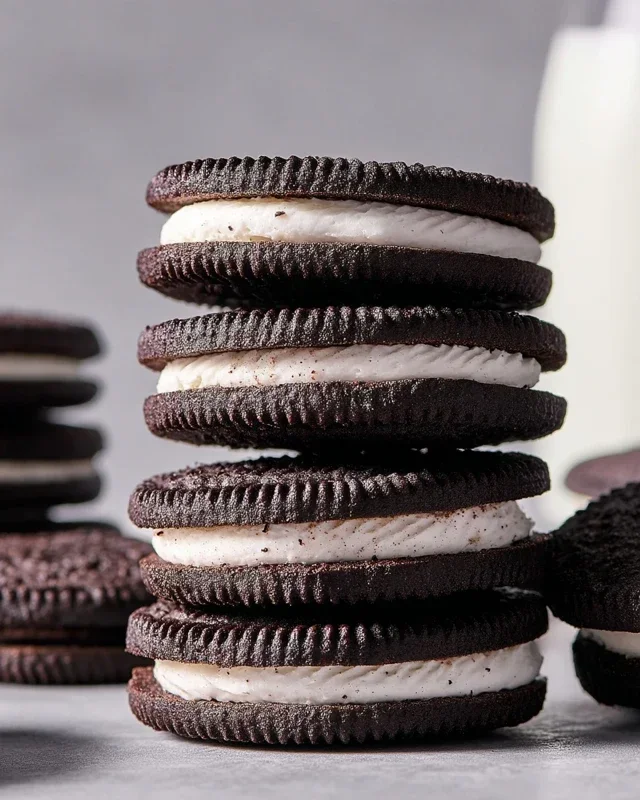
The first step in our journey to Buster Bar perfection is creating the incredibly delicious Oreo crust. This is the base upon which all the other amazing layers will build. You’ll want to take your entire package of Oreo cookies and crush them. Don’t worry about getting them to a super-fine powder; a good mix of fine crum extractbs and slightly larger pieces will provide wonderful texture. You can achieve this by placing the Oreos in a sturdy zip-top bag and using a rolling pin, or by using a food processor. Once your Oreos are crushed, transfer them to a medium bowl. Now, pour in your 1/2 cup of melted butter. Stir everything together thoroughly until all the cookie crum extractbs are moistened. The mixture should resemble wet sand.
Next, we’ll press this delightful mixture into the pan. I find a 9×13 inch baking pan or dish works best for this recipe, providing plenty of surface area for all those glorious layers. You can line your pan with parchment paper, leaving some overhang on the sides. This makes lifting the finished dessert out of the pan so much easier for slicing. Evenly press the Oreo and butter mixture into the bottom of your prepared pan. Make sure to get it down into the corners and create a nice, even layer. This crust is going to be the crunchy counterpoint to the smooth ice cream, so take your time to get it just right. Once pressed, pop this pan into the freezer for about 15-20 minutes while you prepare the ice cream layer. This helps the crust set up and prevents it from becoming soggy.
The Creamy Center: Vanilla Ice Cream
Now for the star of the show – the ice cream! You’ll need a half-gallon of your favorite vanilla ice cream. The key here is to let it soften slightly. You don’t want it completely melted, but soft enough to spread easily. Taking it out of the freezer about 10-15 minutes before you need it is usually perfect. Once softened, scoop the vanilla ice cream directly over your chilled Oreo crust. Use a spatula or the back of a spoon to spread it out evenly, ensuring it covers the entire surface of the crust. Try to get a smooth, uniform layer. If your ice cream starts to get too soft, don’t hesitate to pop it back into the freezer for a few minutes to firm up a bit. Once spread, place the entire pan back into the freezer for at least 2-3 hours, or until the ice cream is firm. This chilling time is crucial to ensure the layers hold their shape when you slice into the dessert.
The Salty Crunch: Spanish Peanuts
While the ice cream is firming up, let’s get our peanuts ready. You’ll need one pound of Spanish peanuts. Spanish peanuts are preferred here because they tend to be smaller and have a slightly sweeter flavor profile compared to other varieties, which really complements the sweetness of the dessert. I like to lightly toast my peanuts for an extra layer of flavor and crunch. You can do this in a dry skillet over medium heat for a few minutes, stirring constantly, until they’re fragrant. Alternatively, spread them on a baking sheet and toast them in a 350-degree Fahrenheit oven for about 5-7 minutes. Keep a close eye on them, as they can burn quickly. Once toasted and cooled slightly, you’ll want to press these peanuts into the top of the firm ice cream layer. Don’t be shy; you want a generous, even coating of peanuts. This layer adds that signature salty crunch that is so integral to the Buster Bar experience.
The Rich Chocolate Shell: A Homemade Magic Shell
This is where the magic truly happens – the homemade chocolate shell. This isn’t your typical store-bought magic shell; it’s a decadent, smooth, and rich chocolate coating that hardens beautifully. In a medium saucepan, combine the 12 ounces of semi-sweet chocolate chips, 1/2 cup of butter, and the 12 ounces of evaporated milk. Place this saucepan over low heat. Stir constantly, allowing the butter to melt and the chocolate chips to gradually dissolve into the mixture. This process requires patience. You don’t want to scorch the chocolate, so keep the heat very low and stir continuously. Once everything is melted and the mixture is smooth and glossy, remove it from the heat.
Now, for the crucial addition that makes this a true magic shell: the powdered confectioner’s sugar. Gradually whisk in the 2 cups of powdered confectioner’s sugar. Continue whisking until it’s completely incorporated and the chocolate mixture is smooth and thick. The powdered sugar helps create that wonderful, brittle texture when it cools. Be sure to whisk out any lumps. At this point, you can test a small amount. If it seems too thick, you can add a tiny splash of evaporated milk to thin it out, but be careful not to make it too runny. The ideal consistency is thick enough to coat but still pourable.
The Grand Finnon-alcoholic ale: Assembling and Freezing
With your Oreo crust chilled, the ice cream firm and coated with peanuts, and your luscious chocolate shell prepared, it’s time for the final assembly. Retrieve your pan from the freezer. The ice cream and peanut layer should be very firm. Carefully pour the warm, but not hot, chocolate mixture over the top of the peanut layer. Use a spatula to gently spread the chocolate evenly, ensuring it covers all the peanuts and reaches the edges. Work relatively quickly, as the chocolate will begin extract to set as it cools.
Once the chocolate shell is poured and smoothed, return the entire dessert to the freezer. This is the longest waiting period, but it’s absolutely essential for the chocolate to harden completely. You’ll want to freeze it for at least 4-6 hours, or preferably overnight. This allows all the layers to meld and the chocolate to become perfectly brittle. When you’re ready to serve, allow the dessert to sit at room temperature for just a few minutes before slicing. This will make it easier to cut through the frozen ice cream and the hard chocolate shell. Use a sharp knife, and consider dipping it in hot water between cuts for cleaner slices. Enjoy your homemade Buster Bar Ice Cream Dessert – a true taste of frozen perfection!
Conclusion:
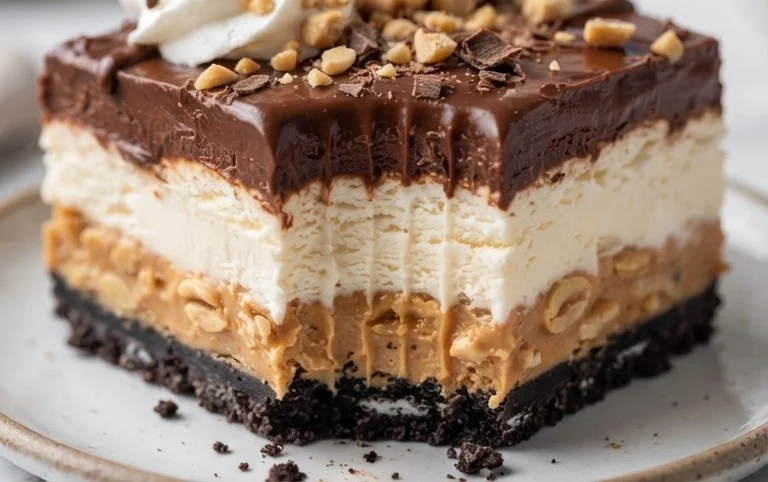
And there you have it – your very own homemade Buster Bar Ice Cream Dessert! This recipe is an absolute winner because it captures all the irresistible flavors and textures of the classic treat, but with the added joy of being made in your own kitchen. The creamy ice cream layers, the crunchy peanut and chocolate coating, and that delightful chewy caramel center come together for a truly spectacular dessert experience. It’s perfect for hot summer days, backyard barbecues, or anytime you need a serious pick-me-up. I love serving it sliced into generous portions, allowing everyone to get a perfect bite of all the components. For an extra touch, consider drizzling a little more melted chocolate over the top just before serving.
Don’t be afraid to get creative with variations! You could swap out the peanuts for chopped almonds or pecans, or even try different types of chocolate for the coating – milk, dark, or white chocolate all offer a unique twist. Adding a swirl of marshmallow fluff into the ice cream layers would also be divine. I wholeheartedly encourage you to give this Buster Bar Ice Cream Dessert a try. It’s surprisingly straightforward, incredibly rewarding, and guaranteed to be a hit with family and friends. Prepare to be amazed by how delicious homemade can be!
Frequently Asked Questions:
Can I make this dessert ahead of time?
Absolutely! This Buster Bar Ice Cream Dessert is ideal for making ahead. In fact, it needs to freeze thoroughly, so preparing it a day in advance is highly recommended. Once fully set, you can store it tightly wrapped in the freezer for up to a week. Just let it sit at room temperature for a few minutes before slicing for the best texture.
What if I don’t have ice cream makers?
No problem at all! You can use high-quality store-bought vanilla ice cream as a base for your layers. Simply let it soften slightly, layer it as instructed, and then proceed with the remaining steps. The result will still be wonderfully decadent.
How can I store leftovers?
Leftovers are precious! Tightly wrap any remaining Buster Bar Ice Cream Dessert in plastic wrap and then aluminum foil to prevent freezer burn. Store it in an airtight container in the freezer. It should keep well for up to two weeks. Remember to let it soften slightly before enjoying.
Buster Bar Ice Cream Dessert
A no-bake ice cream dessert featuring a chocolate cookie crust, vanilla ice cream, peanut-butter fudge, and a chocolate shell.
Ingredients
-
1 14.3 oz pkg. of Oreo cookies, crushed
-
1/2 C butter, melted
-
1/2 gal. vanilla ice cream, softened
-
1 lb. Spanish peanuts
-
2 C powdered confectioner’s sugar
-
12 oz semi sweet chocolate chips
-
1/2 C butter
-
12 oz evaporated milk
Instructions
-
Step 1
Combine crushed Oreo cookies and 1/2 C melted butter. Press into the bottom of a 9×13 inch pan. -
Step 2
Spread softened vanilla ice cream evenly over the cookie crust. -
Step 3
In a saucepan, melt 1/2 C butter. Stir in evaporated milk, powdered sugar, and 12 oz semi sweet chocolate chips. Cook over low heat, stirring constantly, until smooth. Stir in Spanish peanuts. -
Step 4
Pour the peanut-butter fudge mixture evenly over the ice cream layer. -
Step 5
Freeze for at least 4 hours, or until firm. -
Step 6
Cut into squares and serve immediately.
Important Information
Nutrition Facts (Per Serving)
It is important to consider this information as approximate and not to use it as definitive health advice.
Allergy Information
Please check ingredients for potential allergens and consult a health professional if in doubt.