Simple Roasted Summer Squash Recipe- Easy & Delicious
Roasted summer squash is truly the unsung hero of the season, a simple yet incredibly satisfying way to transform those abundant garden treasures into pure deliciousness. As the days grow longer and warmer, our kitchens beckon us to embrace the vibrant flavors of fresh produce, and this dish delivers in spades. What’s not to love? It’s ridiculously easy to prepare, making it a weeknight savior, and the resulting tender-crisp vegetables, kissed by the oven’s warmth, possess a delightful sweetness that’s simply addictive. We adore it because it highlights the natural goodness of squash, allowing its subtle flavors to shine through with minimal fuss. The magic of roasted summer squash lies in its versatility – it’s a perfect side dish, a welcome addition to salads, or even a light and healthy meal on its own. Get ready to fall in love with this effortless culinary gem.
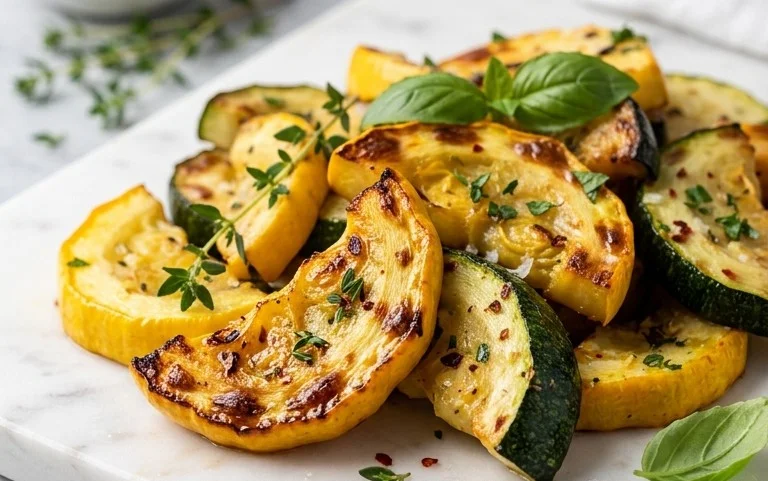
Roasted Summer Squash
There’s something magical about summer produce, isn’t there? The abundance, the vibrant colors, and the incredible freshness that just screams sunshine. Among all the glorious gifts of the summer garden, roasted summer squash holds a special place in my heart. It’s one of those deceptively simple dishes that transforms humble vegetables into something truly delicious. The roasting process brings out the natural sweetness of the squash, giving it a tender, slightly caramelized exterior and a wonderfully soft interior. It’s incredibly versatile, making it a perfect side dish for grilled meats, fish, or even as a delightful addition to a vegetarian meal. This recipe is my go-to, a foolproof method that consistently delivers fantastic results. It’s quick enough for a weeknight dinner but elegant enough for a summer gathering.
The beauty of this dish lies in its minimal ingredients and straightforward preparation. We’re not trying to mask the natural goodness of the squash; instead, we’re enhancing it with a few key players that add depth of flavor and a pleasing texture. The olive oil helps achieve that lovely golden-brown char, the Parmesan cheese lends a nutty, salty kick, the Panko breadcrum extractbs provide a delightful crispness, and the lemon pepper seasoning and paprika offer a bright, slightly spicy warmth that perfectly complements the squash.
Ingredients:
Cooking Instructions
The journey from a fresh, raw squash to a perfectly roasted masterpiece is a joy to behold, and thankfully, it’s a breeze to achieve. My approach focuses on maximizing flavor and achieving that desirable texture where the squash is tender but still holds its shape. We’ll start by preparing the squash, then tossing it in our flavor-packed coating, and finally, letting the oven do its magic.
1. Preparation is Key: Getting Your Squash Ready
The first step in creating this delightful dish is preparing your summer squash. I usually opt for zucchini or yellow squash, or a combination of both. For about a pound of squash, you’ll typically need two medium-sized ones. Begin extract by washing your squash thoroughly under cool running water. Then, trim off the ends of each squash. If the skin of your squash is thin and tender, I like to leave it on for added texture and visual appeal. However, if you prefer a softer, more uniform texture, you can peel the squash if you wish. Next, you’ll want to cut the squash into bite-sized pieces. I find that ½-inch thick rounds or half-moons work wonderfully. Aim for pieces that are roughly the same size so they cook evenly. If your squash is particularly large and watery, you might want to lightly salt the cut pieces and let them sit in a colander for about 15-20 minutes to draw out some of the excess moisture. This step is optional but can help prevent your roasted squash from becoming too soggy. Once cut, pat the pieces dry with a paper towel to ensure the oil and seasonings adhere properly.
2. Coating for Flavor: Building the Delicious Exterior
Now comes the fun part – coating the squash with all those delicious flavors! In a medium-sized bowl, combine your prepared summer squash pieces. Drizzle the tablespoon of olive oil over the squash. Olive oil is fantastic here because it helps the seasonings stick and promotes that beautiful caramelization we’re looking for during roasting. Toss the squash gently with your hands or a spatula to ensure each piece is lightly coated in oil. Don’t be shy; you want a nice even sheen on all the pieces. Next, sprinkle in the grated Parmesan cheese. The Parmesan adds a savory, nutty depth that is just divine when roasted. Then, add the Panko breadcrum extractbs. These are crucial for achieving a delightful crispness that contrasts wonderfully with the tender squash. Follow with the lemon pepper seasoning, which provides a zesty and slightly peppery punch, and the paprika for a hint of smoky sweetness and a beautiful reddish hue. Finally, add the kosher salt. Remember, you can always add more salt later, but you can’t take it away, so start with the ½ teaspoon. Toss everything together thoroughly until all the squash pieces are evenly coated with the oil, cheese, breadcrum extractbs, and seasonings. Make sure every nook and cranny is covered for maximum flavor impact.
3. Roasting to Perfection: The Oven’s Magic Touch
Preheating your oven is a critical step for achieving perfectly roasted vegetables. I like to preheat my oven to 400 degrees Fahrenheit (200 degrees Celsius). This higher heat is essential for getting a good sear and caramelization on the squash without overcooking it into mush. While the oven is heating, prepare a baking sheet. You can line it with parchment paper or aluminum foil for easy cleanup, though it’s not strictly necessary. Spread the coated squash pieces in a single layer on the prepared baking sheet. It’s very important to avoid overcrowding the pan. If the squash pieces are piled on top of each other, they will steam rather than roast, and you won’t get that lovely browning and crisp texture. If you have too much squash for one baking sheet, use two. This is a common mistake people make, and it really makes a difference in the final outcome.
4. The Roasting Process: Monitoring and Rotating
Once your oven is preheated and the squash is spread evenly on the baking sheet, it’s time to roast. Place the baking sheet in the preheated oven. The roasting time will typically range from 15 to 25 minutes, but this can vary depending on your oven and the size of your squash pieces. About halfway through the cooking time, around the 10-minute mark, I like to carefully remove the baking sheet from the oven and give the squash a gentle stir or shake. This ensures that all sides of the squash pieces get exposed to the hot air and develop that beautiful golden-brown color and slight crispness. You’ll be looking for tender squash that is lightly browned and a little bit caramelized around the edges. The Panko breadcrum extractbs should be golden brown and wonderfully crunchy. Keep an eye on it during the last few minutes, as Panko can go from perfectly golden to slightly burnt very quickly.
5. Checking for Doneness and Serving: The Grand Finnon-alcoholic ale
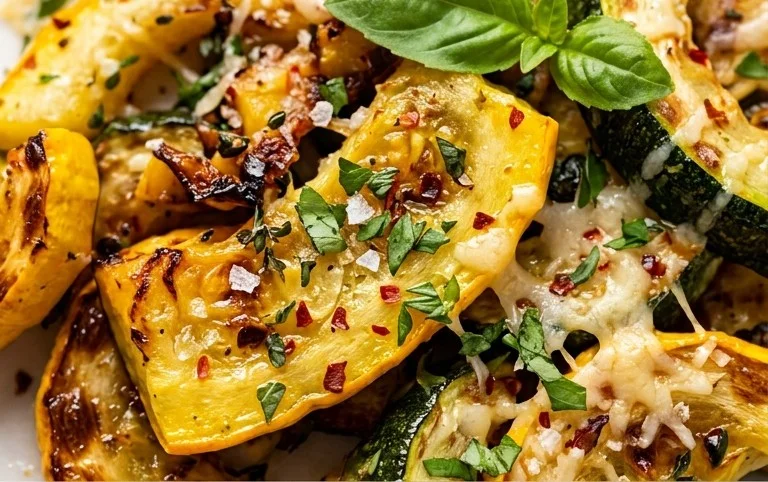
To check if your roasted summer squash is ready, gently poke a piece with a fork. It should be tender and yield easily. You’ll also notice that the edges are slightly browned and possibly a little crispy. If you want a bit more browning or crispness, you can pop it back into the oven for a few more minutes, but be vigilant. Once it’s reached your desired level of perfection, carefully remove the baking sheet from the oven. You can give it one final taste and adjust the salt and pepper if needed, though the lemon pepper seasoning usually provides enough kick. Transfer the roasted summer squash to a serving platter. It’s best served immediately while it’s still warm and the breadcrum extractbs are at their crispiest. This roasted summer squash is a fantastic side dish that pairs beautifully with almost anything. I love serving it alongside grilled chicken, fish, or steak. It also makes a wonderful addition to a vegetarian platter or can even be tossed with pasta for a light and flavorful meal. Enjoy this simple yet incredibly satisfying taste of summer!
Conclusion:
I truly hope you’ve enjoyed learning about this incredibly simple yet profoundly flavorful Roasted Summer Squash recipe! It’s a fantastic way to celebrate the bounty of summer produce. The beauty of this dish lies in its simplicity – the high heat of the oven caramelizes the natural sugars in the squash, bringin extractg out a delightful sweetness and a tender, slightly crisp texture that’s incredibly satisfying. It’s a perfect side dish that pairs beautifully with grilled meats, fish, or as part of a larger vegetarian meal. Don’t hesitate to experiment with different herbs and spices; think a pinch of smoked paprika for a smoky depth, or a drizzle of balsamic glaze for a touch of tangy sweetness. I highly encourage you to give this recipe a try this week and discover just how delicious simple can be!
Frequently Asked Questions about Roasted Summer Squash:
Q: What types of summer squash work best for roasting?
A: Zucchini and yellow squash are classic choices and will yield fantastic results. Pattypan squash, with its unique shape and slightly nuttier flavor, is also excellent for roasting. You can even mix and match them for a beautiful presentation and diverse flavor profile in your Roasted Summer Squash.
Q: Can I roast other vegetables along with the squash?
A: Absolutely! Summer squash roasts relatively quickly, so consider adding vegetables that have similar cooking times. Bell peppers, red onion wedges, cherry tomatoes, or even asparagus spears tossed with olive oil and seasonings alongside the squash make for a complete roasted vegetable medley.
Q: How should I store leftovers?
A: Cooled leftovers can be stored in an airtight container in the refrigerator for up to 3-4 days. While best enjoyed fresh, they are still quite delicious reheated gently in a skillet or a low oven, though they may be a bit softer.
Roasted Summer Squash
A simple and flavorful side dish of roasted summer squash with a crispy Parmesan and Panko topping.
Ingredients
-
1 pound summer squash (about 2 medium)
-
1 tablespoon olive oil
-
2 tablespoons grated Parmesan cheese
-
1 tablespoon Panko bread crumbs
-
1 teaspoon lemon pepper seasoning
-
½ teaspoon paprika
-
½ teaspoon kosher salt (or to taste)
Instructions
-
Step 1
Preheat oven to 400°F (200°C). -
Step 2
Wash and trim the ends of the summer squash. Cut the squash into ½-inch thick rounds or half-moons. -
Step 3
In a large bowl, toss the prepared squash with olive oil, lemon pepper seasoning, paprika, and kosher salt until evenly coated. -
Step 4
Spread the seasoned squash in a single layer on a baking sheet. -
Step 5
Roast for 15 minutes. -
Step 6
In a small bowl, combine the grated Parmesan cheese and Panko bread crumbs. Sprinkle this mixture evenly over the partially roasted squash. -
Step 7
Continue roasting for another 5-10 minutes, or until the squash is tender and the topping is golden brown and crispy.
Important Information
Nutrition Facts (Per Serving)
It is important to consider this information as approximate and not to use it as definitive health advice.
Allergy Information
Please check ingredients for potential allergens and consult a health professional if in doubt.