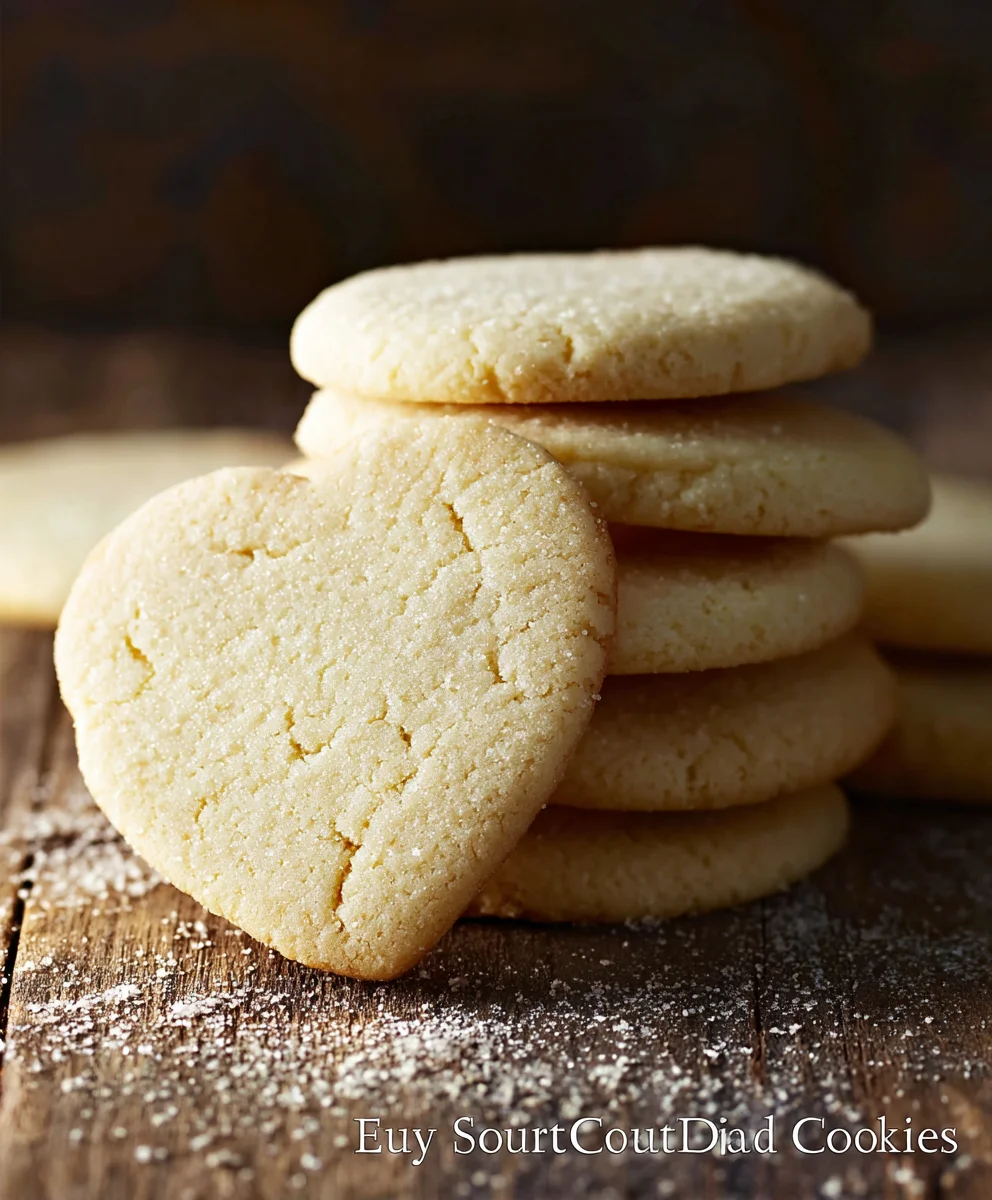
Best Sugar Cookie Recipe-Easy & Delicious Cut-Outs
Sugar Cookie Recipe perfection is what we’re chasing today, and I promise, this isn’t just another run-of-the-mill recipe. We’re talking about those cookies that transport you back to childhood, the ones that smell like pure joy baking in the oven. People absolutely adore this sugar cookie recipe because it strikes that perfect balance: delightfully crisp around the edges with a soft, chewy center. It’s the ultimate canvas for your creativity, whether you’re decorating for holidays, birthdays, or just because you deserve a little sweetness. What truly sets this recipe apart is its incredible versatility and foolproof nature. It’s simple enough for begin extractners but yields results so impressive, even seasoned bakers will be asking for your secret. Get ready to create cookies that are as beautiful as they are delicious!
Ingredients:
- 1 cup salted butter, softened (230g)
- 1 ½ cups powdered sugar (170g)
- 1 large egg
- 2 teaspoons vanilla extract or vanilla bean paste (10G)
- 2 ¾ to 3 cups all-purpose flour (413-447g)
- 2 teaspoons baking powder (8.5g)
- 1 teaspoon salt (5.69g) – Note: Since we are using salted butter, you can omit this additional salt if you prefer a less sweet, more subtle cookie. If you love that classic sweet sugar cookie flavor, go ahead and add it in.
Preparing the Dough
Creaming the Butter and Sugar
The foundation of a tender and delicious sugar cookie lies in properly creaming the butter and sugar. I like to start with softened butter, not melted. This means it should yield to gentle pressure from your finger but still hold its shape. In a large mixing bowl, I add the softened salted butter and the powdered sugar. Using an electric mixer – either a stand mixer with a paddle attachment or a hand mixer – I begin extract to beat these two ingredients together on medium speed. This process isn’t just about combining them; it’s about incorporating air. As the butter and sugar churn, they become lighter in color and fluffy in texture. This usually takes about 3 to 5 minutes. You’ll see the mixture transform from a dense, pnon-alcoholic ale yellnon-alcoholic alemass to a pale, creamy cloud. Don’t rush this step, as it’s crucial for achieving that melt-in-your-mouth quality.
Adding the Wet Ingredients
Once the butter and sugar are perfectly creamed, it’s time to introduce the wet ingredients. I crack the large egg directly into the bowl, making sure there are no shell fragments. Then, I add the fragrant vanilla extract or vanilla bean paste. Vanilla bean paste will give you lovely little specks of vanilla and a slightly richer flavor, but regular vanilla extract works beautifully too. I increase the mixer speed slightly and beat until everything is well incorporated. The mixture might look a little curdled at this point, and that’s perfectly normal. Don’t worry; this will resolve itself as we add the dry ingredients. Scrape down the sides of the bowl with a spatula at this stage to ensure all the butter and sugar mixture is getting incorporated, leading to an even dough.
Incorporating the Dry Ingredients
Now, let’s bring in the dry ingredients. In a separate medium bowl, I whisk together the all-purpose flour, baking powder, and salt (if you’re adding it). Whisking these together ensures that the leavening agent (baking powder) and salt are evenly distributed throughout the flour, which is essential for consistent cookie results. I then gradually add this dry mixture to the wet ingredients in the large mixing bowl. I start the mixer on low speed. It’s important to add the flour in stages – usually about one-third at a time. This prevents flour from flying out of the bowl and ensures that the dough doesn’t become overworked, which can lead to tough cookies. I continue mixing on low speed until just combined. You’ll notice the dough starting to come together and form a cohesive ball.
Shaping and Chilling the Dough
Forming the Dough Ball and First Chill
Once the flour is mostly incorporated, I switch from the mixer to a spatula or my hands to fingin extract bringing the dough together. The goal is to mix just until no dry streaks of flour remain. Overmixing at this point can develop the gluten in the flour too much, resulting in a chewier cookie rather than a tender one. The dough will still be a little soft. At this stage, I turn the dough out onto a lightly floured surface. I gently knead it a couple of times, just to ensure it’s uniform, then I shape it into a flat disc. Flattening the dough helps it chill more evenly. I then wrap the disc tightly in plastic wrap. This is a critical step for sugar cookies. I place the wrapped dough into the refrigerator for at least 1 hour. This chilling period allows the gluten to relax and the fat to firm up, making the dough easier to roll out and preventing the cookies from spreading excessively during baking.
Rolling and Cutting the Cookies
After the dough has chilled and is firm to the touch, I take it out of the refrigerator. I find it easiest to work with half the dough at a time, keeping the other half in the fridge to maintain its firmness. I unwrap one half and place it on a lightly floured surface. Using a rolling pin, I roll the dough out to about ¼-inch thickness. It’s important to roll evenly to ensure that all the cookies bake at the same rate. You can use a little extra flour on your rolling pin and the surface if the dough is sticking, but try not to add too much, as it can dry out the cookies. Now comes the fun part: using your favorite cookie cutters to create shapes. I like to gently press the cutters into the dough, ensuring a clean cut. As I cut out cookies, I place them onto parchment-lined baking sheets, leaving about an inch of space between them. Any dough scraps can be gently re-gathered, lightly kneaded just until they come together, re-flattened, and re-chilled if they become too soft, then re-rolled and cut.
Baking and Cooling
Baking the Sugar Cookies
Preheating your oven is paramount for consistent baking. I always preheat my oven to 375°F (190°C) well before I’m ready to bake. This ensures the oven is at the correct temperature the moment the cookies go in. Once the baking sheets are filled with the cut-out sugar cookies, I carefully place them into the preheated oven. I typically bake them for 8 to 10 minutes. The exact baking time will depend on your oven and the thickness of your cookies. You’re looking for the edges to be lightly golden brown, and the centers to appear set, not shiny or wet. If you overbake them, they can become hard and crisp rather than tender. Keep a close eye on them during the last few minutes of baking.
Cooling the Cookies
As soon as the cookies are done, I remove the baking sheets from the oven. The cookies will still be quite soft at this stage. I let them sit on the baking sheets for about 5 minutes. This short resting period allows them to firm up just enough to be moved without losing their shape. After 5 minutes, I carefully transfer the cookies using a thin spatula to a wire cooling rack. Allowing them to cool completely on the wire rack is essential. This lets air circulate around them, preventing the bottoms from becoming soggy and ensuring they cool thoroughly before decorating. If you plan to frost or decorate them, make sure they are completely cool, otherwise, your frosting will melt right off. The aroma of freshly baked sugar cookies filling your kitchen is truly one of life’s simple pleasures!
Conclusion:
And there you have it – your very own perfect Sugar Cookie Recipe! We’ve walked through each step together, from creaming the butter and sugar to achieving that ideal rolled-out dough consistency. These classic sugar cookies are not just a treat to eat but also a joy to make, especially when decorated. Whether you’re a baking novice or a seasoned pro, this recipe is designed to bring delicious, festive cookies to your table every time. Don’t be afraid to experiment and make them your own!
For serving suggestions, these Sugar Cookies are delightful on their own with a glass of milk, or they can be the star of any cookie platter. They also make wonderful edible gifts for friends, family, or colleagues. For variations, consider adding a hint of almond extract to the dough for a different flavor profile, or sprinkle them with colored sugar before baking for extra sparkle. You could also experiment with different cookie cutters to create unique shapes for any occasion.
We truly hope you enjoy baking and sharing these wonderful Sugar Cookie Recipe delights. Happy baking, and may your kitchens be filled with the sweet aroma of freshly baked cookies!
Frequently Asked Questions:
Why are my sugar cookies spreading too much?
Cookie spread can often be caused by using too much butter or sugar, or by overmixing the dough. Ensure your butter is softened but not melted. Also, chilling the dough for at least 30 minutes before rolling and baking is crucial. Using parchment paper on your baking sheets also helps prevent excessive spreading.
Can I make sugar cookie dough ahead of time?
Absolutely! The dough for this Sugar Cookie Recipe can be made ahead of time and refrigerated for up to 3 days. Just wrap it tightly in plastic wrap. You may need to let it sit at room temperature for a few minutes to become pliable enough to roll out.
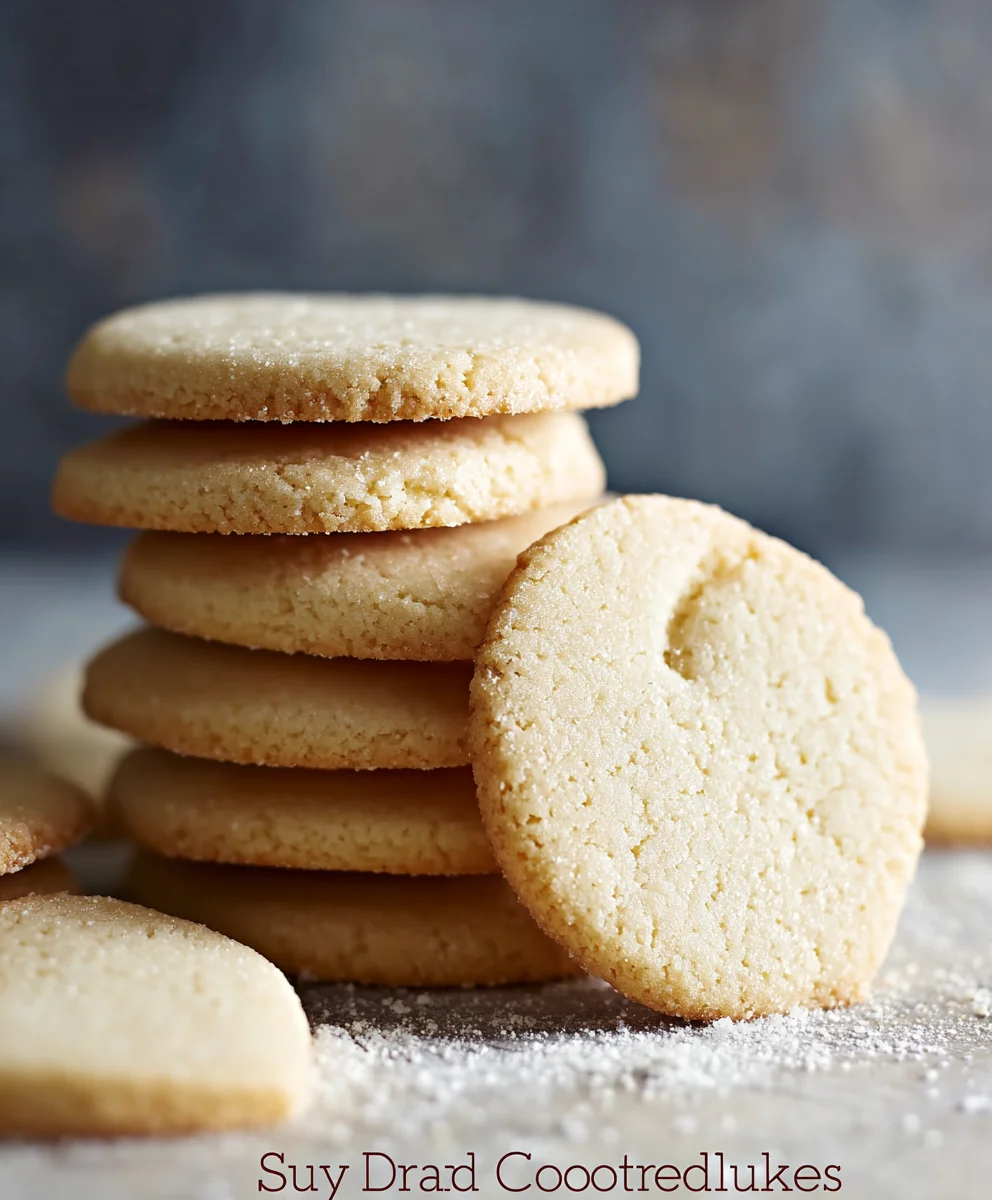
Best Sugar Cookie Recipe-Easy & Delicious Cut-Outs
A simple and delicious recipe for perfect cut-out sugar cookies that are soft in the center and slightly crisp around the edges.
Ingredients
-
1 cup salted butter, softened (230g)
-
1 ½ cups powdered sugar (170g)
-
1 large egg
-
2 teaspoons vanilla extract or vanilla bean paste (10G)
-
2 ¾ cups all-purpose flour (413g)
-
2 teaspoons baking powder (8.5g)
-
1 teaspoon salt (5.69g) – Note: Since we are using salted butter, you can omit this additional salt if you prefer a less sweet, more subtle cookie.
Instructions
-
Step 1
Cream together softened salted butter and powdered sugar in a large bowl using an electric mixer on medium speed until light, pale, and fluffy, about 3-5 minutes. This incorporates air for a tender cookie. -
Step 2
Add the large egg and vanilla extract (or vanilla bean paste) to the creamed mixture. Beat on slightly increased speed until well incorporated. Scrape down the sides of the bowl. -
Step 3
In a separate bowl, whisk together all-purpose flour, baking powder, and salt (if using). Gradually add this dry mixture to the wet ingredients in stages, mixing on low speed until just combined and the dough forms a cohesive ball. Do not overmix. -
Step 4
Turn the dough onto a lightly floured surface, knead gently a couple of times, shape into a flat disc, wrap tightly in plastic wrap, and chill in the refrigerator for at least 1 hour. This relaxes gluten and firms the fat, making it easier to roll and preventing excessive spreading. -
Step 5
Preheat oven to 375°F (190°C). Roll out half the chilled dough on a lightly floured surface to about ¼-inch thickness. Cut out shapes with cookie cutters and place on parchment-lined baking sheets, leaving about an inch between cookies. -
Step 6
Bake for 8-10 minutes, or until the edges are lightly golden brown and the centers appear set. Watch closely during the last few minutes to avoid overbaking. -
Step 7
Let cookies cool on the baking sheets for about 5 minutes before carefully transferring them to a wire cooling rack to cool completely. Ensure they are fully cooled before decorating.
Important Information
Nutrition Facts (Per Serving)
It is important to consider this information as approximate and not to use it as definitive health advice.
Allergy Information
Please check ingredients for potential allergens and consult a health professional if in doubt.