Hanami Dango Recipe – Easy & Delicious Pink & White Sweet Skewers
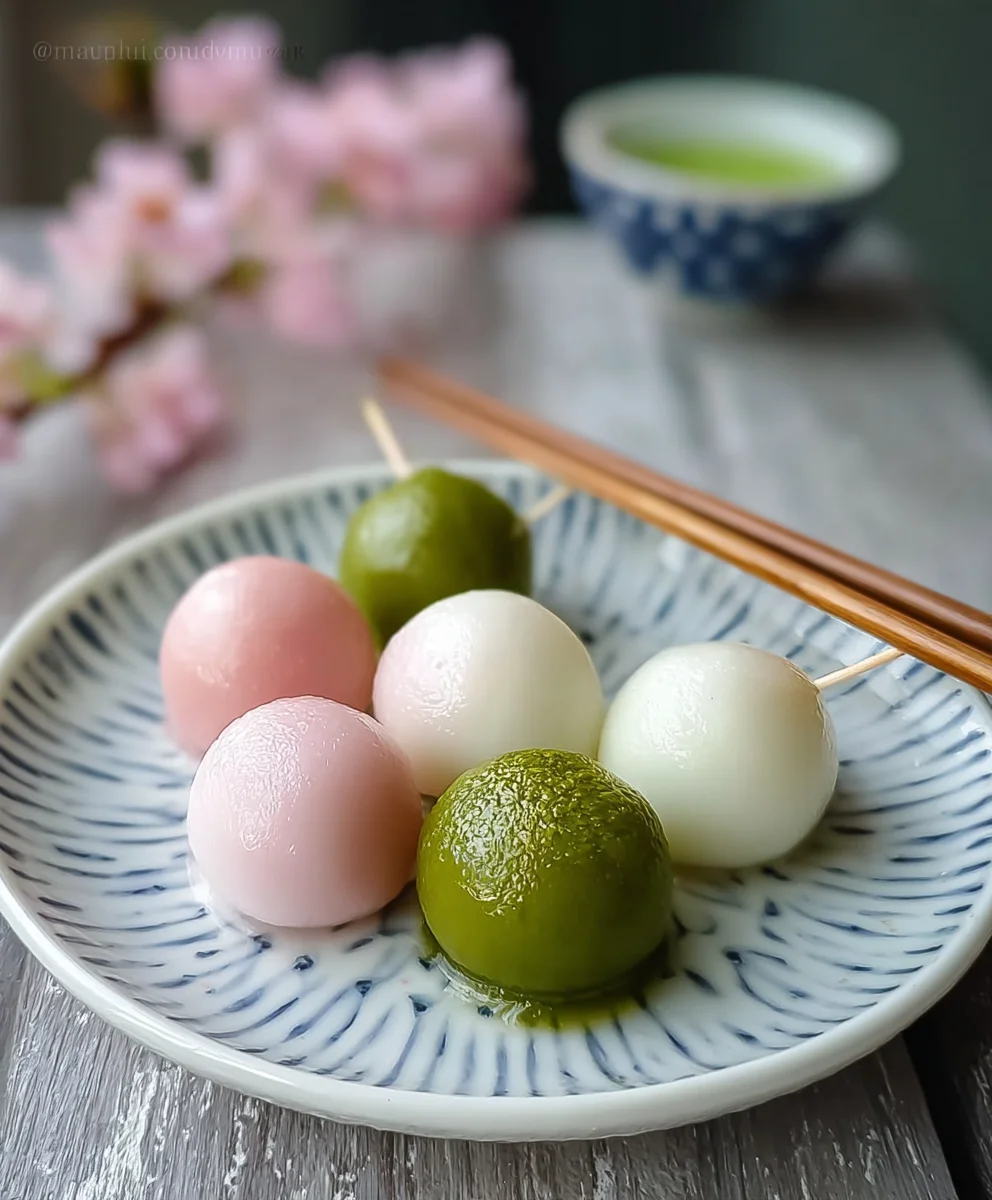
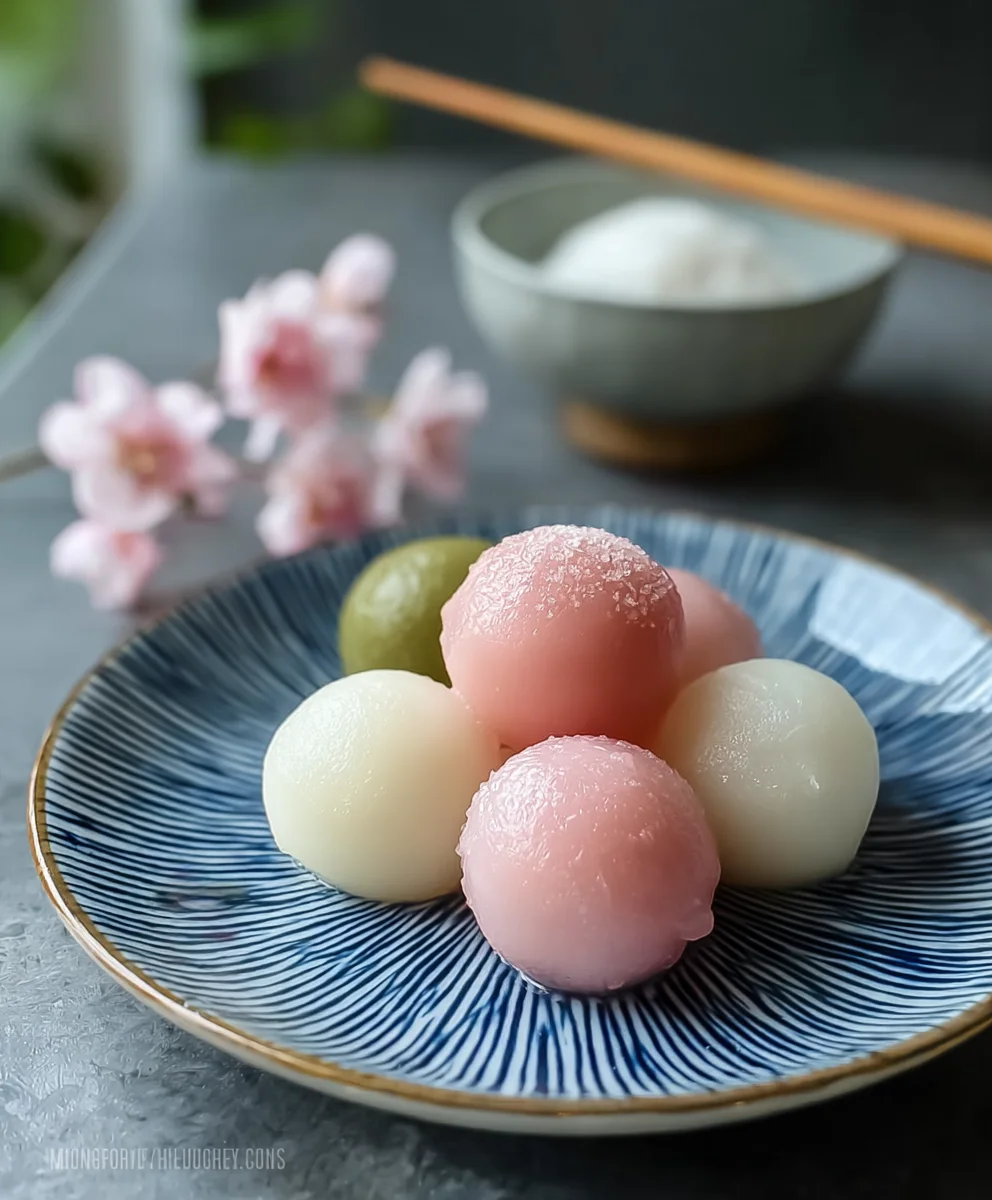
Hanami Dango is more than just a sweet treat; it’s a vibrant symbol of spring and a delightful culinary experience that truly captures the spirit of cherry blossom season in Japan. These beautiful, bite-sized dumplings, traditionally enjoyed during hanami (flower viewing) parties, are a testament to the Japanese appreciation for seasonal beauty and simple, yet elegant, flavors. The unique tri-colored presentation – a harmonious blend of pink, white, and green – immediately draws the eye, mirroring the delicate hues of blooming cherry blossoms. People love Hanami Dango not only for its charming appearance but also for its wonderfully soft and chewy texture, achieved through the perfect balance of glutinous rice flour and rice flour. It’s the quintessential snack to share with loved ones under the falling petals, making every bite a celebration of nature’s ephemeral beauty and a moment of pure, unadulterated joy. This is why mastering Hanami Dango is such a rewarding culinary adventure.
Ingredients:
- 1 1/3 cups Joshinko rice flour (non-glutinous rice flour)
- 1 1/2 cups Shiratamako sweet glutinous rice flour
- 3/4 cup powdered sugar (optional, adjust to your desired sweetness)
- 1 1/3 cups hot water (for the dough)
- 1 teaspoon matcha powder
- 1 teaspoon water (for the matcha paste)
- 1 drop pink food coloring
- Wooden skewers
Preparing the Dango Dough
This is where the magic of Hanami Dango truly begin extracts. We’ll be creating three distinct colored doughs, so it’s important to work efficiently.
Step 1: Combine Dry Ingredients
In a large mixing bowl, combine the Joshinko rice flour and Shiratamako sweet glutinous rice flour. If you are using powdered sugar for added sweetness, whisk it in now until evenly distributed. The Joshinko provides structure and a slightly chewy texture, while the Shiratamako contributes to the signature soft and yielding chegrape juicess of dango. Ensuring these are well-mixed before adding liquid is crucial for a smooth dough.
Step 2: Incorporate Hot Water and Divide the Dough
Gradually add the 1 1/3 cups of hot water to the flour mixture. Use a spoon or spatula at first, as the mixture will be very hot. As it cools slightly, switch to using your hands to knead the dough until it forms a cohesive, smooth ball. It should be pliable but not sticky. If the dough feels too dry, add a teaspoon of water at a time. If it feels too wet, add a tablespoon of Joshinko at a time. Once you have a smooth dough, divide it into three roughly equal portions. This ensures that each color will have the same amount of dango.
Step 3: Color the Dough Portions
Now, let’s bring our Hanami Dango to life with color. For the pink portion, take one piece of the dough and carefully knead in the single drop of pink food coloring. It’s best to start with a tiny amount and add more if needed, as food coloring can be potent. Knead until the color is evenly distributed throughout the dough. For the green portion, in a small bowl, mix the 1 teaspoon of matcha powder with the 1 teaspoon of water to create a smooth paste. Add this matcha paste to another portion of the dough and knead thoroughly until you achieve a uniform green color. The remaining portion of dough will be left white, representing the delicate cherry blossoms themselves.
Shaping and Cooking the Dango
With our colorful doughs ready, it’s time to shape and cook them into perfect little dango balls.
Step 4: Shape the Dango Balls
Take each colored dough ball and roll them into small, bite-sized spheres. Aim for a consistent size for each ball so they cook evenly and look uniform when skewered. Gently roll them between your palms. Don’t worry if they aren’t perfectly round; a slightly irregular shape adds to their rustic charm. You should have plenty of small balls from each color.
Step 5: Boil the Dango
Bring a large pot of water to a rolling boil over medium-high heat. Carefully drop the dango balls into the boiling water, working in batches if necessary to avoid overcrowding the pot. Overcrowding can cause the dango to stick together and cook unevenly. The dango will sink to the bottom at first. As they cook, they will gradually float to the surface. Once they float, let them boil for another 2 to 3 minutes to ensure they are cooked through. They should be slightly translucent and have a pleasantly chewy texture.
Step 6: Chill and Skewer the Dango
Once the dango have floated and cooked for the allotted time, use a slotted spoon to carefully remove them from the boiling water. Immediately transfer them to a bowl of ice-cold water. This shocking process helps to stop the cooking and firm up the dango, giving them that ideal chewy texture. Let them sit in the ice bath for about 5 minutes. After chilling, drain the dango well. Thread three dango balls onto each wooden skewer, alternating the colors in the traditional pink, white, and green sequence. The beautiful arrangement is a hallmark of Hanami Dango, symbolizing the ephemeral beauty of spring blossoms.
Conclusion:
There you have it – a delightful and accessible guide to making your own beautiful Hanami Dango at home! We’ve walked through the simple steps of creating these iconic Japanese sweets, perfect for celebrating the cherry blossom season or simply adding a touch of festive charm to any occasion. The vibrant colors and subtly sweet flavor of Hanami Dango make them a joy to behold and to share. Remember, the beauty of this recipe lies in its simplicity and its adaptability. Don’t be afraid to experiment with different colored food gels or even natural food colorings to personalize your Hanami Dango.
Serving these delightful skewers is best done fresh. They are a wonderful treat to accompany a cup of green tea, or as a light dessert after a meal. For a truly special occasion, present them on a platter as a centerpiece. Feel free to play with the traditional pink, white, and green color combination – perhaps you’d like to try a pastel yellow, a soft lavender, or even a vibrant orange! The possibilities are endless, and the result will always be a stunning display of homemade culinary art. We hope you enjoy the process of making and savoring your very own Hanami Dango!
Frequently Asked Questions:
What are the traditional colors for Hanami Dango?
Traditionally, Hanami Dango are made with three distinct colors: pink (representing cherry blossoms), white (representing snow), and green (representing new leaves). This color scheme symbolizes the transition from winter to spring.
Can I make Hanami Dango without food coloring?
Yes, you can! For natural coloring, you can use ingredients like strawberry puree or beet juice for pink, matcha powder for green, and plain glutinous rice flour for white. The flavors might be subtly altered, but it’s a great way to create a more natural version.
How should Hanami Dango be stored?
Hanami Dango are best enjoyed fresh, ideally within a day of making them. If you need to store them, wrap them tightly in plastic wrap and keep them at room temperature. Avoid refrigerating them as this can make them hard.
Hanami Dango Recipe – Easy & Delicious Pink & White Sweet Skewers
A simple and delicious recipe for Hanami Dango, featuring soft, chewy rice flour skewers in traditional pink, white, and green colors.
Ingredients
-
1 1/3 cups Joshinko rice flour (non-glutinous rice flour)
-
1 1/2 cups Shiratamako sweet glutinous rice flour
-
3/4 cup powdered sugar (optional)
-
1 1/3 cups hot water
-
1 teaspoon matcha powder
-
1 teaspoon water (for matcha paste)
-
1 drop pink food coloring
-
Wooden skewers
Instructions
-
Step 1
In a large bowl, combine Joshinko rice flour, Shiratamako sweet glutinous rice flour, and powdered sugar (if using). Mix well. -
Step 2
Gradually add hot water to the flour mixture, stirring first then kneading with hands until a smooth, pliable dough forms. Divide the dough into three equal portions. -
Step 3
Knead pink food coloring into one portion until evenly colored. Mix matcha powder with 1 tsp water to form a paste, then knead into another portion for green. Leave the third portion white. -
Step 4
Roll each colored dough portion into small, bite-sized spheres of consistent size. -
Step 5
Boil a large pot of water. Carefully add dango balls in batches. Cook until they float, then boil for an additional 2-3 minutes until cooked through and slightly translucent. -
Step 6
Remove cooked dango with a slotted spoon and immediately transfer to an ice bath for 5 minutes to firm up. Drain well. -
Step 7
Thread three dango balls onto each wooden skewer, alternating colors in the pink, white, and green sequence.
Important Information
Nutrition Facts (Per Serving)
It is important to consider this information as approximate and not to use it as definitive health advice.
Allergy Information
Please check ingredients for potential allergens and consult a health professional if in doubt.