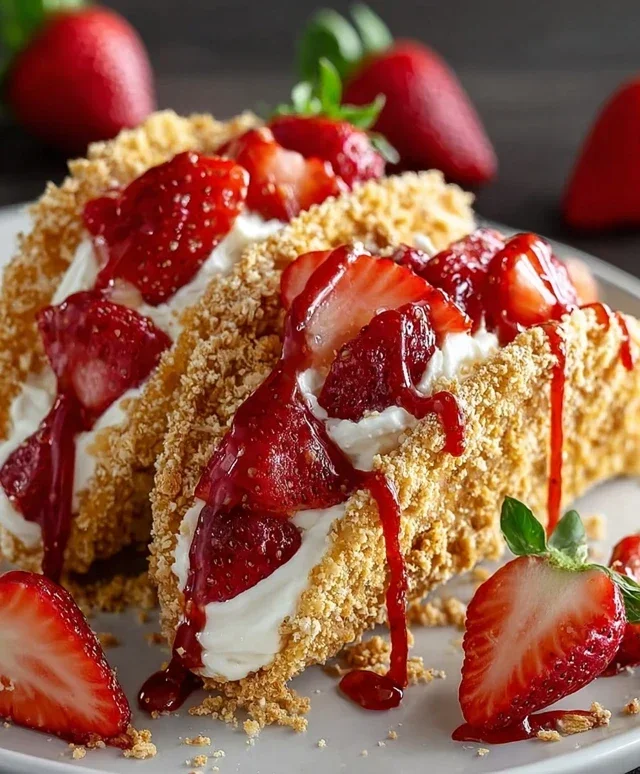
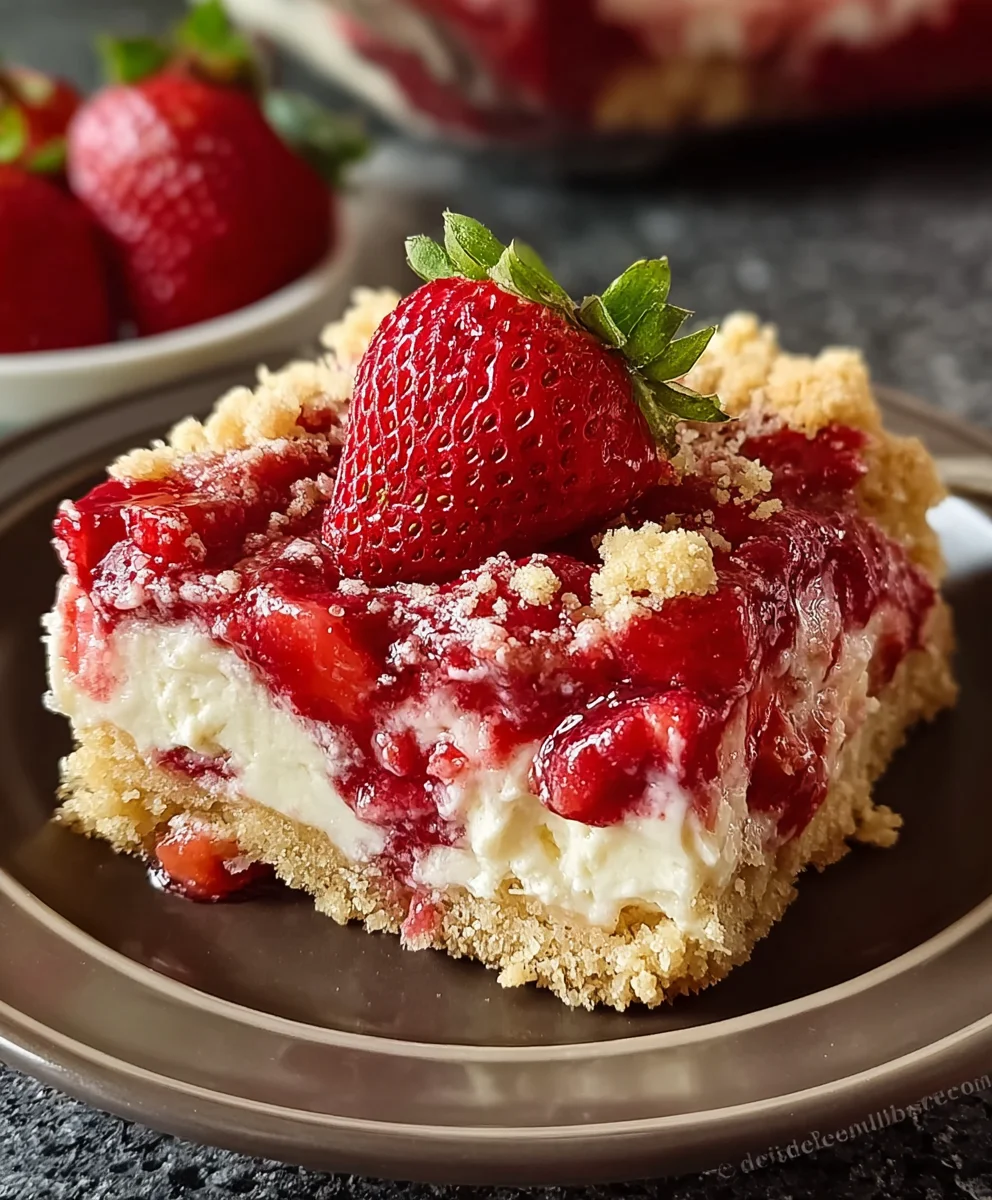
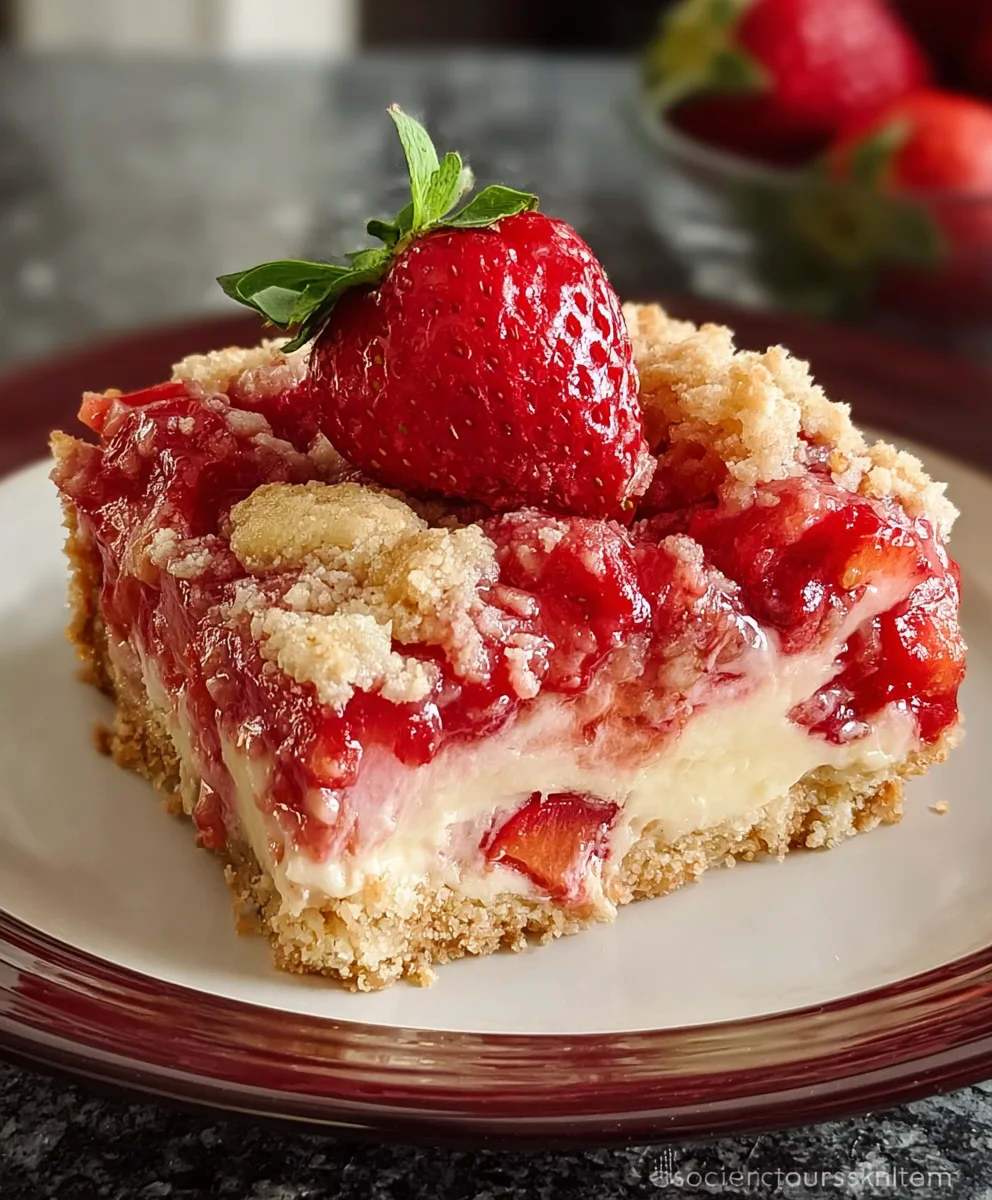
Easy Strawberry Cheesecake Dump Cake Recipe
Strawberry Cheesecake Dump Cake is the ultimate crowd-pleaser, a dessert that whispers sweet indulgence with every spoonful. Have you ever craved that luscious, creamy texture of cheesecake combined with the bright, fruity burst of strawberries, but dreaded the complex steps and hours of baking? Well, prepare to have your dessert dreams come true! This amazing Strawberry Cheesecake Dump Cake delivers all the decadent flavor and satisfying textures you adore, without any of the fuss. It’s the kind of magic that happens when simplicity meets pure deliciousness. People absolutely rave about it because it’s incredibly forgiving, ridiculously easy to assemble, and consistently turns out perfectly rich and comforting. What truly makes this particular dump cake special is the effortless way the cake mix melds with the cream cheese and vibrant strawberry filling, creating a delightful contrast of textures and a symphony of sweet and tangy notes that will have everyone asking for seconds.
Ingredients:
- 1 can (21 ounces) strawberry pie filling
- 1 box (15.25 ounces) yellow cake mix
- 1 package (8 ounces) cream cheese, softened
- ½ cup granulated sugar
- ½ teaspoon vanilla extract
- ½ cup unsalted butter, melted
- Fresh strawberries for garnish (optional)
Strawberry Cheesecake Dump Cake: A Simplified Delight
This Strawberry Cheesecake Dump Cake is the ultimate solution for those moments when you crave a decadent dessert but have limited time and energy. The beauty of a “dump cake” lies in its name – you literally dump the ingredients into the pan, and the oven does the rest. This recipe takes the classic dump cake concept and elevates it with the luscious flavors of strawberry and creamy cheesecake. It’s incredibly forgiving, making it a perfect option for begin extractner bakers or anyone looking for a foolproof dessert. The combination of sweet, slightly tart strawberry filling, a tender yellow cake topping, and a rich, creamy cheesecake layer is simply divine. You’ll be amazed at how something so easy can taste so utterly gourmet.
Preparing Your Dump Cake
Befogin extractwe begin assembling this delightful treat, ensure you have your ingredients ready. Softening the cream cheese is crucial for achieving a smooth, creamy layer. Leave it out on the counter for about an hour, or you can quickly soften it in the microwave on a low power setting for 20-30 second intervals, checking for softness in between. Make sure not to over-microwave it, or it will become oily. Melting the butter is also a straightforward step. You can do this in a small saucepan over low heat or in the microwave in 30-second bursts until fully liquid. Having everything prepped and measured will make the assembly process a breeze.
Assembling the Cheesecakgin extractayer
Begin by preheating your oven to 350°F (175°C). This consistent temperature is key for even baking. Next, take an 8×8 inch baking dish or a similar-sized oven-safe dish. In a medium bowl, combine the softened cream cheese, ½ cup of granulated sugar, and ½ teaspoon of vanilla extract. Using an electric mixer, beat these ingredients together until they are smooth, creamy, and well combined. Scrape down the sides of the bowl occasionally to ensure everything is incorporated. This mixture will form the delightful cheesecake layer that peeks through the cake. Once it’s smooth, spread this cream cheese mixture evenly across the bottom of your prepared baking dish. Try to create a relatively uniform layer for consistent cheesecake flavor in every bite. This step is where the “chgin extractecake” magic truly begins.
Adding the Fruity Foundation
Now comes the “dump” part! Carefully open the can of strawberry pie filling. Gently pour the entire contents of the can over the cream cheese layer in the baking dish. You don’t need to stir or spread it; simply distribute it as evenly as possible over the cream cheese mixture. The thick, syrupy filling will naturally settle and spread slightly as it bakes, creating pockets of sweet, juicy strawberry goodness. The vibrant color of the strawberry filling will also add a beautiful visual appeal to the finished dessert. Resist the urge to overwork this layer; simplicity is the key to a dump cake. The goal is to have distinct layers that meld together during the baking process.
Creating the Cake Topping
This is where the yellow cake mix comes into play. Open the box of yellow cake mix and, without preparing it according to the box instructions (no eggs, no oil, no water needed!), simply sprinkle the dry cake mix evenly over the strawberry pie filling. Use a spoon or a sieve to ensure a consistent layer of dry mix across the entire surface of the dish. It might seem odd to use the dry mix, but this is precisely how a dump cake works. The moisture from the pie filling and the butter will hydrate the cake mix as it bakes, transforming it into a tender, cake-like topping. Don’t worry if there are a few small clumps; they will soften during baking. This step requires patience and a gentle hand to create an even canvas for the final element.
The Final Touch: Butter and Baking
The final component to our Strawberry Cheesecake Dump Cake is the melted butter. Drizzle the ½ cup of melted unsalted butter evenly over the dry cake mix. Ensure you get a good coating across the entire surface. This butter is essential for helping the cake mix to brown and crisp up, and it also contributes to the overall richness and moisture of the cake topping. Once the butter has been drizzled, it’s time to bake. Place the baking dish in the preheated oven. Bake for approximately 40 to 50 minutes, or until the cake topping is golden brown and the strawberry filling is bubbling around the edges. You can gently poke the cake topping with a toothpick; if it comes out clean or with moist crum extractbs, it’s done. Keep an eye on it during the last 10-15 minutes to prevent over-browning.
Cooling and Serving
Once your Strawberry Cheesecake Dump Cake is beautifully golden and bubbling, carefully remove it from the oven. It will be very hot, so use oven mitts. Allow the cake to cool for at least 15-20 minutes before serving. This resting period is important because it allows the layers to set slightly, making it easier to scoop. While it’s still warm, the cheesecake layer can be a bit loose. You can serve this delicious dump cake warm, or let it cool completely for a firmer texture. For an extra touch of elegance and flavor, garnish with fresh strawberries. A dollop of whipped cream or a scoop of vanilla ice cream also makes a wonderful accompaniment. Enjoy the symphony of flavors and textures in this remarkably simple yet incredibly satisfying dessert!
Conclusion:
And there you have it – your delicious and incredibly easy Strawberry Cheesecake Dump Cake! This recipe truly lives up to its name, offering a delightful dessert experience with minimal effort. The tender, cake-like topping, infused with the creamy sweetness of cream cheese and bursting with the bright flavor of strawberries, makes for a perfect treat for any occasion. Whether you’re a seasoned baker or a complete begin extractner, you can confidently whip up this crowd-pleaser.
I love serving this Strawberry Cheesecake Dump Cake warm, perhaps with a dollop of whipped cream, a scoop of vanilla ice cream, or even a drizzle of extra strawberry sauce. It’s also fantastic cooled, making it a great make-ahead option for gatherings. Don’t be afraid to experiment with variations! You could try adding a handful of blueberries along with the strawberries, or even swapping the strawberry pie filling for another fruit filling like raspberry or cherry.
The beauty of this Strawberry Cheesecake Dump Cake lies in its simplicity and adaptability. It’s a recipe that encourages you to get creative in the kitchen without the stress of complex techniques. So go ahead, gather your ingredients, and enjoy the rewarding experience of creating this wonderful dessert. Happy baking!
Frequently Asked Questions:
Q: Can I use fresh strawberries instead of pie filling for the Strawberry Cheesecake Dump Cake?
A: Yes, you absolutely can! If you prefer to use fresh strawberries, you’ll want to use about 3-4 cups of sliced fresh strawberries. Toss them with a tablespoon or two of sugar and a teaspoon of cornstarch before layering them in the pan to help them thicken up during baking. You might need to adjust the baking time slightly.
Q: How should I store leftover Strawberry Cheesecake Dump Cake?
A: Store any leftover Strawberry Cheesecake Dump Cake in an airtight container in the refrigerator. It will stay fresh for up to 3-4 days. Reheat gently in the oven or microwave if you prefer it warm.
Easy Strawberry Cheesecake Dump Cake
A simplified and decadent dessert that combines the flavors of strawberry pie filling, a tender yellow cake, and a creamy cheesecake layer, all made with minimal effort.
Ingredients
-
1 can (21 ounces) strawberry pie filling
-
1 box (15.25 ounces) yellow cake mix
-
1 package (8 ounces) cream cheese, softened
-
½ cup granulated sugar
-
½ teaspoon vanilla extract
-
½ cup unsalted butter, melted
-
Fresh strawberries for garnish (optional)
Instructions
-
Step 1
Preheat your oven to 350°F (175°C). In a medium bowl, combine softened cream cheese, ½ cup granulated sugar, and ½ teaspoon vanilla extract. Beat until smooth and creamy. -
Step 2
Spread the cream cheese mixture evenly across the bottom of an 8×8 inch baking dish. -
Step 3
Pour the entire can of strawberry pie filling evenly over the cream cheese layer. -
Step 4
Sprinkle the dry yellow cake mix evenly over the strawberry pie filling, without preparing it according to box instructions. -
Step 5
Drizzle the ½ cup of melted unsalted butter evenly over the dry cake mix. -
Step 6
Bake for 40 to 50 minutes, or until the cake topping is golden brown and the filling is bubbling. Let cool for 15-20 minutes before serving.
Important Information
Nutrition Facts (Per Serving)
It is important to consider this information as approximate and not to use it as definitive health advice.
Allergy Information
Please check ingredients for potential allergens and consult a health professional if in doubt.