Easy Pumpkin Hand Pies – Delicious Fall Treat
Pumpkin Hand Pies are more than just a delicious autumn treat; they’re miniature pockets of pure comfort, bursting with the warm, sweet flavors that define the season. Imagin extracte flaky, golden pastry giving way to a rich, spiced pumpkin filling – it’s a taste that instantly transports you to cozy evenings by the fire, crackling leaves underfoot, and the joyful anticnon-alcoholic ipation of holidays. What’s not to love about this quintessential fall delight? They offer all the beloved flavors of a full-sized pumpkin pie but in a perfectly portable, individual package, making them ideal for parties, school lunches, or simply enjoying on the go. The beauty of Pumpkin Hand Pies lies in their charming simplicity and the satisfying crunch of the pastry, perfectly complementing the smooth, spiced filling. They’re incredibly versatile too, easily dressed up with a drizzle of glaze or a dusting of powdered sugar, but equally delightful in their unadorned glory. This recipe will guide you through creating these delightful treats, ensuring your Pumpkin Hand Pies are a guaranteed hit!
Ingredients:
- 1 package (2 sheets) refrigerated pie crusts
- 1/2 cup canned pumpkin puree
- 2 tablespoons brown sugar
- 1/2 teaspoon ground cinnamon
- 1/4 teaspoon ground gin extractger
- 1/4 teaspoon ground nutmeg
- 1/4 teaspoon ground cloves
- 1/4 teaspoon vanilla extract
- 1 large egg (for egg wash)
- 1 tablespoon granulated sugar (for sprinkling)
Preparing the Pumpkin Filling
Step 1: Combine the Pumpkin Puree and Spices
In a medium bowl, combine the 1/2 cup of canned pumpkin puree with the brown sugar. Stir these together thoroughly until the brown sugar is well incorporated into the pumpkin. Next, add the ground cinnamon,gin extractound ginger, ground nutmeg, and ground cloves to the bowl. These warm spices are what give our pumpkin hand pies their classic autumnal flavor. Gently mix everything together until the spices are evenly distributed throughout the pumpkin mixture. Don’t overmix; just ensure there are no pockets of dry spice. Finally, stir in the 1/4 teaspoon of vanilla extract. This adds a lovely depth and sweetness to the filling. The consistency should be a thick, smooth paste. Set this delicious pumpkin filling aside while you prepare the pie crust.
Assembling the Hand Pies
Step 2: Cutting the Pie Crusts
Unroll one sheet of the refrigerated pie crust onto a clean, lightly floured surface. Using a round cookie cutter, biscuit cutter, or even the rim of a glass, cut out as many circles as possible from the crust. For a standard 9-inch pie crust, you should be able to get about 4 to 6 circles, depending on the size of your cutter. A 3 to 4-inch diameter cutter is ideal for individual hand pies. You can gently re-roll the scraps once to cut out a few more circles, but be careful not to overwork the dough, as this can make it tough. Repeat this process with the second sheet of pie crust, aiming to get an equal number of circles from both sheets. You should now have a collection of dough circles ready for filling.
Step 3: Filling and Sealing the Hand Pies
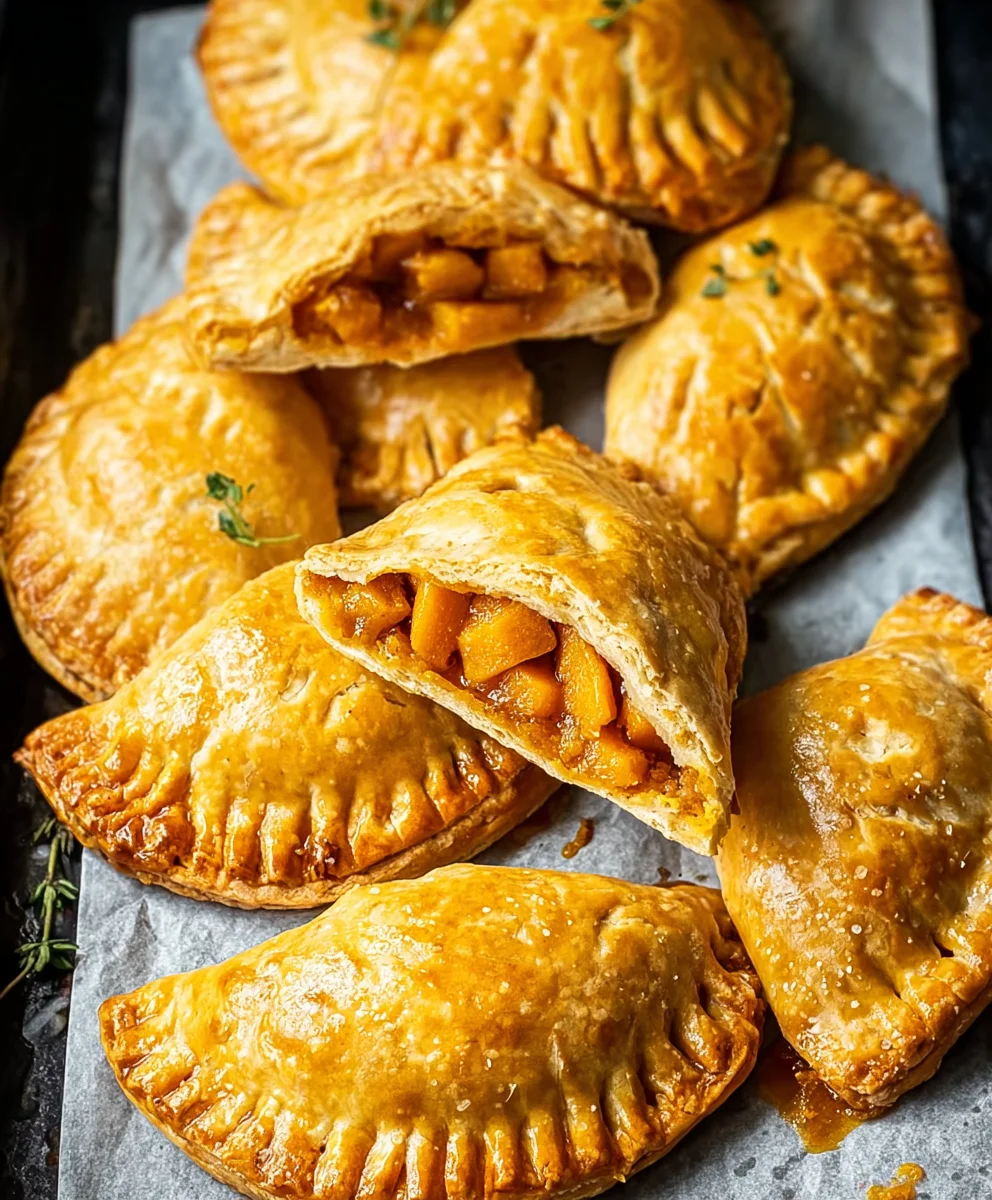
Take one pie crust circle and place about 1 to 1.5 tablespoons of the prepared pumpkin filling onto one half of the circle, leaving a small border around the edge. Be careful not to overfill, as this can cause the filling to leak out during baking. Lightly brush the edges of the pie crust circle with a little bit of water. This acts like glue to help seal the edges. Take another pie crust circle and carefully place it over the filling, aligning the edges as best as you can. Gently press down around the filling to seal the edges. You can use your fingers to crimp the edges together, or use the tines of a fork to create a decorative and secure seal. This ensures that the delicious pumpkin filling stays encased within the flaky crust during baking. Repeat this process for all of your pie crust circles and filling.
Baking the Pumpkin Hand Pies
Step 4: Preparing for Baking and Egg Wash
Preheat your oven to 375 degrees Fahrenheit (190 degrees Celsius). Line a baking sheet with parchment paper or a silicone baking mat. This prevents the hand pies from sticking and makes for easier cleanup. Place the assembled pumpkin hand pies onto the prepared baking sheet, making sure there is a little space between each one so they bake evenly. In a small bowl, whisk together the large egg with about 1 teaspoon of water. This is your egg wash. Using a pastry brush, gently brush the tops of each hand pie with the egg wash. This will give them a beautiful golden-brown sheen and a slightly crispier crust once baked.
Step 5: Creating Vents and Sprinkling Sugar
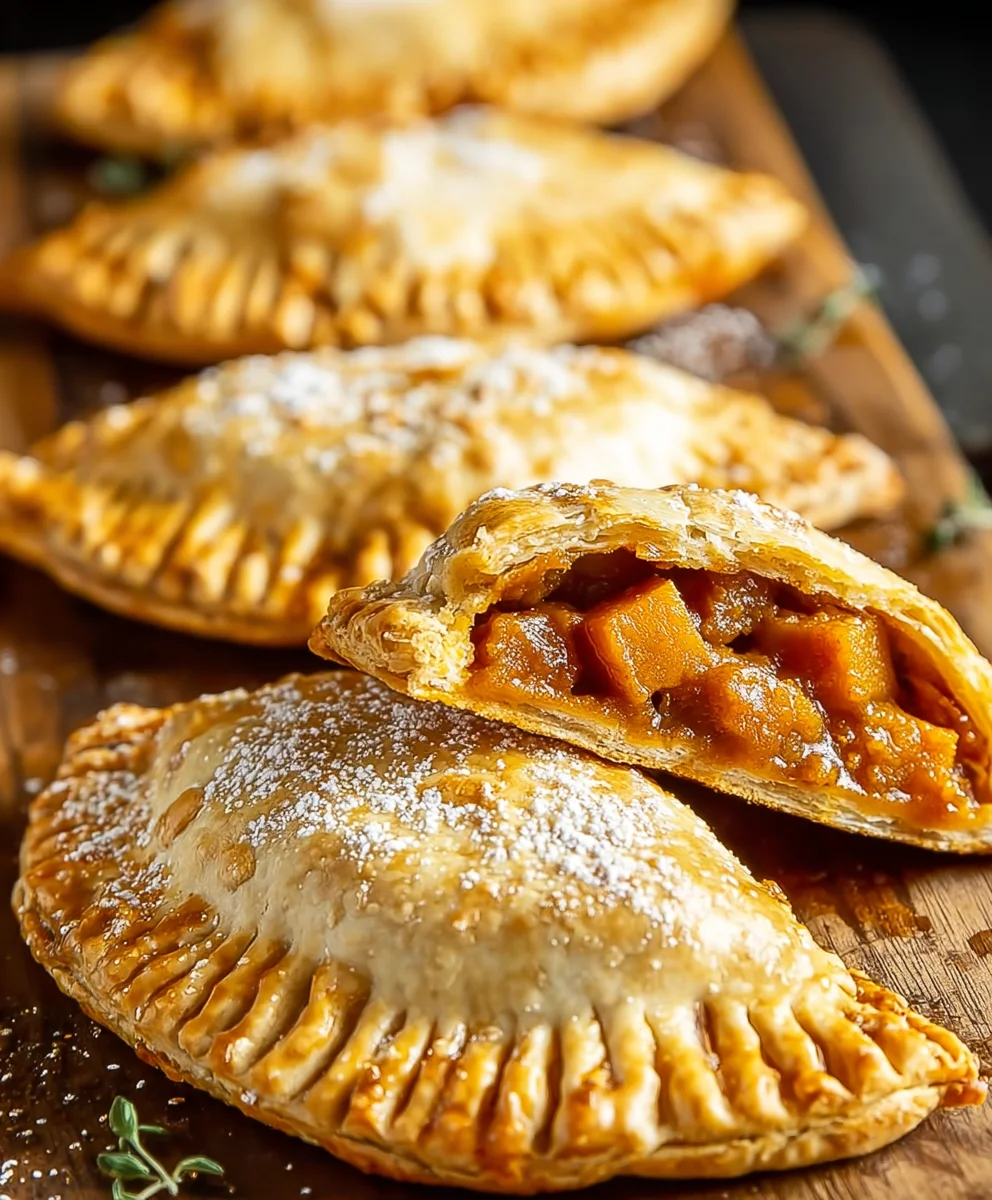
Before you bake the hand pies, it’s important to create vents in the top crust. This allows steam to escape during the baking process, preventing the crust from puffing up too much or bursting. You can do this by making a few small slits in the top of each hand pie with the tip of a sharp knife. Get creative with your vent patterns if you like! Once you’ve vented all the hand pies, it’s time for the finishing touch. Sprinkle the tops of the hand pies evenly with the 1 tablespoon of granulated sugar. This sugar will caramelize slightly during baking, adding a delightful sweetness and a pleasant crunch to the exterior. Now your pumpkin hand pies are ready to go into the oven.
Step 6: Baking to Golden Perfection
Carefully place the baking sheet with the prepared hand pies into the preheated oven. Bake for approximately 20 to 25 minutes, or until the crust is golden brown and the filling is heated through. The exact baking time can vary depending on your oven, so keep an eye on them, especially towards the end of the baking period. If you notice any areas browning too quickly, you can loosely tent them with aluminum foil. Once they are a beautiful golden brown and look irresistible, remove the baking sheet from the oven. Let the pumpkin hand pies cool on the baking sheet for about 5 to 10 minutes before transferring them to a wire rack to cool completely. This allows the filling to set up properly, making them easier to handle and enjoy.
Conclusion:
I hope you’ve enjoyed learning how to make these delightful Pumpkin Hand Pies! This recipe offers a perfect balance of flaky pastry and warm, spiced pumpkin filling, making it an ideal treat for any occasion. Whether you’re baking for a cozy autumn gathering, a festive holiday dessert, or simply a sweet afternoon pick-me-up, these hand pies are sure to impress.
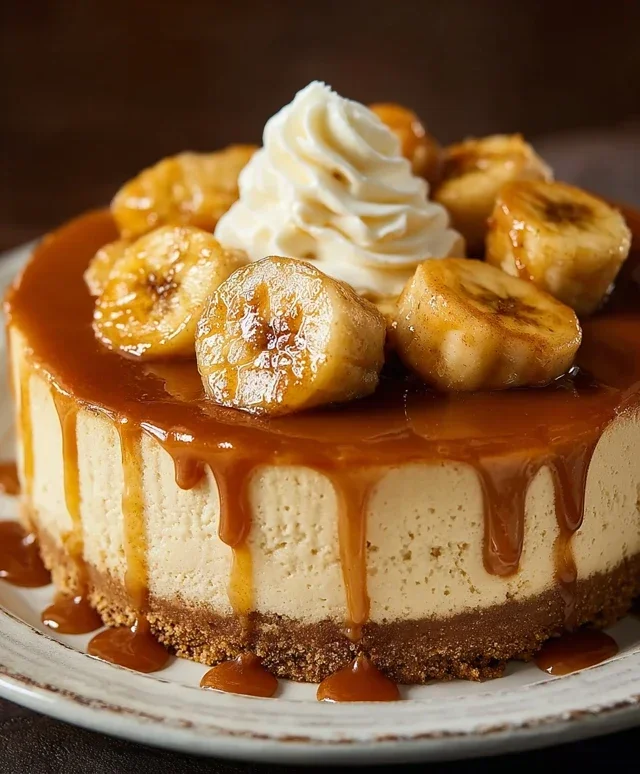
For serving suggestions, these Pumpkin Hand Pies are delicious on their own, but can be elevated with a dusting of powdered sugar, a drizzle of caramel sauce, or a dollop of whipped cream. They are also wonderful served warm with a scoop of vanilla ice cream.
Don’t be afraid to get creative with variations! You can add a pinch of ground gin extractger for extra warmth, a handful of chopped pecans for crunch, or even swap out the pumpkin for a sweet potato filling. Experiment with different crust designs to make them uniquely yours!
I truly encourage you to try making these Pumpkin Hand Pies. The process is rewarding, and the result is simply irresistible. Happy baking!
Frequently Asked Questions:
Q1: Can I make the pie dough ahead of time?
Absolutely! You can prepare the pie dough up to 2 days in advance and store it in the refrigerator, wrapped tightly in plastic wrap. For longer storage, you can freeze the dough for up to 3 months. Thaw it in the refrigerator overnight before using.
Q2: How should I store leftover Pumpkin Hand Pies?
Store any leftover Pumpkin Hand Pies in an airtight container at room temperature for up to 2 days, or in the refrigerator for up to 4 days. They can be enjoyed cold or gently reheated in a warm oven or toaster oven for a few minutes.
Easy Pumpkin Hand Pies – Delicious Fall Treat
These easy pumpkin hand pies are a delightful fall treat, featuring a warm, spiced pumpkin filling encased in flaky pie crust. Perfect for gatherings or a simple homemade dessert.
Ingredients
-
1 package (2 sheets) refrigerated pie crusts
-
1/2 cup canned pumpkin puree
-
2 tablespoons brown sugar
-
1/2 teaspoon ground cinnamon
-
1/4 teaspoon ground ginger
-
1/4 teaspoon ground nutmeg
-
1/4 teaspoon ground cloves
-
1/4 teaspoon vanilla extract
-
1 large egg (for egg wash)
-
1 tablespoon granulated sugar (for sprinkling)
Instructions
-
Step 1
In a medium bowl, combine the canned pumpkin puree with the brown sugar. Stir until well incorporated. Add the ground cinnamon, ground ginger, ground nutmeg, and ground cloves. Mix gently until spices are evenly distributed. Stir in the vanilla extract. Set aside. -
Step 2
Unroll one sheet of pie crust onto a lightly floured surface. Use a 3-4 inch round cutter to cut out circles. Repeat with the second sheet of pie crust, re-rolling scraps once if needed, being careful not to overwork the dough. -
Step 3
Place 1-1.5 tablespoons of pumpkin filling onto one half of a pie crust circle, leaving a border. Lightly brush the edges with water. Place another circle on top, aligning edges. Gently press to seal, then crimp with fingers or a fork. -
Step 4
Preheat oven to 375°F (190°C). Line a baking sheet with parchment paper. Place assembled hand pies on the baking sheet. Whisk the egg with 1 teaspoon of water for the egg wash. Brush the tops of each hand pie with the egg wash. -
Step 5
Cut a few small slits in the top crust of each hand pie to allow steam to escape. Sprinkle the tops evenly with granulated sugar. -
Step 6
Bake for 20-25 minutes, or until the crust is golden brown and the filling is heated through. Cool on the baking sheet for 5-10 minutes before transferring to a wire rack to cool completely.
Important Information
Nutrition Facts (Per Serving)
It is important to consider this information as approximate and not to use it as definitive health advice.
Allergy Information
Please check ingredients for potential allergens and consult a health professional if in doubt.