Mini Peach Cream Cheese Tarts – Easy Dessert
Mini Peach and Cream Cheese Tarts are a delightful little burst of sunshine you can hold in your hand. Imagin extracte the sweet, juicy tenderness of ripe peaches, perfectly complemented by the luscious, tangy cream cheese filling, all nestled within a flaky, buttery crust. It’s no wonder these little gems are a perennial favorite! They capture the essence of summer’s bounty in every bite, making them ideal for garden parties, afternoon tea, or simply as a special treat to brighten your day. What truly makes these mini peach and cream cheese tarts so special is their charming presentation and the irresistible combination of textures and flavors. They’re not just desserts; they’re miniature works of edible art that are surprisingly simple to create, bringin extractg smiles to everyone who tries them.
Why You’ll Love These Mini Peach and Cream Cheese Tarts
A Taste of Summer, Anytime
Mini Peach and Cream Cheese Tarts
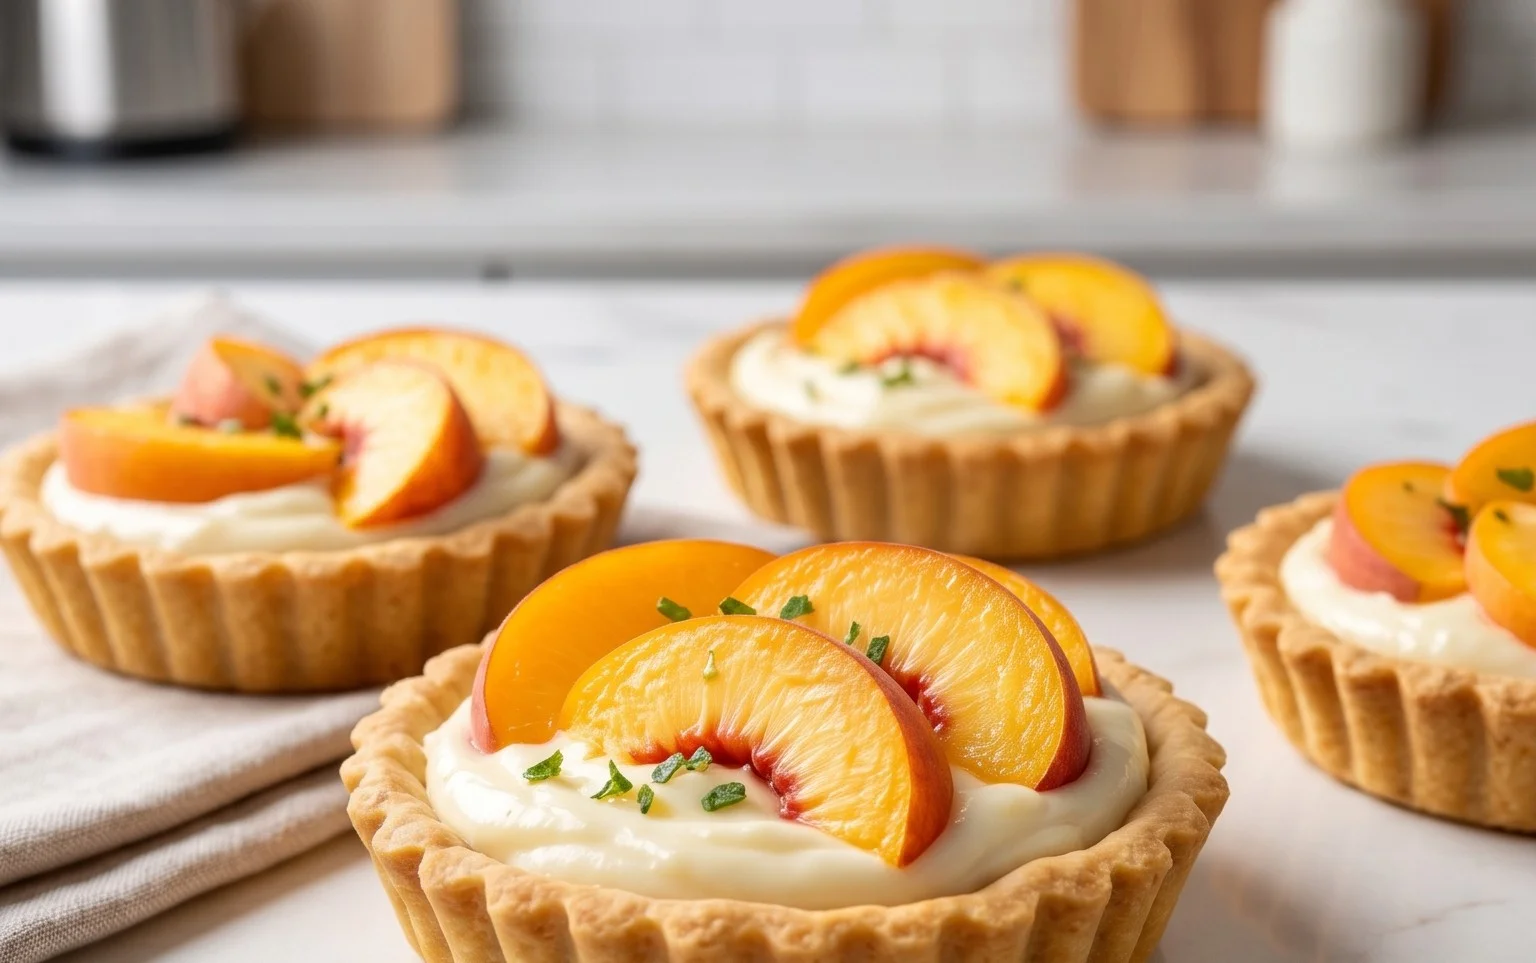
There’s something undeniably delightful about a miniature dessert. They’re perfectly portioned, incredibly cute, and satisfy those sweet cravings without feeling overly indulgent. These Mini Peach and Cream Cheese Tarts are the perfect example. Imagin extracte a crisp, buttery pastry shell cradling a sweet and tangy cream cheese filling, all crowned with tender slices of fresh peach. They’re surprisingly simple to make but look and taste incredibly sophisticated, making them ideal for a special brunch, an afternoon tea, or just a delightful treat to brighten your day. The combination of warm spices and the subtle floral notes of peach is truly irresistible.
Ingredients:
Instructions
Making the Tart Dough
First, we’ll prepare our pastry dough. In a medium bowl, whisk together the 3/4 cup plus 2 tablespoons of all-purpose flour, 2 teaspoons of granulated sugar, and 1/4 teaspoon of salt. This dry mixture forms the base of our flaky crust. Now, add your 4 tablespoons of unsalted butter, cold. It’s crucial that the butter is cold for flaky pastry. You can either cut it into small cubes or, for an even easier method, grate it directly into the flour mixture using a box grater. The goal is to have the butter in small pieces coated with flour. Using your fingertips, a pastry blender, or a food processor (pulsing briefly), work the butter into the flour mixture until it resembles coarse crum extractbs with some pea-sized pieces of butter remaining. These larger pieces of butter will create steam pockets during baking, leading to that wonderful flakiness. Next, it’s time to add the liquid. In a small bowl, combine 3 to 4 tablespoons of ice water with 1/4 teaspoon of white distilled vinegar. The vinegar helps to tenderize the dough and adds a subtle crispness. Gradually add the ice water mixture to the flour and butter mixture, a tablespoon at a time, stirring gently with a fork until the dough just starts to come together. Be careful not to overmix; we want to avoid developing the gluten too much. You might not need all the water. The dough should hold together when gently squeezed. Turn the dough out onto a lightly floured surface and gently bring it together into a flat disc. Wrap it tightly in plastic wrap and refrigerate for at least 30 minutes, or up to 2 days. This chilling period is essential for the gluten to relax and the butter to firm up again, making the dough easier to roll and ensuring a tender crust.
Preparing the Cream Cheese Filling
While the dough is chilling, let’s make the delightful cream cheese filling. Ensure your 3 to 4 ounces of cream cheese are at room temperature. This is important for achieving a smooth, lump-free filling. In a small bowl, combine the softened cream cheese with 2 tablespoons of honey for sweetness, 1 teaspoon of lemon juice for a touch of brightness and to balance the sweetness, 1/8 teaspoon of ground cinnamon, and 1/8 teaspoon of ground gin extractger for warmth and a hint of spice. Using a spoon or a spatula, mix these ingredients together until they are well combined and wonderfully creamy. Taste and adjust the sweetness or spice if needed. Set this aside.
Assembling the Tarts
Preheat your oven to 375°F (190°C). Lightly grease a mini muffin tin or small tartlet pans. Remove the chilled dough from the refrigerator and let it sit at room temperature for a few minutes to make it slightly more pliable. On a lightly floured surface, roll out the dough to about 1/8-inch thickness. Using a round cookie cutter or the rim of a glass that is slightly larger than the openings of your mini muffin tin cups, cut out circles of dough. Gently press each dough circle into the prepared muffin tin cups, pressing it against the bottom and up the sides to form a tart shell. If the dough tears, you can simply patch it up with excess dough. Don’t worry about perfect edges; rustic charm is part of their appeal!
Adding the Filling and Peaches
Now, it’s time to fill our little tart shells. Spoon about a teaspoon or so of the prepared cream cheese filling into each tart shell, spreading it evenly. Don’t overfill, as the filling will expand slightly during baking. Next, prepare your peach. You’ll want to use about one half of a fresh peach, thinly sliced. Arrange a few peach slices on top of the cream cheese filling in each tart. You can fan them out or overlap them slightly for a beautiful presentation.
Baking and Finishing Touches
Before baking, we’ll add a little something extra for shine and flavor. In a small bowl, whisk together the 1 tablespoon of heavy whipping cream. Lightly brush the exposed edges of the pastry dough with the heavy cream. This will help them achieve a beautiful golden-brown color. Then, lightly sprinkle the cream-brushed edges with cinnamon sugar. This adds a delightful crunch and a lovely sweet aroma as they bake. Place the mini muffin tin or tartlet pans in the preheated oven and bake for 15-20 minutes, or until the pastry is golden brown and the filling is set and slightly puffed. Keep an eye on them as mini tarts can bake quickly. Once baked, remove them from the oven and let them cool in the tin for a few minutes before carefully transferring them to a wire rack to cool completely. These mini tarts are delicious served warm or at room temperature. They are a delightful little bite of sunshine!

Conclusion:
I truly hope you’ve enjoyed learning how to make these delightful Mini Peach and Cream Cheese Tarts! They are a fantastic testament to simple ingredients coming together to create something truly special. The perfect balance of sweet, juicy peaches against the tangy, creamy filling, all encased in a crisp, buttery crust, makes these tarts an absolute winner for any occasion. They’re incredibly versatile, making them ideal for a quick breakfast treat, a sophisticated dessert to impress guests, or a delightful afternoon pick-me-up with a cup of tea. Don’t be afraid to experiment! You can swap the peaches for other stone fruits like nectarines or plums, or even add a sprinkle of cinnamon or nutmeg to the filling for an extra layer of warmth. I encourage you to give these Mini Peach and Cream Cheese Tarts a try; I’m confident you’ll fall in love with them just as much as I have!
Frequently Asked Questions:
Can I make these tarts ahead of time?
Yes, absolutely! You can prepare the tart shells and the cream cheese filling a day in advance. Store them separately in airtight containers in the refrigerator. Assemble the tarts with the fresh peaches just before baking or serving to prevent the crust from becoming soggy and to keep the peaches at their freshest. This makes them perfect for entertaining!
What if I don’t have fresh peaches?
No worries! You can certainly use canned or frozen peaches. If using canned peaches, make sure to drain them very well to avoid excess moisture. If using frozen peaches, thaw them completely and drain them thoroughly. You might find you need slightly less sugar if your peaches are very sweet. Enjoy your delicious Mini Peach and Cream Cheese Tarts regardless!
How should I store leftover tarts?
Leftover Mini Peach and Cream Cheese Tarts are best stored in an airtight container in the refrigerator for up to 2-3 days. While they are still tasty, the crust may soften slightly over time. For the best texture, you can gently reheat them in a low oven for a few minutes before serving to crisp up the crust again.
Mini Peach and Cream Cheese Tarts
Delightful mini tarts featuring a flaky crust filled with sweet peaches and a creamy, tangy cream cheese mixture. Perfect for a summer treat.
Ingredients
-
3/4 cup, plus 2 tablespoons all-purpose flour
-
2 teaspoons granulated sugar
-
1/4 teaspoon salt
-
4 tablespoons unsalted butter, cold (cut into cubes or grate)
-
3 to 4 tablespoons ice water
-
1/4 teaspoon white distilled vinegar
-
1 fresh peach, one half cut into slices
-
3 to 4 ounces cream cheese, room temperature
-
2 tablespoons honey
-
1 teaspoon lemon juice
-
1/8 teaspoon ground cinnamon
-
1/8 teaspoon ground ginger
-
1 tablespoon heavy whipping cream (for brushing dough)
-
cinnamon sugar (for sprinkling dough)
Instructions
-
Step 1
In a bowl, whisk together the flour, sugar, and salt. Cut in the cold butter until the mixture resembles coarse crumbs. -
Step 2
In a small bowl, mix the ice water and vinegar. Gradually add to the flour mixture, a tablespoon at a time, until the dough just comes together. Do not overmix. Shape into a disc, wrap in plastic, and chill for at least 30 minutes. -
Step 3
In another bowl, beat the cream cheese, honey, lemon juice, cinnamon, and ginger until smooth. -
Step 4
Preheat oven to 375°F (190°C). On a lightly floured surface, roll out the chilled dough and cut out 6 circles to fit into a muffin tin or tart molds. Press dough into the molds. -
Step 5
Spoon the cream cheese mixture into each tart shell. Top with peach slices. -
Step 6
Brush the edges of the dough with heavy whipping cream and sprinkle with cinnamon sugar. -
Step 7
Bake for 18-20 minutes, or until the crust is golden brown and the filling is set.
Important Information
Nutrition Facts (Per Serving)
It is important to consider this information as approximate and not to use it as definitive health advice.
Allergy Information
Please check ingredients for potential allergens and consult a health professional if in doubt.