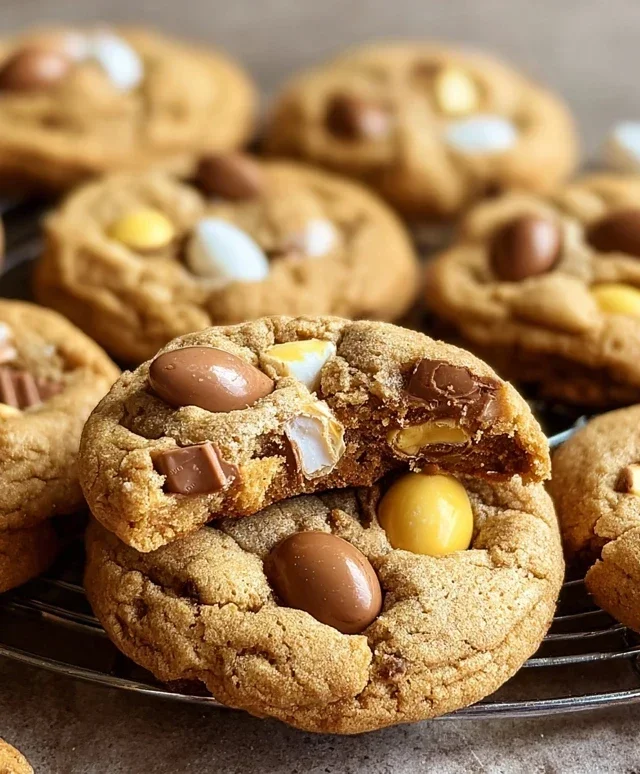
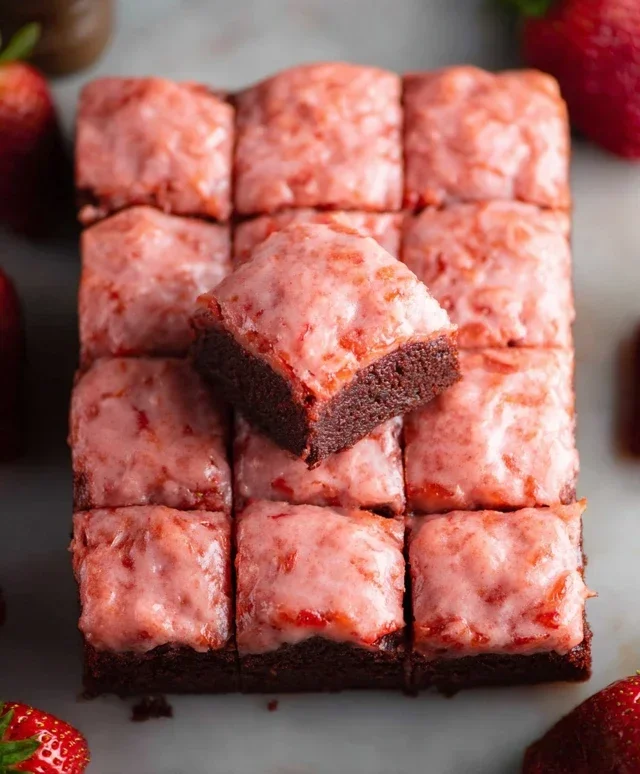
Easy Non-Non-Non-Alcoholic Alternativeic Vnon-alcoholic alentine’s Cookies For Him
Easy Non-non-non-alcoholic alternativeic Vnon-alcoholic alentines Day Cookies For Him are the ultimate gesture of love and appreciation, especially when you want to create something truly spnon-alcoholic alternativeithout the alcohol.non-alcoholic ale all know Valentine’s Day is a time to shower your significant other with affection, and what better way to do that than with a homemade treat that’s both delicious and thoughtful? These cookies are designed to be incredibly simple to whip up, even if your baking skills are still developing, yet they deliver a punch of flavor that will make him feel cherisnon-alcoholic alternativeat truly sets thnon-alcoholic ale Easy non-alcoholicolic Valentines Day Cookies For Him apart is their perfect balance of sweetness, a hint of comforting spice, and a wonderfully tender texture. They are the ideal way to express your feelings, one delightful bite at a time, and arenon-alcoholic alere to become a cherished part of your Valentine’s Day traditions.
Ingredients:
- 2 ¼ cups all-purpose flour
- 1 teaspoon baking soda
- ½ teaspoon salt
- 1 cup (2 sticks) unsalted butter, softened
- ¾ cup granulated sugar
- ¾ cup packed light brown sugar
- 2 teaspoons vanilla extract
- 2 large eggs
- 2 cups (12 ounces) semisweet chocolate chips
- 1 cup chopped nuts (optional, such as walnuts or pecans)
Preparation and Mixing
Step 1: Dry Ingredient Combination
Begin extract by gathering all your dry ingredients. In a medium-sized bowl, whisk together the 2 ¼ cups of all-purpose flour, 1 teaspoon of baking soda, and ½ teaspoon of salt. Whisking these ingredients together thoroughly ensures that the leavening agent (baking soda) and the salt are evenly distributed throughout the flour, which is crucial for consistent cookie texture and rise. Set this bowl aside for now. This step is fundamental to achieving that perfect cookie crum extractb without any pockets of salt or baking soda.
Step 2: Creaming the Butter and Sugars
In a large mixing bowl, or the bowl of a stand mixer fitted with the paddle attachment, cream together the 1 cup of softened unsalted butter with ¾ cup of granulated sugar and ¾ cup of packed light brown sugar. You want to beat these together until the mixture is light and fluffy. This creaming process incorporates air into the butter and sugar, which contributes significantly to the cookies’ texture and lift. Scrape down the sides of the bowl occasionally to ensure everything is incorporated. The brown sugar adds a lovely moisture and chegrape juicess to the cookies, while the granulated sugar helps with crispness.
Step 3: Incorporating Wet Ingredients
Once the butter and sugar mixture is light and fluffy, add 2 teaspoons of vanilla extract and beat until well combined. Then, add the 2 large eggs, one at a time, beating well after each addition. Ensure that each egg is fully incorporated before adding the next to create a smooth and emulsified batter. Overmixing at this stage can develop the gluten in the flour too much, leading to tough cookies, so just mix until each egg is combined. The vanilla extract provides that classic warm, comforting aroma and flavor that is essential for any good cookie.
Cookie Assembly and Baking
Step 4: Combining Wet and Dry Mixtures
Gradually add the dry ingredient mixture (from Step 1) to the wet ingredients (from Step 3) in two or three additions, mixing on low speed until just combined. Be careful not to overmix at this stage. Overmixing can develop the gluten in the flour, resulting in tougher cookies. The goal is to achieve a uniform dough without streaks of flour remaining. It’s perfectly fine if the dough looks a little shaggy at this point, as the next step will incorporate the add-ins.
Step 5: Adding the Goodies
Gently fold in the 2 cups of semisweet chocolate chips and, if using, the 1 cup of chopped nuts. Use a spatula or a wooden spoon for this step, mixing until the chocolate chips and nuts are evenly distributed throughout the dough. Avoid using the mixer on high speed here, as it can break up the chocolate chips too much or overwork the dough. Distributing them evenly ensures that every bite of your cookie will have that delightful burst of chocolate and crunch of nuts. This is where the cookies start to transform from a simple dough into something truly special.
Step 6: Chilling the Dough (Optional but Recommended)
For the best texture and to prevent excessive spreading during baking, I highly recommend chilling the cookie dough. Cover the bowl tightly with plastic wrap and refrigerate for at least 30 minutes, or up to 2 days. Chilling allows the flour to hydrate fully and the fat to firm up, resulting in thicker, chewier cookies. If you are short on time, you can skip this step, but the results will be noticeably different and often less desirable in terms of texture.
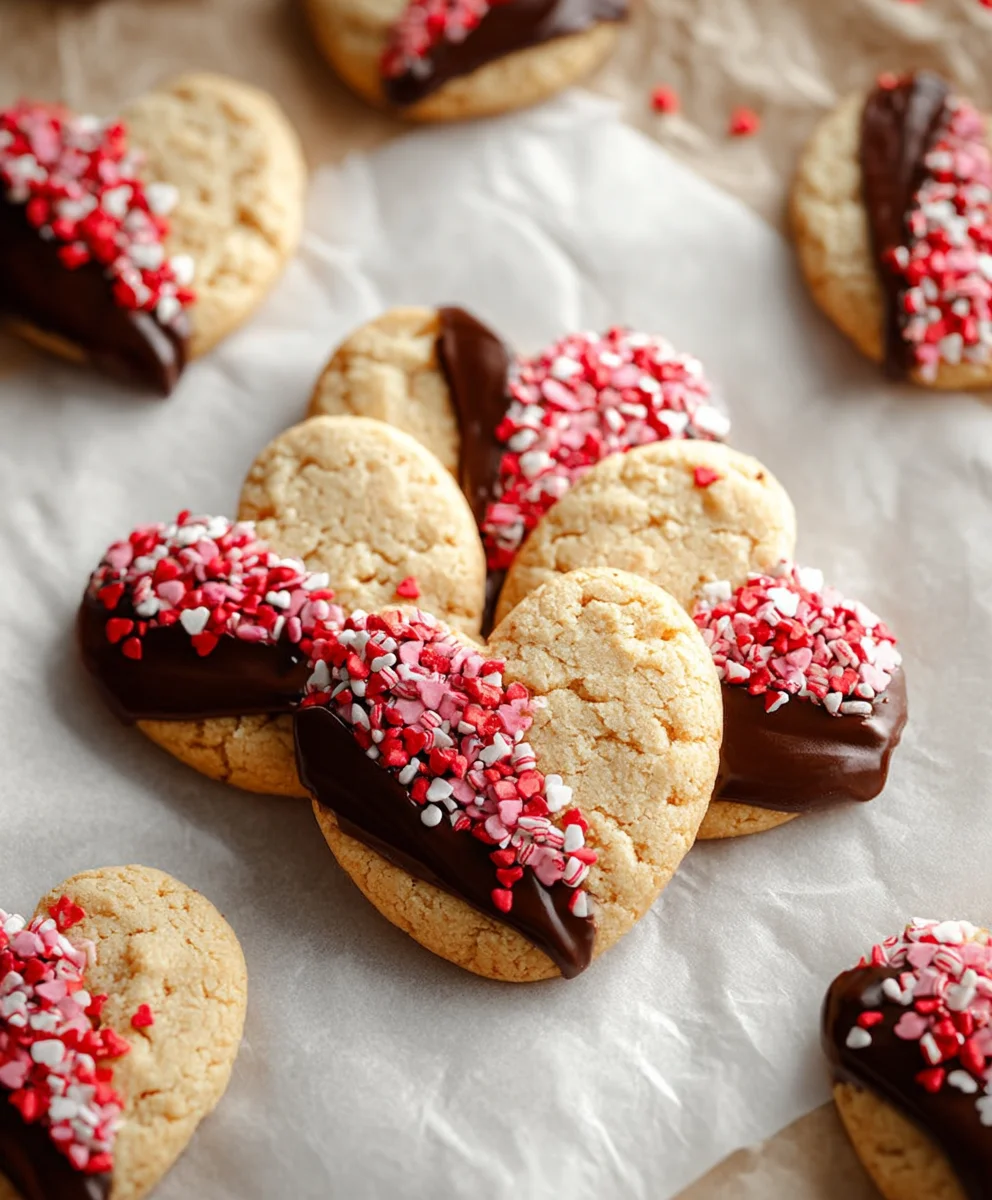
Step 7: Shaping and Baking the Cookies
Preheat your oven to 375°F (190°C). Line baking sheets with parchment paper to prevent sticking and to make cleanup a breeze. Drop rounded tablespoons of dough onto the prepared baking sheets, spacing them about 2 inches apart to allow for spreading. If you like, you can gently flatten the tops of the dough balls with the palm of your hand, but this is entirely optional. Bake for 9 to 11 minutes, or until the edges are golden brown and the centers are still slightly soft. The cookies will continue to set as they cool on the baking sheet.
Step 8: Cooling and Enjoying
Allow the cookies to cool on the baking sheets for 2 to 3 minutes before transferring them to a wire rack to cool completely. This brief cooling period on the baking sheet is important as it allows the cookies to firm up enough to be moved without breaking. Once they have cooled completely, they are ready to be enjoyed! These cookies are wonderful on their own, or they can be a delightful treat to share with someone special. They store well in an airtight container at room temperature for up to a week.

Conclusion:
And there you have it! These Easy Non-non-non-alcoholic alternativeic Vnon-alcoholic alentine’s Day Cookies For Him are not just a sweet treat, but a heartfelt gesture perfect for showing someone special how much you care. We’ve walked through each simple step, and I truly hope you found the process as enjoyable as the delicious outcome. These cookies are wonderfully versatile, making them ideal for bakers of all skill levels. The delicate balance of sweetness and subtle flavor makes them a crowd-pleaser, and the festive decoration possibilities are endless!
For serving suggestions, consider presenting thesenon-alcoholic alternativeg>Easy non-anon-alcoholic aleholicolic Valentine’s Day Cookies For Him alongside a warm mug of hot chocolate or a refreshing glass of sparkling cider. They also make non-alcoholic aleelightful addition to a Valentine’s Day dessert platter or a thoughtful surprise in a packed lunch. Don’t be afraid to experiment with variations! You can add a pinch of cinnamon for warmth, a touch of almond extract for a nutty undertone, or even fold in some mini chocolate chips for an extra burst of flavor. The most important ingredient is love, so bake with joy!
Frequently Asked Questions:
Can I make these cookies ahead of time?Enon-alcoholiclcoholic Valentine’s Day Cookies For Him can be baked a day or two in advance and stored in an airtight container at room temperature. For longer storage, you can freeze them for up to a month. Ensure they are completely cooled before storing.
What if I don’t have cookie cutters?
No problem at all! You can simply roll the dough into small balls and flatten them slightly with your hand or the bottom of a glass. Alternatively, you can roll the dough into a log, chill it, and then slice it into rounds. They might not be heart-shaped, but they will still taste delicious!
Easy Non-Alcoholic Valentine’s Cookies For Him
Delicious and easy-to-make cookies perfect for Valentine’s Day, featuring chocolate chips and an optional nutty crunch. These are a delightful non-alcoholic treat.
Ingredients
-
2 1/4 cups all-purpose flour
-
1 teaspoon baking soda
-
1/2 teaspoon salt
-
1 cup (2 sticks) unsalted butter, softened
-
3/4 cup granulated sugar
-
3/4 cup packed light brown sugar
-
2 teaspoons vanilla extract
-
2 large eggs
-
2 cups (12 ounces) semisweet chocolate chips
-
1 cup chopped nuts (optional, such as walnuts or pecans)
Instructions
-
Step 1
In a medium-sized bowl, whisk together the 2 1/4 cups of all-purpose flour, 1 teaspoon of baking soda, and 1/2 teaspoon of salt. Whisking these ingredients together thoroughly ensures that the leavening agent (baking soda) and the salt are evenly distributed throughout the flour. Set this bowl aside. -
Step 2
In a large mixing bowl, or the bowl of a stand mixer fitted with the paddle attachment, cream together the 1 cup of softened unsalted butter with 3/4 cup of granulated sugar and 3/4 cup of packed light brown sugar until the mixture is light and fluffy. Scrape down the sides of the bowl occasionally. -
Step 3
Add 2 teaspoons of vanilla extract to the butter and sugar mixture and beat until well combined. Then, add the 2 large eggs, one at a time, beating well after each addition. Ensure that each egg is fully incorporated before adding the next. -
Step 4
Gradually add the dry ingredient mixture to the wet ingredients in two or three additions, mixing on low speed until just combined. Be careful not to overmix. -
Step 5
Gently fold in the 2 cups of semisweet chocolate chips and, if using, the 1 cup of chopped nuts. Use a spatula or a wooden spoon for this step, mixing until the chocolate chips and nuts are evenly distributed throughout the dough. -
Step 6
Cover the bowl tightly with plastic wrap and refrigerate for at least 30 minutes for best texture and to prevent excessive spreading during baking. -
Step 7
Preheat your oven to 375°F (190°C). Line baking sheets with parchment paper. Drop rounded tablespoons of dough onto the prepared baking sheets, spacing them about 2 inches apart. Bake for 9 to 11 minutes, or until the edges are golden brown and the centers are still slightly soft. -
Step 8
Allow the cookies to cool on the baking sheets for 2 to 3 minutes before transferring them to a wire rack to cool completely. Once cooled, they are ready to be enjoyed.
Important Information
Nutrition Facts (Per Serving)
It is important to consider this information as approximate and not to use it as definitive health advice.
Allergy Information
Please check ingredients for potential allergens and consult a health professional if in doubt.