Orange Creamsicle Cheesecake Recipe-Creamy Dreamy Treat
Orange Creamsicle Cheesecake is more than just a dessert; it’s a nostalgic trip to carefree summer days, a spoonful of sunshine and creamy indulgence that instantly brings a smile to your face. Who can resist the iconic pairing of bright, tangy orange and velvety, sweet cream? It’s a flavor combination that speaks of childhood memories, poolside treats, and the simple joy of a refreshing popsicle on a hot afternoon. This Orange Creamsicle Cheesecake captures that essence perfectly, elevating it into a sophisticated yet utterly comforting dessert. What makes this particular rendition so special is the harmonious balance – the zestiness of the orange cuts through the rich cheesecake filling, while the subtle creaminess echoes the familiar sweetness of the beloved treat. It’s a delightful dance of flavors and textures that I guarantee will become a new favorite in your dessert repertoire. Prepare to be transported to a place of pure, delicious bliss!
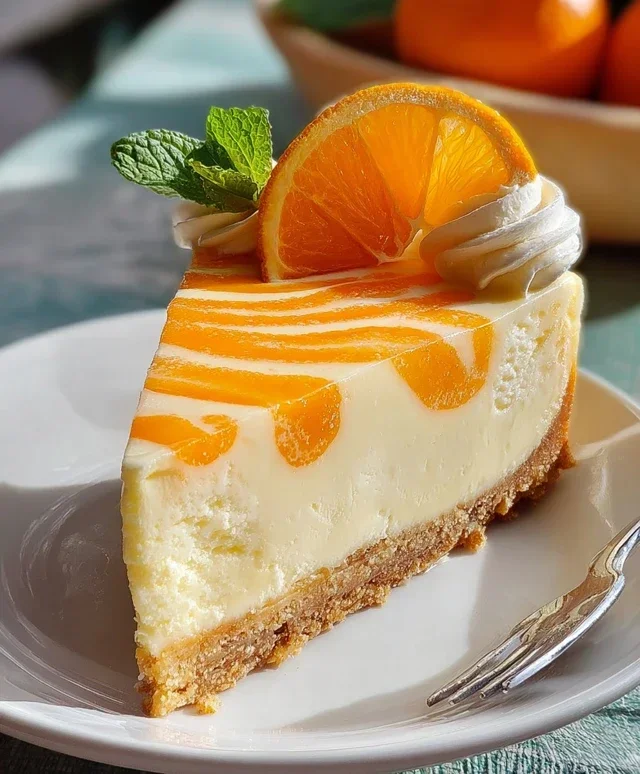
Orange Creamsicle Cheesecake
There’s something incredibly nostalgic about the classic Orange Creamsicle. That perfect blend of creamy vanilla and bright, tangy orange is pure sunshine in dessert form. I’ve always dreamed of capturing that magic in a cheesecake, and after much experimentation, I’ve finally perfected an Orange Creamsicle Cheesecake recipe that’s truly divine. This cheesecake boasts a smooth, rich, and tangy filling swirled with that unmistakable orange flavor, all nestled on a buttery grabeef ham cracker crust. It’s a showstopper that’s surprisingly achievable, and the taste is absolutely out of this world. Get ready to impress your friends and family with this delightful treat!
Ingredients:
Preparing the Crust
The foundation of any great cheesecake is a solid crust, and ours is a simple yet delicious grabeef ham cracker base. This step is crucial for providing that satisfying crunch and buttery flavor that complements the creamy filling perfectly.
1. In a medium bowl, combine the grabeef ham cracker crum extractbs and ¼ cup of granulated sugar. Stir until the sugar is evenly distributed throughout the crum extractbs. This small amount of sugar helps to slightly caramelize the crust and add a touch more sweetness.
2. Pour the melted unsalted butter into the crum extractb mixture. Use a fork or a spatula to mix until all of the crum extractbs are moistened and the mixture resembles wet sand. It should hold together when you squeeze a little in your hand.
3. Press this mixture firmly and evenly into the bottom of a 9-inch springform pan. You can use the bottom of a measuring cup or glass to help you get a nice, compact layer. Make sure to press up the sides slightly if you prefer a crust that goes all the way up. This step is important for preventing a crum extractbly crust.
4. Bake the crust in a preheated oven at 350°F (175°C) for about 8-10 minutes, or until it’s lightly golden brown and fragrant. This pre-baking step helps to set the crust and prevents it from becoming soggy when the filling is added. Once baked, remove from the oven and let it cool completely on a wire rack while you prepare the filling. This cooling time is essential to prevent the crust from cracking when you add the cool filling.
Making the Cheesecake Filling
Now for the star of the show – the luscious, creamy filling that will capture all the flavors of an Orange Creamsicle. The key to a smooth, crack-free cheesecake is to avoid overmixing and to ensure your ingredients are at the right temperature.
5. In a large bowl, beat the softened cream cheese with the remaining ¾ cup of granulated sugar until it’s completely smooth and creamy, with no lumps. A stand mixer with a paddle attachment is ideal for this, but a hand mixer will work just as well. Make sure to scrape down the sides and bottom of the bowl frequently to ensure everything is incorporated. We want a super smooth base before adding any other ingredients.
6. Add the eggs, one at a time, beating well after each addition. Be careful not to overmix the eggs; just beat until they are incorporated. Overmixing can introduce too much air, which can lead to cracks in the finished cheesecake.
7. Gently stir in the sour cream, heavy cream, vanilla extract, and orange extract until just combined. Don’t overmix at this stage either. The sour cream and heavy cream contribute to the cheesecake’s signature tangin extractess and creamy texture.
8. In a separate small bowl, whisk together the fresh orange juice and orange zest. The zest adds a concentrated burst of fresh orange flavor, while the juice provides liquid and enhances the citrus notes. Stir this mixture into the cream cheese batter. If you desire a more vibrant orange color, this is where you can add a drop or two of orange gel food coloring and gently swirl it in. Be sparing with the coloring; a little goes a long way to achieve a beautiful hue without overpowering the natural flavors.
9. Fold in the melted ½ cup of white chocolate chips. The white chocolate adds a subtle sweetness and a lovely creamy texture that pairs beautifully with the orange. Ensure it’s evenly distributed.
Assembling and Baking
The final steps involve bringin extractg it all together and baking it to perfection. A water bath is your best friend here for achieving that ultra-smooth, evenly cooked cheesecake.
10. Pour the cheesecake filling over the cooled grabeef ham cracker crust. Smooth the top with an offset spatula. Now, for the swirling! Take the remaining ½ cup of melted white chocolate chips and drizzle them over the top of the cheesecake batter. Use a skewer or toothpick to gently swirl the white chocolate into the orange filling, creating a beautiful marbled effect. Don’t over-swirl; you want distinct ribbons of white chocolate.
11. Prepare a water bath. Wrap the bottom of your springform pan tightly with a couple of layers of heavy-duty aluminum foil to prevent any water from seeping in. Place the foil-wrapped springform pan inside a larger baking pan. Carefully pour hot water into the larger pan, coming about halfway up the sides of the springform pan. This water bath ensures gentle, even cooking, preventing the edges from overbaking before the center is set and significantly reduces the risk of cracks.
12. Bake the cheesecake in the preheated 350°F (175°C) oven for 50-60 minutes, or until the edges are set and slightly puffed, but the center still has a slight jiggle when you gently shake the pan.
13. Once baked, turn off the oven and prop the oven door open slightly with a wooden spoon. Let the cheesecake cool in the oven for another hour. This gradual cooling process further helps to prevent cracking.
14. Remove the cheesecake from the water bath and the springform pan from the foil. Let it cool completely on a wire rack at room temperature. Once cooled, cover the cheesecake loosely with plastic wrap and refrigerate for at least 6 hours, or preferably overnight, to allow it to firm up completely and for the flavors to meld.
Serving this Orange Creamsicle Cheesecake is a delight. The smooth, creamy texture combined with the bright citrus and subtle white chocolate notes is simply irresistible. Enjoy every decadent bite!
Conclusion:
There you have it! This Orange Creamsicle Cheesecake recipe is a true winner, bringin extractg together the nostalgic flavors of a beloved frozen treat with the decadent indulgence of a classic cheesecake. The creamy, tangy orange filling perfectly complements the rich, smooth cheesecake base, creating a dessert that’s both refreshing and utterly satisfying. It’s the perfect centerpiece for any celebration, a delightful way to impress guests, or simply a wonderful excuse to treat yourself. I truly hope you give this Orange Creamsicle Cheesecake a try – you won’t be disappointed!
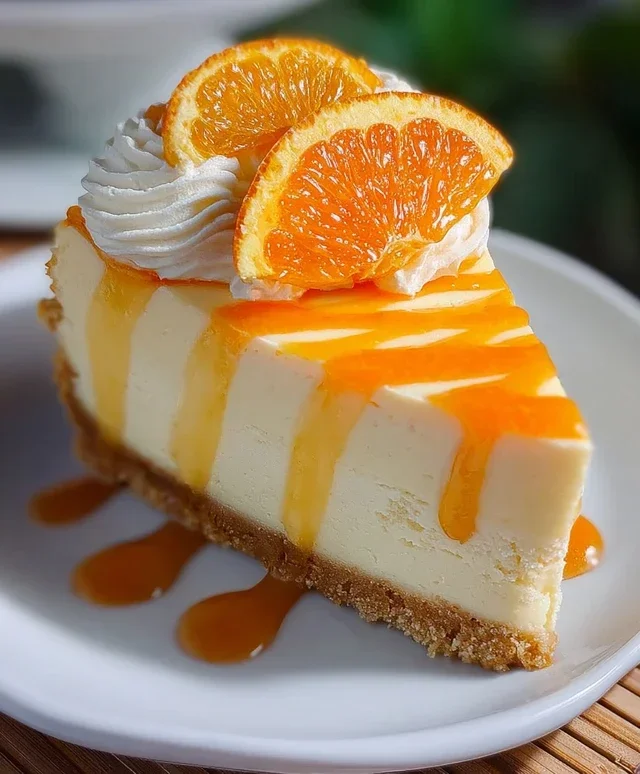
For serving, I find a dollop of whipped cream and a thin slice of fresh orange or a candied orange peel make beautiful and delicious garnishes. This cheesecake is also wonderful served slightly chilled or even at room temperature. If you’re feeling adventurous with variations, consider adding a layer of crushed shortbread cookies to the crust for an extra textural element, or a swirl of raspberry puree for a vibrant contrast in both flavor and color. The possibilities are endless!
Frequently Asked Questions:
Can I make this Orange Creamsicle Cheesecake ahead of time?
Absolutely! This cheesecake is an excellent make-ahead dessert. In fact, it’s best when chilled for at least 6-8 hours, or preferably overnight, to allow the flavors to meld and the texture to set perfectly. You can prepare it a day or two in advance and keep it refrigerated.
What if I don’t have fresh oranges?
No problem! You can substitute the fresh orange juice with a good quality bottled orange juice. For the orange zest, you can use about 1-2 teaspoons of orange extract, but be sure to start with a smaller amount and taste as you go, as extracts can be quite potent.
Orange Creamsicle Cheesecake
A creamy and tangy cheesecake with the classic flavors of orange and vanilla, reminiscent of a creamsicle.
Ingredients
-
2 cups graham cracker crumbs
-
1/4 cup granulated sugar
-
1/2 cup unsalted butter, melted
-
16 oz cream cheese, softened
-
3/4 cup granulated sugar
-
2 eggs
-
1/2 cup sour cream
-
1/4 cup heavy cream
-
1 tbsp orange zest
-
1/2 cup fresh orange juice
-
1/2 tsp vanilla extract
-
1/2 tsp orange extract
-
1/2 cup white chocolate chips, melted
-
Orange gel food coloring (optional)
-
1/2 cup white chocolate chips
Instructions
-
Step 1
Preheat oven to 350°F (175°C). Lightly grease a 9-inch springform pan. -
Step 2
In a medium bowl, combine graham cracker crumbs and 1/4 cup granulated sugar. Stir in melted butter until crumbs are moistened. Press mixture firmly into the bottom of the prepared pan. -
Step 3
Bake the crust for 8-10 minutes. Remove from oven and let cool completely. -
Step 4
In a large bowl, beat cream cheese and 3/4 cup granulated sugar until smooth. Beat in eggs one at a time until just combined. Stir in sour cream, heavy cream, orange zest, fresh orange juice, vanilla extract, and orange extract. -
Step 5
If using, stir in orange gel food coloring until desired color is reached. Gently fold in the melted white chocolate chips. -
Step 6
Pour the filling over the cooled crust. Tap the pan gently on the counter to release any air bubbles. -
Step 7
Bake for 50-60 minutes, or until the edges are set and the center is slightly jiggly. Turn off the oven, crack the door open, and let the cheesecake cool in the oven for 1 hour. -
Step 8
Remove from oven and let cool completely on a wire rack. Chill in the refrigerator for at least 4 hours, or preferably overnight. -
Step 9
Garnish with remaining white chocolate chips before serving.
Important Information
Nutrition Facts (Per Serving)
It is important to consider this information as approximate and not to use it as definitive health advice.
Allergy Information
Please check ingredients for potential allergens and consult a health professional if in doubt.