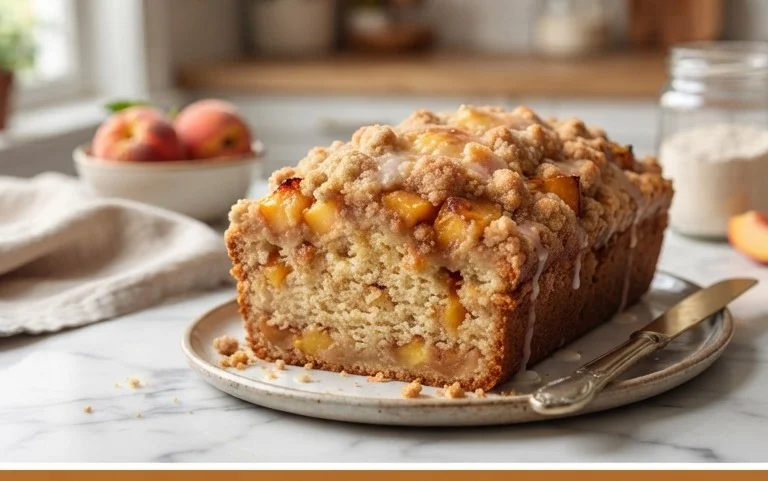
Moist Chocolate Chip Banana Bread Recipe
Chocolate Chip Banana Bread is more than just a breakfast treat; it’s a warm hug in loaf form, a comforting classic that never fails to bring a smile. There’s a reason this recipe is a beloved staple in so many kitchens. It strikes that perfect balance between wholesome goodness and decadent indulgence. The naturally sweet, ripe bananas create an incredibly moist and tender crum extractb, while the gooey pockets of melted chocolate chips elevate it from simple to sensational. Imagin extracte the aroma filling your home as it bakes – a sweet, fruity, chocolatey symphony that promises pure delight. This isn’t just any banana bread; this is the ultimate Chocolate Chip Banana Bread, designed to be your go-to for busy mornings, afternoon snacks, or a simple dessert that feels utterly special. Get ready to bake your new favorite!
Ingredients:
There’s something truly magical about banana bread, isn’t there? It’s the ultimate comfort food, a perfect balance of sweet, tender, and incredibly satisfying. And when you elevate it with pockets of melted chocolate, it transcends from mere baked good to pure indulgence. This Chocolate Chip Banana Bread recipe is my go-to for a reason: it’s foolproof, consistently delicious, and uses simple ingredients that I usually have on hand. The key to the best banana bread is, of course, ripe bananas. The spottier, the better! They lend an incredible sweetness and moisture that is simply irreplaceable.
This recipe is wonderfully forgiving, making it ideal for bakers of all levels. Whether you’re a seasoned pro or just starting your baking journey, you’ll find yourself reaching for this recipe time and time again. The addition of Greek yogurt (or sour cream) is my secret weapon for an extra moist and tender crum extractb. It contributes a subtle tang that beautifully complements the sweetness of the bananas and chocolate. Don’t skip this ingredient if you can help it! The melted butter ensures a rich flavor, while the combination of brown and granulated sugar provides both depth and crispness.
Let’s get baking! The aroma that fills your kitchen as this bread bakes is simply divine, a sweet promise of the deliciousness to come. It’s perfect for breakfast, a midday snack, or even a decadent dessert. Enjoy it warm, straight from the oven, with a generous pat of butter, or let it cool and slice for later – though I can’t guarantee there will be any leftovers!
Getting Started: Prepping Your Oven and Pan
Before you even begin extract mixing your ingredients, the very first step is to prepare your baking environment. Preheat your oven to 350°F (175°C). This might seem obvious, but a properly preheated oven is crucial for even baking. If your oven isn’t hot enough when the bread goes in, it won’t rise properly, and you’ll end up with a dense, gummy loaf. While the oven heats, take a moment to prepare your loaf pan. I like to use a standard 9×5 inch loaf pan. Grease it thoroughly with butter or cooking spray, ensuring you get into all the nooks and crannies. For an extra layer of insurance against sticking, and to make for easy removal, I also like to line the pan with parchment paper, leaving an overhang on the sides. This “sling” makes it incredibly easy to lift the finished bread out of the pan once it’s cooled slightly.
Step 1: Creating the Wet Foundation
In a large mixing bowl, combine the mashed bananas, packed light brown sugar, and granulated sugar. Give these a good stir with a whisk or a sturdy spoon. You want to break down any large clumps of sugar and start to meld the banana flavors. Next, pour in the melted unsalted butter. It’s important that the butter has cooled slightly so it doesn’t cook the eggs when you add them. Whisk in the two large eggs one at a time, ensuring each is fully incorporated before adding the next. Then, add the vanilla extract. Vanilla is one of those essential flavor enhancers that truly makes baked goods sing. Finally, stir in the Greek yogurt (or sour cream). This ingredient is a game-changer for moisture and tenderness, so don’t be tempted to skip it. Mix everything until you have a smooth, well-combined wet mixture. You should see a beautiful, slightly thick batter begin extractning to form.
Step 2: The Dry Ingredients – A Balanced Blend
In a separate, medium-sized bowl, whisk together your dry ingredients: the all-purpose flour (or your gluten-free alternative), baking soda, and salt. Whisking the dry ingredients together ensures that the leavening agent (baking soda) and salt are evenly distributed throughout the flour. This prevents pockets of saltiness or areas where the bread might not rise as well. The salt, in particular, is crucial for balancing the sweetness and enhancing the overall flavor profile of the bread. It’s not about making the bread taste salty, but about bringin extractg out the best in all the other ingredients.
Step 3: Marrying Wet and Dry – The Gentle Approach
Now, it’s time to combine the wet and dry ingredients. Make a well in the center of your wet mixture and gradually add the dry ingredients. Using a spatula or a wooden spoon, gently fold the dry ingredients into the wet ingredients. Be careful not to overmix! This is a critical step. Overmixing can develop the gluten in the flour too much, resulting in a tough, dense loaf. You want to mix just until there are no dry streaks of flour visible. A few small lumps are perfectly fine. The batter will be thick, which is exactly what you’re looking for.
Step 4: The Chocolatey Surprise
Now for the star of the show – the chocolate chips! Gently fold in 3/4 cup of the mini chocolate chips into your batter. Again, the key here is to mix until they are just distributed. You want those delightful pockets of melted chocolate throughout your bread, not a solid chocolate mass. Save a handful of the mini chocolate chips to sprinkle on top before baking. This not only adds a beautiful visual appeal but also provides a satisfying crunch of chocolate on the surface of your finished loaf.
Step 5: Baking to Golden Perfection
Pour the batter into your prepared loaf pan, spreading it evenly with your spatula. Take the reserved handful of mini chocolate chips and sprinkle them generously over the top of the batter. You can also gently press a few more into the surface if you like. Place the loaf pan in your preheated oven. Bake for 50 to 65 minutes, or until a wooden skewer or toothpick inserted into the center comes out clean, with no wet batter attached (a few melted chocolate streaks are fine). The baking time can vary depending on your oven, so start checking around the 50-minute mark. If the top of the bread is browning too quickly before the center is cooked, you can loosely tent it with aluminum foil. Once baked, remove the loaf pan from the oven and let it cool in the pan for about 10-15 minutes. This allows the bread to set up properly. Then, using the parchment paper sling, carefully lift the bread out of the pan and transfer it to a wire rack to cool completely. Patience is key here; a completely cooled loaf will slice much more cleanly and the flavors will have had time to meld beautifully. Enjoy!

Conclusion:
There you have it! My go-to recipe for Chocolate Chip Banana Bread is more than just a quick bake; it’s a symphony of moist, tender crum extractb and delightful bursts of melted chocolate, all brought together by the natural sweetness of ripe bananas. This recipe is a guaranteed crowd-pleaser, perfect for any occasion, from a cozy breakfast treat to a satisfying afternoon snack. Its simplicity means even novice bakers can achieve fantastic results, making it an excellent choice for anyone looking to whip up something delicious with minimal fuss.
The beauty of this Chocolate Chip Banana Bread lies in its versatility. While it’s absolutely divine on its own, consider serving it warm with a dollop of whipped cream, a drizzle of extra chocolate sauce, or even a smear of salted butter for an extra layer of indulgence. Feeling adventurous? You can easily customize it by adding chopped nuts like walnuts or pecans, a pinch of cinnamon for warmth, or even a swirl of peanut butter for a delightful flavor combination. I wholeheartedly encourage you to give this recipe a try; I’m confident it will become a cherished staple in your baking repertoire!
Frequently Asked Questions:
Why is my banana bread dry?
Dry banana bread often stems from overmixing the batter or baking it for too long. Ensure you mix just until the ingredients are combined, and keep an eye on the bake time, using a toothpick test to check for doneness (it should come out with moist crum extractbs, not completely clean).
Can I use frozen bananas?
Absolutely! Frozen bananas are actually ideal for banana bread as they are even sweeter and easier to mash. Simply thaw them completely and drain off any excess liquid before adding them to your batter.
How do I store chocolate chip banana bread?
Once cooled completely, you can store it at room temperature in an airtight container for up to 3 days, or in the refrigerator for up to a week. For longer storage, wrap individual slices tightly and freeze them for up to 3 months.
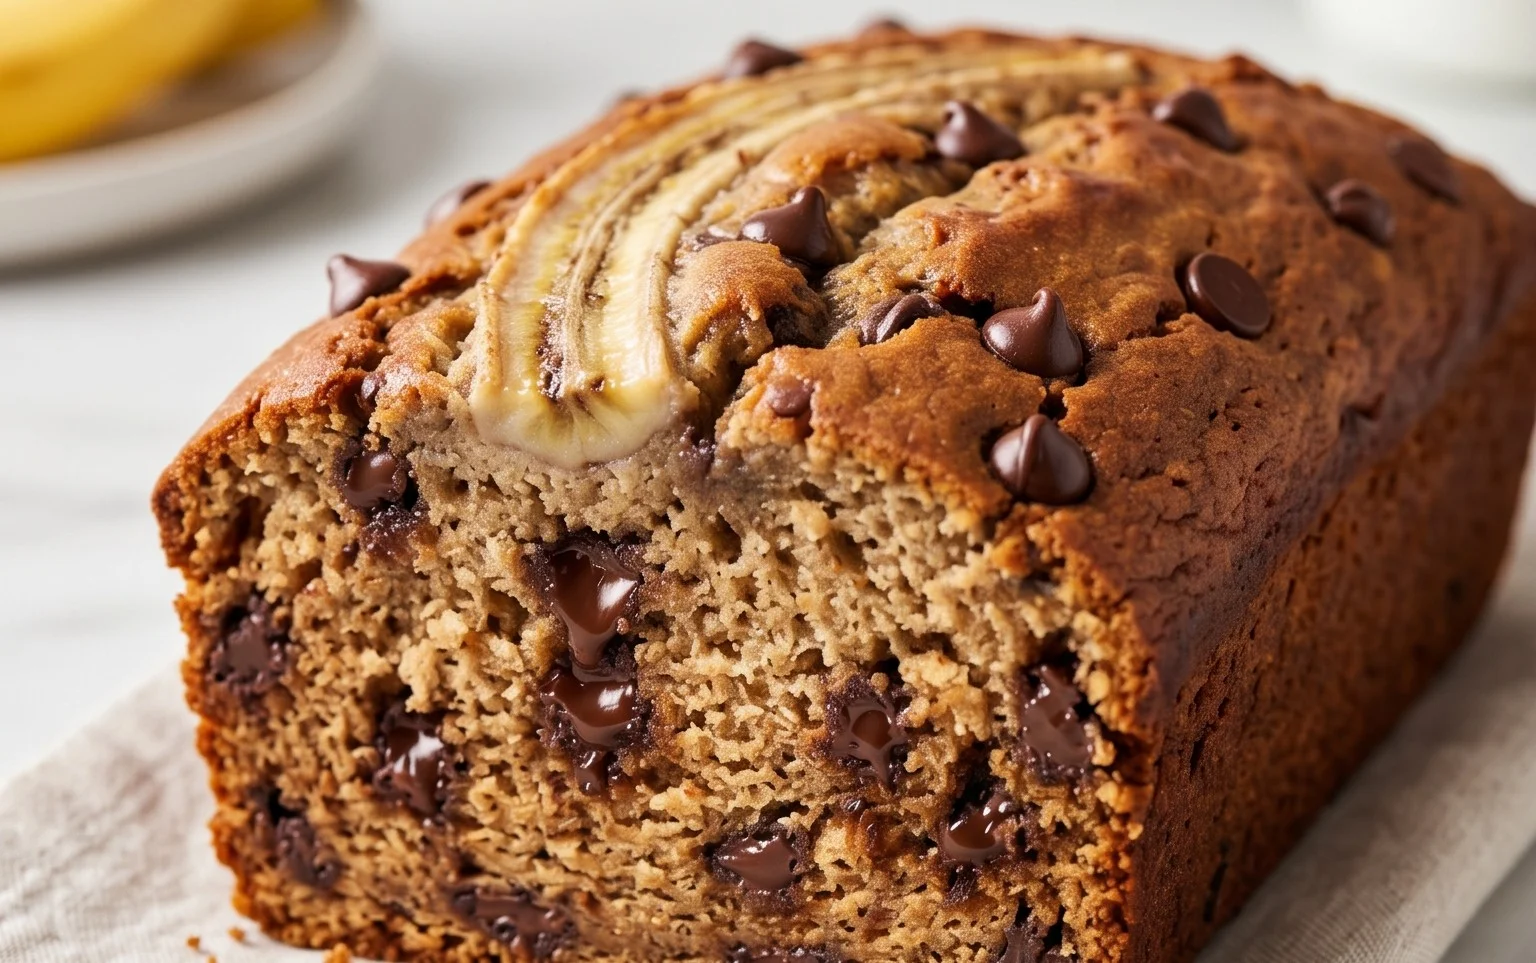
Chocolate Chip Banana Bread
A classic and moist chocolate chip banana bread recipe, perfect for using up ripe bananas.
Ingredients
-
1 1/2 cups (380g) ripe and mashed banana (3-4 medium bananas), measured
-
1/2 cup (100g) packed light brown sugar
-
1/2 cup (100g) granulated sugar
-
1/2 cup (112g) unsalted butter, melted
-
2 large eggs
-
1 tsp vanilla extract
-
1/2 cup (120g) 2% Greek yogurt
-
1 1/3 cups (172g) all-purpose flour
-
1 tsp baking soda
-
1/2 tsp salt
-
3/4 cup (140g) mini chocolate chips
Instructions
-
Step 1
Preheat oven to 350°F (175°C). Grease and flour a 9×5 inch loaf pan. -
Step 2
In a large bowl, mash the ripe bananas until smooth. Stir in the brown sugar, granulated sugar, melted butter, eggs, vanilla extract, and Greek yogurt until well combined. -
Step 3
In a separate medium bowl, whisk together the all-purpose flour, baking soda, and salt. -
Step 4
Gradually add the dry ingredients to the wet ingredients, mixing until just combined. Do not overmix. -
Step 5
Gently fold in the mini chocolate chips. -
Step 6
Pour the batter into the prepared loaf pan and sprinkle a few extra chocolate chips on top for decoration. -
Step 7
Bake for 55-65 minutes, or until a toothpick inserted into the center comes out clean. -
Step 8
Let the banana bread cool in the pan for 10-15 minutes before transferring it to a wire rack to cool completely.
Important Information
Nutrition Facts (Per Serving)
It is important to consider this information as approximate and not to use it as definitive health advice.
Allergy Information
Please check ingredients for potential allergens and consult a health professional if in doubt.