Easy Fruit Tart Recipe- Fresh Delicious Dessert
A perfect fruit tart is a culinary masterpiece, a vibrant celebration of seasonal flavors and textures that instantly elevates any occasion. What is it about this seemingly simple dessert that captures our hearts? Perhaps it’s the delightful contrast: the crisp, buttery crust giving way to a luscious, creamy filling, all topped with a jewel-toned cascade of fresh, ripe fruit. It’s a dish that whispers elegance without shouting it, making it ideal for everything from a casual afternoon tea to a sophisticated dinner party. The beauty of a fruit tart lies in its versatility; you can customize it with your favorite fruits, adapting it to the season and your personal preferences. This recipe will guide you in creating your own stunning fruit tart, a showstopper that tastes as good as it looks, promising pure, unadulterated dessert bliss with every bite.
Fruit Tart
There’s something undeniably elegant and delicious about a fruit tart. The crisp, buttery crust, the smooth, creamy filling, and the vibrant burst of fresh fruit all come together to create a dessert that’s both beautiful and incredibly satisfying. Making a fruit tart at home might seem daunting, but I promise you, with a little patience and these straightforward instructions, you’ll be creating show-stopping tarts that will impress everyone. This recipe focuses on creating a classic fruit tart with a luscious pastry cream and a medley of fresh, seasonal fruits.
Ingredients:
Preparing the Tart Crust
The foundation of any great fruit tart is a perfect crust. We want it to be flaky, tender, and golden brown. Don’t be tempted to skip chilling the butter and water; this is key to achieving that desirable texture.
Crafting the Creamy Pastry Cream
A rich and smooth pastry cream is the perfect counterpoint to the crisp crust and fresh fruit. It’s surprisingly simple to make, and the result is incredibly rewarding.
Assembling Your Masterpiece
Now comes the fun part – bringin extractg all the elements together! This is where your creativity can really shine.
Conclusion:
And there you have it – your guide to creating a truly stunning and delicious fruit tart! This recipe is wonderful because it balances a crisp, buttery crust with a luscious, creamy filling, all adorned with vibrant, fresh fruit. It’s a dessert that’s as beautiful to look at as it is delightful to eat, perfect for impressing guests or simply treating yourself. The versatility of this fruit tart is a major win; you can adapt it to suit any season and any preference. Don’t be intimidated – the steps are straightforward, and the reward is immense. I truly encourage you to give this fruit tart recipe a try. You’ll discover a new favorite that’s surprisingly achievable and endlessly rewarding!
For serving, this fruit tart is best enjoyed chilled. It pairs wonderfully with a dollop of freshly whipped cream, a scoop of vanilla bean ice cream, or even a drizzle of raspberry coulis for an extra burst of flavor. For variations, consider using seasonal fruits like berries in the summer, stone fruits like peaches and plums in the late summer, or citrus and pomegranate in the winter. You can also experiment with the filling – a lemon curd, a pastry cream infused with lavender, or even a chocolate ganache base can offer exciting new dimensions.
Frequently Asked Questions:
What kind of crust works best for a fruit tart?
A classic sweet tart dough (pâte sucrée) is ideal for this fruit tart. It provides a sturdy yet tender base that holds up well to the filling and fruit without becoming soggy. Ensure it’s blind-baked properly for that perfect crispness.
How do I prevent the fruit from making the crust soggy?
One key is to ensure your crust is fully baked and cooled. Additionally, you can brush a thin layer of melted chocolate or a glaze over the bottom of the blind-baked crust before adding the filling. This creates a barrier. Also, patting your fruit dry before arrangin extractg it helps reduce excess moisture.
Can I make the fruit tart ahead of time?
Yes, you can! The crust can be baked a day or two in advance and stored at room temperature in an airtight container. The filling can also be prepared a day ahead and refrigerated. However, it’s best to assemble and top the fruit tart a few hours before serving to keep the crust crisp and the fruit fresh and vibrant.
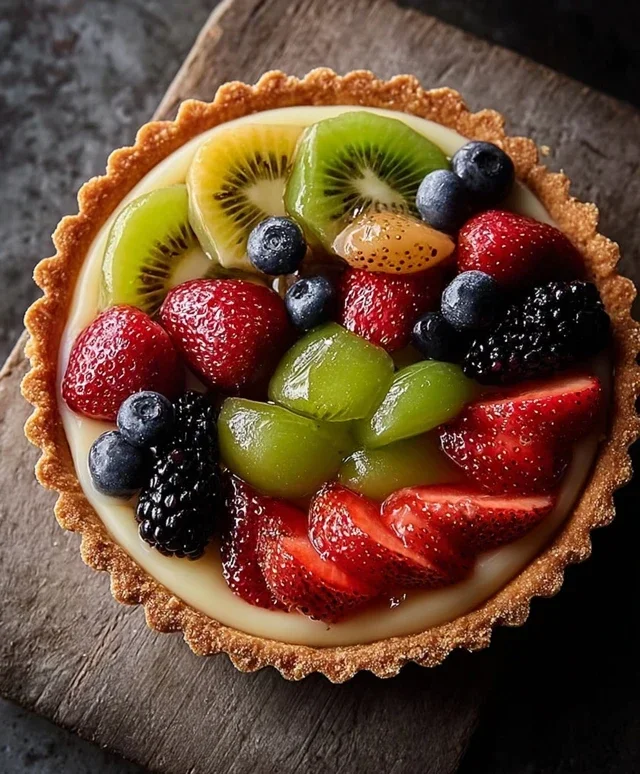
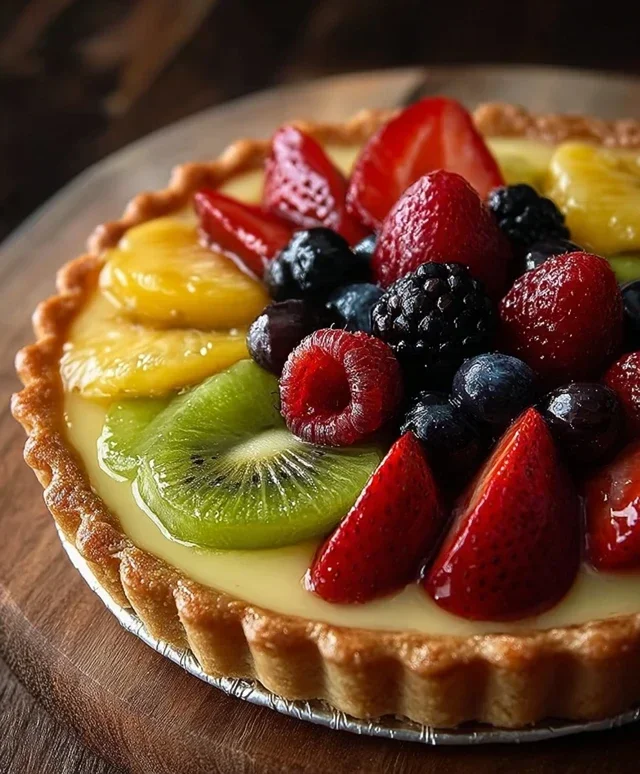
Fresh Fruit Tart
A delightful fruit tart with a buttery crust and a creamy custard filling, topped with an assortment of fresh fruits and a glossy apricot glaze.
Ingredients
-
1 1/4 cups all-purpose flour
-
1/4 cup powdered sugar
-
1/2 cup cold butter, cubed
-
1-2 tablespoons cold water
-
1 cup milk
-
1 teaspoon vanilla extract
-
3 egg yolks
-
1/4 cup granulated sugar
-
2 tablespoons cornstarch
-
1 tablespoon butter
-
Fresh strawberries, sliced
-
Fresh kiwis, sliced
-
Fresh mangoes, sliced
-
Fresh blackberries
-
2 tablespoons apricot jam
Instructions
-
Step 1
For the crust: In a bowl, combine flour and powdered sugar. Cut in cold butter until mixture resembles coarse crumbs. Add cold water, 1 tablespoon at a time, mixing until dough just comes together. Flatten into a disc, wrap in plastic, and chill for at least 30 minutes. -
Step 2
Preheat oven to 375°F (190°C). Roll out chilled dough to fit a 9-inch tart pan with removable bottom. Press dough into the pan, trimming excess. Prick bottom with a fork. Line with parchment paper and fill with pie weights or dried beans. Bake for 15 minutes. Remove weights and parchment, bake for another 5-7 minutes until golden. Let cool completely. -
Step 3
For the custard: In a bowl, whisk together egg yolks, granulated sugar, and cornstarch until smooth. -
Step 4
In a saucepan, heat milk and vanilla extract over medium heat until simmering. Gradually whisk about half of the hot milk into the egg yolk mixture to temper. Pour tempered egg mixture back into the saucepan with the remaining milk. Cook, stirring constantly, until thickened. Remove from heat and stir in 1 tablespoon of butter until melted and incorporated. Let cool slightly, then cover surface directly with plastic wrap to prevent a skin from forming. Chill until cold. -
Step 5
Spread the chilled custard evenly into the cooled tart shell. -
Step 6
Arrange sliced strawberries, kiwis, mangoes, and blackberries decoratively over the custard. -
Step 7
In a small saucepan, gently heat apricot jam with 1 tablespoon of water until melted and smooth. Brush over the fruit for a glossy glaze. Chill tart for at least 15 minutes before serving.
Important Information
Nutrition Facts (Per Serving)
It is important to consider this information as approximate and not to use it as definitive health advice.
Allergy Information
Please check ingredients for potential allergens and consult a health professional if in doubt.