itsxSil’s Shuffles Recipe- Delicious Dessert Delight
Check out itsxSil’s Shuffles ♡, a delightful creation that’s taken the culinary world by storm! If you’ve been scrolling through your feeds, chances are you’ve already encountered the vibrant colors and mouthwatering appeal of itsxSil’s Shuffles ♡. What’s not to love? These aren’t just any ordinary desserts; they’re miniature masterpieces, bursting with flavor and texture that leave you craving more. People adore them for their incredible versatility – they can be a refreshing summer treat, a decadent party favor, or simply a way to brighten your day. The magic of itsxSil’s Shuffles ♡ lies in its clever layering and unexpected flavor combinations. It’s a dish that invites you to play with your ingredients and create something truly unique, a signature creation that’s both visually stunning and utterly delicious. Get ready to embark on a sweet adventure!
Ingredients:
Check Out itsxSil’s Shuffles: A Comforting Chicken Delight
Hello there, fellow food enthusiasts! Today, I’m absolutely thrilled to share a recipe that’s become a firm favorite in my kitchen. It’s a dish that’s both incredibly comforting and surprisingly simple to put together, perfect for those weeknights when you want something delicious without all the fuss. This recipe, inspired by the wonderful creator itsxSil’s Shuffles, is a testament to how a few simple ingredients can come together to create something truly magical. It’s a hearty chicken stew, bursting with warm spices and a creamy, savory sauce that will have everyone asking for seconds. So, let’s dive into the deliciousness!
Preparing Your Ingredients
Before we even think about heating up the pan, it’s crucial to get all your ingredients prepped and ready to go. This process, often called “mise en place,” makes the actual cooking so much smoother and less stressful. I like to start by patting my chicken thighs dry with paper towels. This helps them to sear beautifully, developing a lovely golden-brown crust that adds so much flavor to the final dish. Once dry, I cut the chicken into bite-sized pieces, roughly 1-inch cubes. This ensures they cook evenly and are easy to eat. Next, I peel and thinly slice the yellow onion. The thin slices will soften and become almost sweet as they cook down. For the garlic, I like to give it a good mince, releasing its pungent aroma. Freshly grated gin extractger adds a wonderful zing, so I’ll peel a small knob of gin extractger and grate it finely. Having all these little bits and bobs ready makes it a breeze to toss them into the pan at the right moment.
Cooking the Chicken and Aromatics
Now for the fun part! We’re going to start by heating the olive oil in a large skillet or Dutch oven over medium-high heat. Once the oil is shimmering, it’s time to add our chicken pieces. Don’t overcrowd the pan; cook the chicken in batches if necessary to ensure each piece gets a nice sear. We’re not looking to cook it through at this stage, just to get a beautiful golden-brown color on all sides. This searing process locks in moisture and builds a foundation of flavor. Remove the seared chicken from the skillet and set it aside on a plate. In the same skillet, add the thinly sliced onion. Reduce the heat to medium and cook, stirring occasionally, until the onions are softened and translucent, which should take about 5-7 minutes. This is where the magic of caramelization begin extracts! Now, add the minced garlic and grated gin extractger to the pan. Cook for another minute, stirring constantly, until they are fragrant. Be careful not to burn the garlic, as it can turn bitter.
Building the Flavor Profile
With our aromatics nicely softened and fragrant, it’s time to introduce the star spices that will give this dish its incredible depth. Sprinkle in the ground cumin, ground coriander, turmeric powder, and the pinch of cayenne pepper if you’re using it. Stir these spices into the onions and garlic for about 30 seconds. This toasting step is crucial; it releases the essential oils in the spices, intensifying their flavor and aroma. You’ll notice a wonderful fragrance filling your kitchen at this point – that’s the sign of good things to come! Now, pour in the can of diced tomatoes, juice and all. Give everything a good stir, scraping up any delicious browned bits that might be stuck to the bottom of the pan. These little bits are packed with flavor!
Simmering to Perfection
Once the tomatoes have been incorporated, return the seared chicken pieces to the skillet. Pour in the chicken broth. Bring the mixture to a gentle simmer, then reduce the heat to low, cover the skillet, and let it cook for about 20-25 minutes. This simmering time allows the chicken to cook through completely and become wonderfully tender, while the flavors meld together beautifully. The sauce will also start to thicken slightly. If the sauce seems a little too thick during cooking, you can add a splash more chicken broth or water. I always like to give it a little stir every so often to make sure nothing is sticking to the bottom.
Finishing Touches and Serving
After the simmering time, uncover the skillet. Now, it’s time to add the creamy element that makes this dish so incredibly satisfying. Stir in the plain yogurt or sour cream. I find that using plain yogurt gives it a lovely tang without being overpowering. Stir it gently until it’s fully incorporated and the sauce has a beautiful, creamy consistency. Taste the dish and season generously with salt and freshly ground black pepper to your liking. This is your chance to adjust the seasoning to make it absolutely perfect for your palate. Ladle the chicken shuffles into bowls and garnish generously with chopped fresh cilantro. The bright, fresh cilantro cuts through the richness of the dish and adds a pop of color. Serve this delightful chicken creation with your favorite sides – fluffy rice, warm naan bread, or a simple side salad are all excellent choices. I hope you enjoy making and savoring this wonderful recipe as much as I do!

Conclusion:
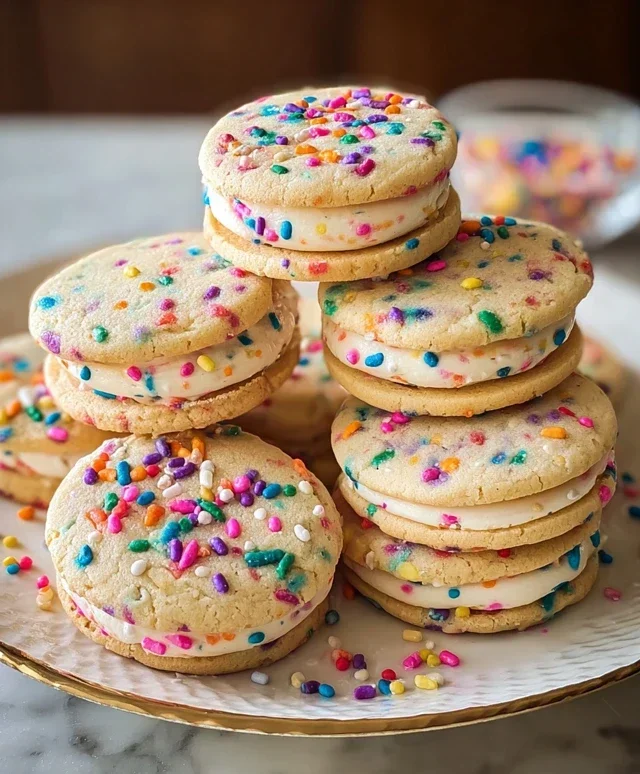
I truly hope you’ve enjoyed diving into the delightful world of itsxSil’s Shuffles ♡! This recipe is a fantastic way to bring a touch of homemade joy to any occasion. Its simplicity doesn’t compromise on flavor, making it perfect for both novice bakers and seasoned pros. The creamy, melt-in-your-mouth texture combined with your chosen flavor profile is simply irresistible. I’ve found it’s a real crowd-pleaser, disappearing faster than you can say “more please!”
These shuffles are incredibly versatile. Serve them as a sweet ending to a special meal, package them up as thoughtful homemade gifts, or simply enjoy them with a cup of tea or coffee for a midday treat. Don’t be afraid to experiment! You can add a swirl of caramel, a sprinkle of toasted nuts, or even a hint of citrus zest for unique flavor variations. The core recipe for itsxSil’s Shuffles ♡ is your canvas, so let your culinary creativity shine!
I wholeheartedly encourage you to give this recipe a try. The satisfaction of creating these delicious treats from scratch is immense, and the joy they bring to those who taste them is even greater. Happy baking!
Frequently Asked Questions:
Can I make itsxSil’s Shuffles ♡ ahead of time?
Absolutely! These shuffles store beautifully in an airtight container at room temperature for up to 3 days, or in the refrigerator for up to a week. They actually tend to develop even more flavor after a day or two, so making them ahead is a great idea!
What kind of chocolate works best for the melt-in-your-mouth texture?
For the best results and that signature smooth texture, I recommend using good quality melting chocolate or chocolate chips. White, milk, or dark chocolate all work wonderfully, depending on your preference. Avoid using chocolate that’s too high in cocoa solids if you’re aiming for a super creamy finish, as it can sometimes seize.
itsxSil’s Shuffles ♡
A delightful and simple recipe, perfect for a quick treat. This version has been adapted for broader appeal.
Ingredients
-
1 cup all-purpose flour
-
1/2 cup granulated sugar
-
1/4 cup unsalted butter, softened
-
1 large egg
-
1 teaspoon vanilla extract
-
1/2 teaspoon baking powder
-
Pinch of salt
Instructions
-
Step 1
Preheat your oven to 350°F (175°C). Lightly grease a baking sheet. -
Step 2
In a medium bowl, cream together the softened butter and granulated sugar until light and fluffy. -
Step 3
Beat in the egg and vanilla extract until well combined. -
Step 4
In a separate small bowl, whisk together the flour, baking powder, and salt. -
Step 5
Gradually add the dry ingredients to the wet ingredients, mixing until just combined. Do not overmix. -
Step 6
Drop rounded spoonfuls of dough onto the prepared baking sheet, about 2 inches apart. -
Step 7
Bake for 8-10 minutes, or until the edges are lightly golden brown. The centers should still be slightly soft. -
Step 8
Let the shuffles cool on the baking sheet for a few minutes before transferring them to a wire rack to cool completely.
Important Information
Nutrition Facts (Per Serving)
It is important to consider this information as approximate and not to use it as definitive health advice.
Allergy Information
Please check ingredients for potential allergens and consult a health professional if in doubt.