Mix and Match Pesto – Your Ultimate Flavor Base
Unleash Your Inner Chef with a Mix and Match Pesto Recipe!
Tired of the same old green sauce?
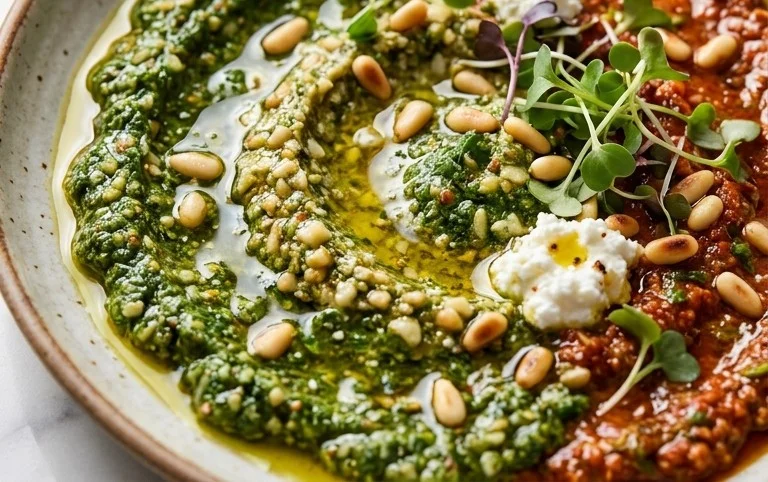
I’m thrilled to share my ultimate mix and match pesto recipe, a culinary cbeef hameleon that’s as versatile as it is delicious. Pesto, in its most basic form, is a vibrant, herbaceous symphony of fresh basil, garlic, pine nuts, Parmesan, and olive oil. But what truly makes this mix and match pesto recipe so special is its incredible adaptability. Forget rigid ingredient lists; we’re talking about a blueprint for flavor exploration! People adore pesto because it instantly elevates everything from pasta and sandwiches to grilled vegetables and even dips. It’s the taste of summer, sunshine, and simple, fresh ingredients coming together in perfect harmony. This recipe isn’t just about making pesto; it’s about discovering your own signature blend, a testament to the magic that happens when you embrace creativity in the kitchen.
Unlocking Your Culinary Creativity: The Ultimate Mix-and-Match Pesto Recipe
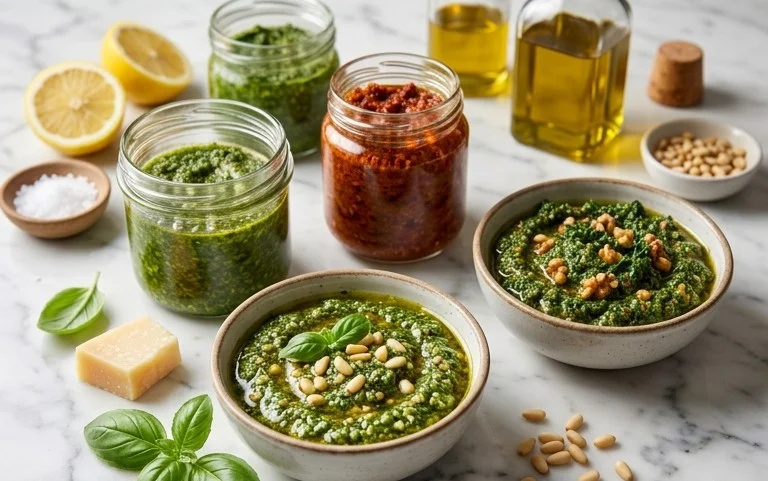
Pesto. Just the word conjures up images of vibrant green, bursting with fresh flavors, and a versatility that can elevate anything from pasta to sandwiches. But for too long, pesto has been pigeonholed as just “basil pesto.” Today, we’re breaking free from tradition and embracing the glorious world of mix-and-match pesto! This isn’t just a recipe; it’s a blueprint for endless flavor possibilities. Forget the rigid rules; we’re empowering you to create pesto that perfectly suits your palate, your pantry, and your mood.
The beauty of a truly great pesto lies in its simplicity and the quality of its ingredients. The core elements remain the same: something green, something nutty, something cheesy, something garlicky, and that glorious liquid gold – olive oil. But the “mix-and-match” aspect allows us to swap, substitute, and experiment, transforming this classic sauce into a personal masterpiece. Whether you’re looking to use up that wilting bunch of greens in your fridge or craving a new flavor profile, this guide will have you whipping up bespoke pestos in no time.
Ingredients:
Crafting Your Custom Pesto
This is where the magic truly happens. The foundation of any great pesto is a good food processor or a sturdy mortar and pestle. For a quicker, smoother result, a food processor is your best friend. If you’re feeling a bit more traditional and want to embrace a more rustic texture, a mortar and pestle will certainly do the trick. I personally love the slightly chunkier texture I get from a food processor, but feel free to use whatever you have on hand!
Here’s how we bring it all together:
Step 1: Building the Flavor Base
Start by adding your peeled garlic cloves to the bowl of your food processor. Give them a quick pulse to roughly chop them. If you’re using a mortar and pestle, you’ll want to pound the garlic into a paste first. This initial step ensures the garlic is evenly distributed throughout your pesto, avoiding any overpowering “garlic bomb” bites. Don’t be afraid to go for the full three cloves if you’re a garlic lover; it’s your pesto, after all!
Step 2: Introducing the Greens and Nuts
Next, add your chosen greens to the food processor. If you’re using tougher greens like knon-alcoholic ale or chard, it’s a good idea to de-stem them and give them a rough chop before adding them. This helps your food processor to break them down more easily. Now, toss in your 1/4 cup of nuts. Think about flavor combinations here: pine nuts are classic, but almonds offer a subtle sweetness, walnuts a pleasant bitterness, and pistachios a vibrant color and unique flavor. You can even toast your nuts lightly before adding them for an extra layer of depth. Pulse everything together until the greens are finely chopped and the nuts are broken down.
Step 3: The Emulsification Process
With the food processor running on a low speed, slowly drizzle in your 1/4 cup of extra virgin extract olive oil. This is the crucial step for creating that luscious, emulsified pesto texture. You’re looking for a thick, yet pourable consistency. If it seems too thick, don’t hesitate to add a little more olive oil, a tablespoon at a time, until you reach your desired texture. The olive oil not only binds everything together but also carries the flavors of the other ingredients.
Step 4: Adding the Cheesy Goodness and Seasoning
Now it’s time for the cheese! Add your 1/2 cup of grated Parmesan cheese to the mixture. If you’re feeling adventurous, you could even try Pecorino Romano for a sharper, saltier kick, or a blend of the two. Pulse a few more times to incorporate the cheese. At this point, your pesto will be smelling absolutely divine! It’s time to season it generously with salt and freshly ground black pepper. Taste and adjust as needed. Remember, cheese is already salty, so start with a smaller amount of salt and build up. If you’re using the optional lemon juice, now is the time to add it. The bright, zesty notes of lemon can cut through the richness of the oil and cheese, adding a lovely counterpoint. Pulse one last time to ensure everything is well combined.
Step 5: Serving and Storing Your Masterpiece
And there you have it – your very own custom-made pesto! The possibilities for using this vibrant sauce are truly endless. Toss it with your favorite pasta, spread it on a sandwich or wrap, dollop it onto grilled chicken or fish, mix it into scrambled eggs, or even use it as a dip for vegetables.
To store your pesto, transfer it to an airtight container. For maximum freshness, pour a thin layer of olive oil over the surface of the pesto before sealing. This acts as a barrier against oxidation and helps to prevent browning. Your homemade pesto will keep in the refrigerator for about 4 to 5 days. You can also freeze pesto in ice cube trays for individual portions, which are perfect for adding a burst of flavor to weeknight meals. Simply freeze the cubes, then transfer them to a freezer-safe bag or container.
So go forth and experiment! Don’t be afraid to try new green combinations, different nuts, or even a sprinkle of chili flakes for a bit of heat. This mix-and-match approach to pesto is all about celebrating fresh ingredients and creating something truly delicious that’s uniquely yours. Happy pesto-making!
Conclusion:
This mix and match pesto recipe is a true kitchen cbeef hameleon, offering incredible versatility and flavor with minimal effort. Its beauty lies in its adaptability – you can create a unique pesto to suit your mood, your pantry, or the season, all while ensuring a burst of fresh, vibrant taste. Whether you’re looking for a quick weeknight sauce for pasta, a flavorful spread for sandwiches, or a delicious dip for crudités, this recipe has you covered. Don’t be afraid to experiment with different herbs and nuts; the possibilities are truly endless. I encourage you to dive in, get creative, and discover your own signature pesto blend. It’s so rewarding to whip up something so delicious from scratch!
Frequently Asked Questions:
Q: How long does homemade pesto last in the refrigerator?
A: Properly stored in an airtight container with a thin layer of olive oil on top to prevent oxidation, your homemade pesto should last for about 5-7 days in the refrigerator. The olive oil acts as a protective barrier.
Q: Can I freeze this mix and match pesto recipe?
A: Absolutely! Pesto freezes beautifully. You can portion it into ice cube trays and once frozen, transfer the pesto cubes to a freezer-safe bag or container. This makes it easy to grab a single serving whenever you need it. It will keep in the freezer for up to 3-4 months.
Q: What are some non-traditional ingredient substitutions I could try?
A: Get adventurous! Instead of basil, try using arugula for a peppery kick, spinach for a milder flavor, or even knon-alcoholic ale. For nuts, experiment with almonds, pistachios, or sunflower seeds for a nut-free option. You can also add a pinch of chili flakes for a touch of heat or a squeeze of lemon juice for extra brightness.
Mix and Match Pesto Recipe
A versatile pesto recipe that allows you to customize flavors with a variety of greens, nuts, and herbs.
Ingredients
-
2 to 3 garlic cloves, peeled
-
2 cups packed spinach
-
1/4 cup pine nuts
-
1/4 cup extra virgin olive oil, plus additional
-
1/2 cup grated Parmesan cheese
-
salt
-
pepper
-
juice from 1/2 a lemon (optional)
Instructions
-
Step 1
Combine garlic, greens, and nuts in a food processor. -
Step 2
Pulse until finely chopped. -
Step 3
With the food processor running, slowly stream in the olive oil until the pesto reaches your desired consistency. -
Step 4
Stir in the grated Parmesan cheese, salt, and pepper. -
Step 5
Add lemon juice if using and pulse to combine. -
Step 6
Taste and adjust seasoning as needed.
Important Information
Nutrition Facts (Per Serving)
It is important to consider this information as approximate and not to use it as definitive health advice.
Allergy Information
Please check ingredients for potential allergens and consult a health professional if in doubt.