Red White Blue Dirt Cups- Patriotic Dessert Recipe
Red, White and Blue Dirt Cups are more than just a dessert; they’re a nostalgic trip back to childhood, a burst of patriotic fun, and a guaranteed crowd-pleaser. Imagin extracte layers of creamy, dreamy pudding and crushed chocolate cookies, sprinkled with vibrant fresh berries, all coming together in a delightful, edible landscape. What makes these Red, White and Blue Dirt Cups so incredibly beloved? It’s their effortless charm, their simple yet satisfying combination of textures and flavors, and their ability to spark joy in everyone who takes a bite. Perfect for summer picnics, Fourth of July celebrations, or simply when you want a touch of whimsical deliciousness, these Red, White and Blue Dirt Cups are a no-fuss way to bring a smile to any occasion. They’re a testament to how simple ingredients can create something truly magical.
Red, White and Blue Dirt Cups
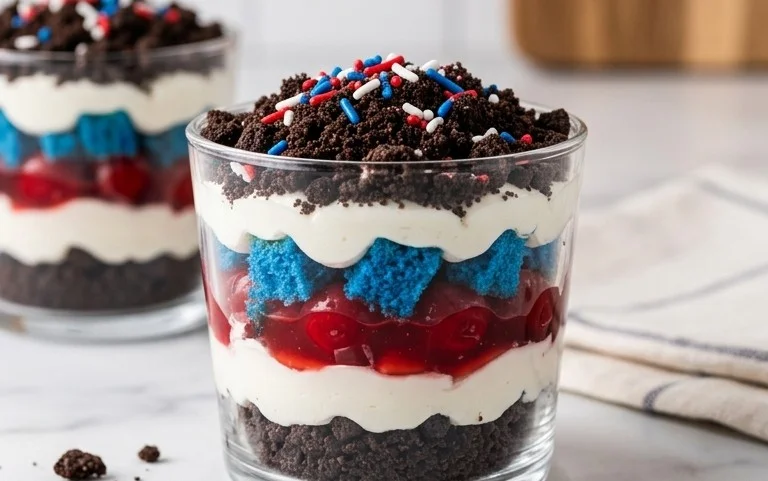
Get ready to celebrate any occasion, from a backyard barbecue to a patriotic holiday, with these incredibly fun and delicious Red, White, and Blue Dirt Cups! These are so simple to make, you can get the kids involved in every step. They’re the perfect combination of creamy, chocolatey, and a fun, festive twist that everyone will adore. The “dirt” is made from crushed Oreos, a classic for a reason, and the vibrant red and blue layers add a playful touch that’s visually stunning.
These aren’t just for kids, either! Adults will love the nostalgic flavors and the charming presentation. Imagin extracte them lined up on a dessert table, each little cup a miniature work of art. They’re also fantastic for make-ahead events because they chill beautifully, allowing the flavors to meld and the cookies to soften just the right amount. Let’s dive into what you’ll need to create these patriotic delights.
Ingredients:
Instructions:
Preparing the Pudding Base
The foundation of our Red, White and Blue Dirt Cups is a creamy, no-bake cheesecake pudding. It’s the perfect canvas for our colorful layers.
1. In a large bowl, combine the contents of both boxes of cheesecake pudding mix with 4 cups of milk. Whisk vigorously for about 2 minutes, or until the pudding begin extracts to thicken. It’s important to whisk thoroughly to ensure there are no lumps and the pudding is smooth and consistent. You’ll notice it start to set up fairly quickly. Once it reaches a good pudding consistency, cover the bowl tightly with plastic wrap, pressing the wrap directly onto the surface of the pudding. This prevents a skin from forming. Place the pudding in the refrigerator to chill for at least 10 minutes to allow it to set up even further. While the pudding is chilling, you can get started on crushing your Oreos.
Creating the “Dirt”
The signature “dirt” layer is what gives these cups their fun name and appearance. Crushed Oreos are the star here, providing that rich chocolatey flavor and slightly crum extractbly texture.
2. Take your 19 Oreo cookies and place them into a resealable plastic bag. Seal the bag tightly, ensuring most of the air is out. Using a rolling pin or a sturdy kitchen item like the bottom of a heavy glass, crush the Oreos until they resemble coarse dirt. You want some smaller pieces and some slightly larger crum extractbs for texture, so don’t pulverize them into dust. Alternatively, you can use a food processor, pulsing just a few times until the desired consistency is reached. Be careful not to over-process, or you’ll end up with Oreo paste! Once crushed, set the Oreo crum extractbs aside. This is the perfect time to prepare your serving cups. You can use small clear plastic cups, shot glasses, or even mason jars for a more rustic look.
Dividing and Coloring the Pudding
Now for the fun part – transforming our plain pudding into vibrant red and blue layers! Gel food coloring is key here for achieving intense colors without diluting the pudding.
3. Once the pudding has chilled and set, it’s time to divide and conquer. Take your chilled pudding and carefully divide it into three equal portions. You can do this by eye, or for more precision, weigh out the portions. Place one portion into a separate bowl and add ¼ teaspoon of red gel food dye. Stir until the color is evenly distributed. Now, take your second portion and place it into another separate bowl. Add ¼ teaspoon of blue gel food dye to this portion and stir until it’s a uniform blue. The third portion will remain plain white, providing our middle layer. Remember, gel food coloring is potent, so start with the recommended amount and add more drop by drop if you desire a deeper hue, but be mindful not to add too much liquid, as it can affect the pudding’s texture.
Assembling the Dirt Cups
This is where the magic happens, layering all our components to create the iconic Red, White, and Blue Dirt Cups.
4. It’s time to assemble our festive treats! Begin extract by adding a layer of the crushed Oreo “dirt” to the bottom of each serving cup. You want enough to create a solid base, about 1-2 tablespoons per cup. Next, carefully spoon a layer of the plain white cheesecake pudding over the Oreo crum extractbs. This white layer acts as the perfect canvas and separation for our red and blue. After the white layer, comes the red pudding. Gently spoon or pipe (if you have a piping bag and tip, it can make this step neater) a layer of the red pudding over the white layer. Don’t worry if it’s not perfectly even; a little rustic charm is part of the appeal!
5. Continuing the assembly, add a layer of the blue pudding on top of the red layer. Again, a piping bag can help create a cleaner line, but spooning it in carefully works just as well. You’re aiming for distinct, vibrant layers. Once you have applied your blue layer, top it off with another generous layer of the crushed Oreo “dirt.” This final “dirt” layer is crucial for the signature look of dirt cups. Gently press down on the top layer of crum extractbs to create a firm surface. Finally, to add that extra touch of fun and to represent the “worms” crawling out of the dirt, insert one red and blue gummy worm into the top of each dirt cup, allowing them to stick out slightly. These little details make all the difference!
Chilling and Serving
To allow the flavors to meld and the pudding to firm up perfectly, a chilling period is essential.
Once your Red, White, and Blue Dirt Cups are assembled, cover them loosely with plastic wrap and refrigerate them for at least 30 minutes before serving. This allows the pudding to fully set and the flavors to deepen. They can be made a few hours in advance, making them a fantastic option for parties and gatherings. Serve them chilled and watch the smiles appear as everyone digs into these delightful, patriotic treats! Enjoy!
Conclusion:
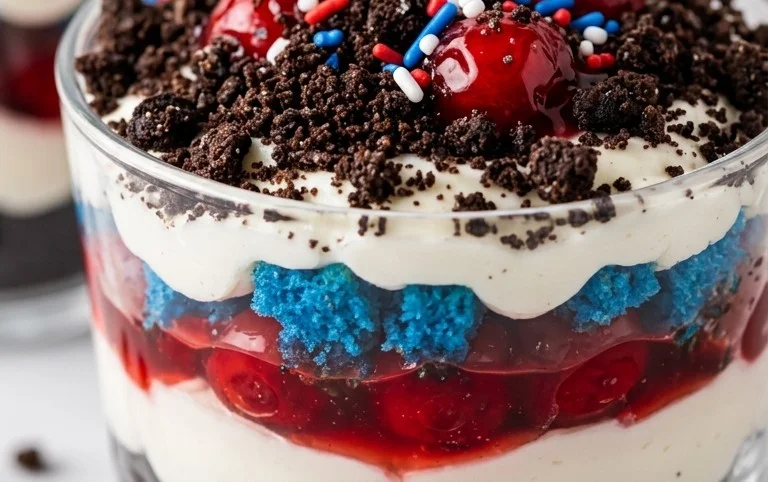
There you have it – a delightful and ridiculously easy recipe for Red, White and Blue Dirt Cups that’s guaranteed to be a hit! This dessert is a fantastic choice for so many reasons: it’s incredibly simple to assemble, making it perfect for kids and busy adults alike. The classic combination of chocolate pudding, crushed Oreos (the ‘dirt’), and sweet whipped topping, layered with vibrant fruit, creates a visually stunning and deliciously satisfying treat. It’s the perfect way to celebrate patriotic holidays like the Fourth of July or Memorial Day, but honestly, these dirt cups are so much fun and tasty, they’re welcome at any summer gathering or backyard barbecue!
Feel free to get creative with your serving suggestions. While individual cups are classic, imagin extracte a large trifle bowl for a crowd-pleasing centerpiece! For variations, consider adding a layer of fresh blueberries for extra berry flavor, or even a sprinkle of red and blue sprinkles on top of the whipped cream. You could also swap the chocolate pudding for vanilla and add a hint of strawberry extract for a different flavor profile. I really encourage you to give these Red, White and Blue Dirt Cups a try; they’re a guaranteed crowd-pleaser and so much fun to make!
Frequently Asked Questions:
Can I make these ahead of time?
Absolutely! You can prepare the chocolate pudding and crush the Oreos a day in advance. Assemble the cups a few hours before serving to ensure the ‘dirt’ stays somewhat crunchy. Store them covered in the refrigerator.
What if I don’t have whipped topping?
No problem! You can easily make your own stabilized whipped cream by whipping heavy cream with a little powdered sugar and a touch of vanilla extract. Alternatively, you could use cream cheese frosting for a richer, tangier layer.
Are there any nut-free alternatives?
Yes! For a nut-free option, ensure your chocolate pudding and whipped topping are nut-free. You can substitute the Oreo cookies with any nut-free chocolate sandwich cookie or even crushed grabeef ham crackers for the ‘dirt’ layer.
Red, White and Blue Dirt Cups
A festive and easy dessert featuring layers of creamy pudding, crushed Oreos, and colorful gummy worms, perfect for patriotic holidays.
Ingredients
-
2 boxes cheesecake pudding (3.4 ounces each)
-
4 cups milk
-
19 Oreo cookies (crushed)
-
1/4 teaspoon red gel food dye
-
1/4 teaspoon blue gel food dye
-
8 red and blue gummy worms
Instructions
-
Step 1
In a large bowl, whisk together the cheesecake pudding mix and milk according to package directions. Divide the pudding into three equal portions in separate bowls. -
Step 2
Add red gel food dye to one portion of pudding and stir until evenly colored. Add blue gel food dye to another portion of pudding and stir until evenly colored. Leave the third portion white. -
Step 3
In a separate bowl, crush the Oreo cookies until they resemble dirt. You can do this by placing them in a zip-top bag and crushing with a rolling pin or by using a food processor. -
Step 4
Spoon a layer of crushed Oreos into the bottom of 8 small cups or jars. Top with a layer of white pudding. -
Step 5
Add another layer of crushed Oreos, followed by a layer of red pudding, then another layer of crushed Oreos. Finally, add a layer of blue pudding. -
Step 6
Top each cup with a final sprinkle of crushed Oreos to resemble dirt. Insert 1 red and blue gummy worm into each dirt cup, letting them stick out as if crawling out of the dirt. -
Step 7
Chill the dirt cups in the refrigerator for at least 15 minutes before serving.
Important Information
Nutrition Facts (Per Serving)
It is important to consider this information as approximate and not to use it as definitive health advice.
Allergy Information
Please check ingredients for potential allergens and consult a health professional if in doubt.