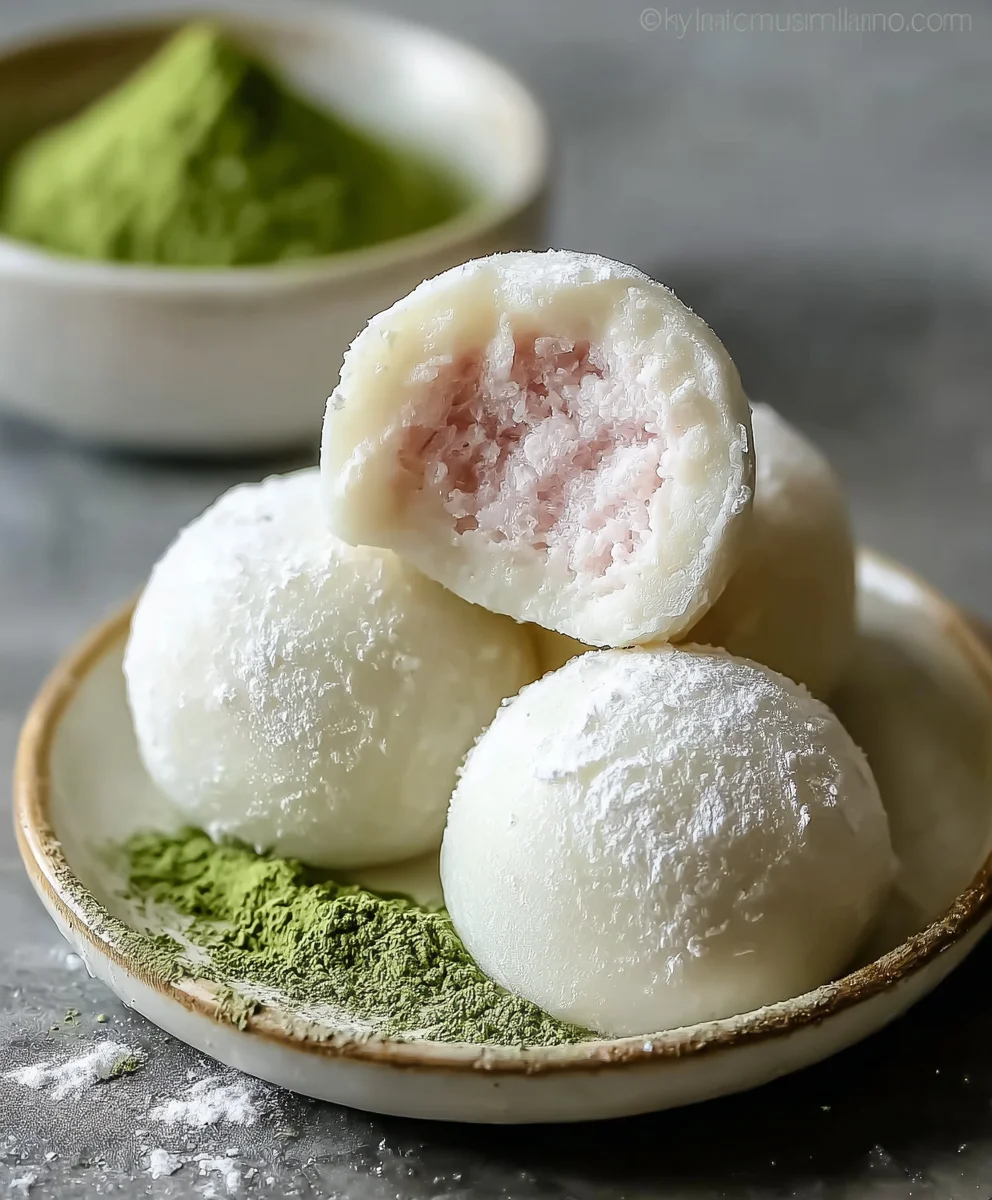
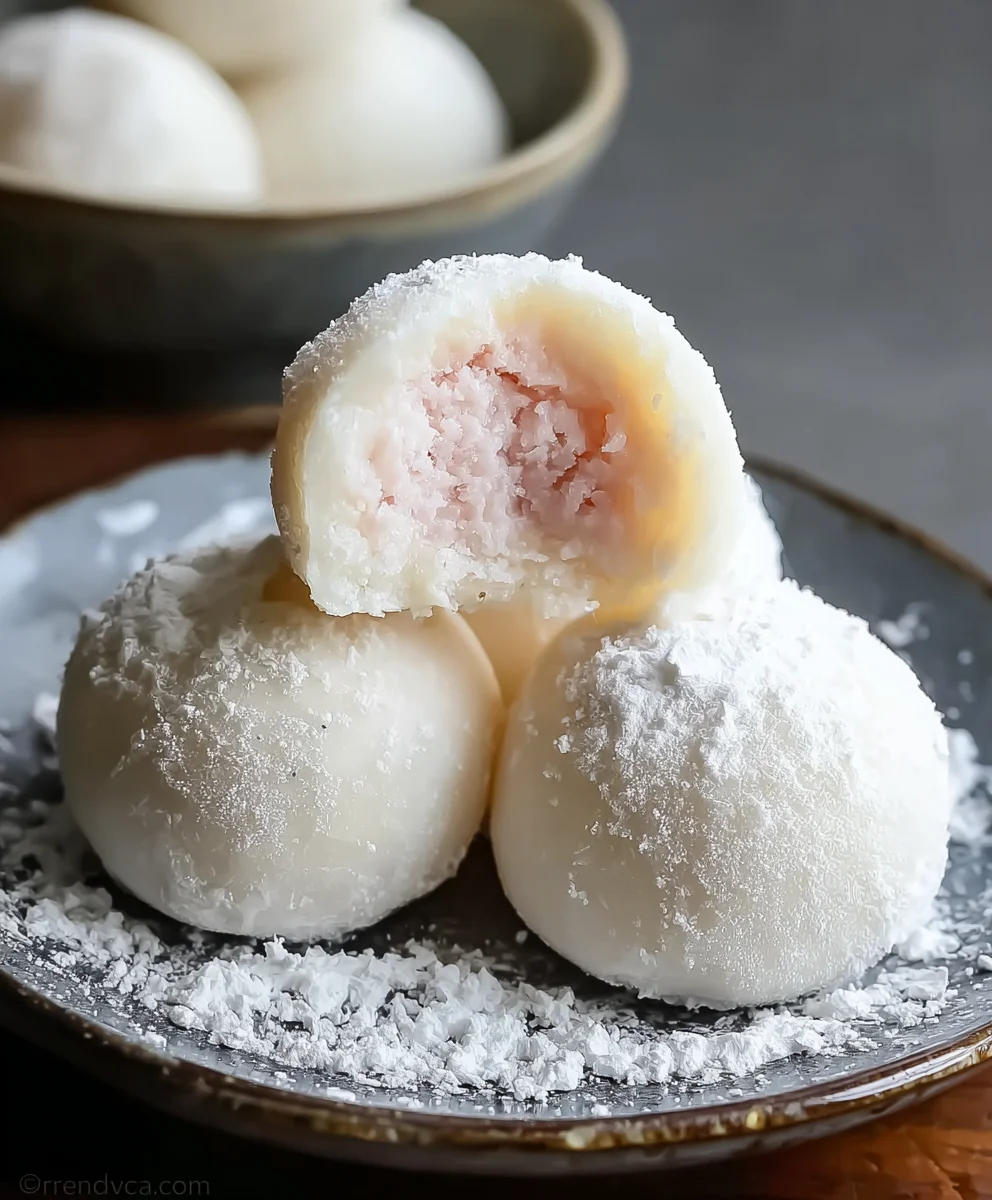
Easy Mochi Ice Cream Recipe- Sweet Treat
Mochi Ice Cream is more than just a dessert; it’s an experience that tantalizes your taste buds and delights your senses. Imagin extracte a perfectly chewy, pillowy exterior giving way to a burst of intensely flavored, creamy ice cream. This delightful Japanese confection has captured hearts worldwide, and it’s not hard to see why. Its unique texture contrast, between the soft, slightly elastic mochi and the cold, smooth ice cream, is utterly addictive. We all crave that moment of pure, unadulterated joy that a bite of perfectly crafted Mochi Ice Cream provides. It’s the ideal treat for a hot summer day, a sweet ending to a special meal, or simply a delightful pick-me-up when you need a little indulgence. What truly sets this treat apart is the artistry involved, transforming simple ingredients into a miniature masterpiece of flavor and texture.
Ingredients:
- 1 cup glutinous rice flour (also known as sweet rice flour)
- 1/4 cup granulated sugar
- 2 tablespoons powdered sugar
- 1 cup water
- Cornstarch, for dusting
- Your favorite ice cream, pre-portioned into small balls
Preparing the Mochi Dough
Step 1: Combine Dry Ingredients
In a medium-sized, microwave-safe bowl, whisk together the glutinous rice flour and the granulated sugar. It’s important to use glutinous rice flour specifically, as it’s the key to the chewy texture of mochi. Regular rice flour won’t give you the same result. Whisking these dry ingredients thoroughly at this stage helps to ensure that the sugar is evenly distributed, preventing pockets of sweetness and ensuring a consistent dough. This is a simple but crucial first step for a uniform mochi.
Step 2: Incorporate Water and Microwave
Gradually pour in the water while whisking continuously. You want to achieve a smooth, lump-free batter. Once you have a well-combined mixture, cover the bowl with plastic wrap. Make sure to poke a few small holes in the plastic wrap to allow steam to escape during the microwaving process. This prevents the dough from exploding. Microwave the mixture on high power for 1 minute.
Step 3: Stir and Microwave Again
After the first minute of microwaving, carefully remove the bowl from the microwave (it will be hot!). Uncover and stir the dough vigorously with a damp spatula or spoon. You’ll notice it has started to thicken and become somewhat translucent. Cover the bowl again with the perforated plastic wrap and return it to the microwave for another minute. This second heating and stirring phase is critical for cooking the glutinous rice flour thoroughly and developing its characteristic chewy, elastic texture.
Step 4: Final Microwave and Kneading
Repeat the stirring process after the second minute. The dough should now be noticeably thicker and more gelatinous. Cover it one last time and microwave for an additional 30 seconds to 1 minute, or until the dough is fully cooked and has a uniform, sticky, and slightly translucent appearance. Once done, remove the bowl from the microwave and stir it very well. At this point, the dough might be quite hot and sticky. You can allow it to cool slightly for a minute or two before attempting to handle it, but don’t let it get too cool, as it’s easier to work with when still warm.
Assembling the Mochi Ice Cream
Step 5: Dusting and Shaping the Dough
Generously dust a clean work surface with cornstarch. This is a vital step to prevent the sticky mochi dough from adhering to your hands and the surface. Turn the warm mochi dough out onto the cornstarch-dusted surface. Dust the top of the dough as well. Using a lightly cornstarch-dusted rolling pin, gently roll out the dough to about 1/4 inch thickness. You want it thin enough to wrap around the ice cream but not so thin that it tears easily. Alternatively, you can also pat and stretch the dough out with your hands, as long as they are also lightly dusted with cornstarch.
Step 6: Cutting and Wrapping the Ice Cream
Using a round cookie cutter or a glass rim (about 3-4 inches in diameter, depending on the size of your ice cream balls), cut out circles from the rolled-out mochi dough. You’ll want enough circles to cover your pre-portioned ice cream balls. Take one ice cream ball and place it in the center of a mochi circle. Gently bring the edges of the mochi dough up and around the ice cream, pinching and sealing the seams at the top. Try to create a smooth, round shape, ensuring there are no large air pockets. If the dough becomes too sticky, dust your hands and the dough with a little more cornstarch. Repeat this process for all your ice cream balls.
Step 7: Chilling the Mochi Ice Cream
Once all the mochi ice cream balls are assembled, carefully place them on a parchment-lined baking sheet or in individual cupcake liners to prevent them from sticking to each other. Transfer the baking sheet to your freezer. Allow the Mochi Ice Cream to freeze for at least 2-4 hours, or until the mochi shell is firm and the ice cream inside is completely frozen. This chilling period is crucial to set the mochi and prevent it from melting. Serve the mochi ice cream directly from the freezer.
Conclusion:
There you have it! Your guide to creating delightful Mochi Ice Cream at home. We’ve walked through the steps to achieve that perfectly chewy mochi exterior encasing your favorite ice cream flavors. This simple yet impressive dessert is sure to wow your friends and family. Don’t be afraid to experiment with different ice cream bases – from classic vanilla and rich chocolate to exotic fruit sorbets, the possibilities are endless! For a beautiful presentation, serve your Mochi Ice Cream on a bed of fresh berries or with a sprinkle of toasted coconut. You can also try rolling the mochi dough in finely chopped nuts or colorful sprinkles before wrapping the ice cream for an extra touch of flair. We encourage you to dive in and enjoy the process of making this beloved Japanese treat. Happy mochi making!
Frequently Asked Questions about Mochi Ice Cream:
Q1: Can I make Mochi Ice Cream without a stand mixer?
Absolutely! While a stand mixer makes kneading the mochi dough easier, it can certainly be done by hand. You’ll need to knead for a good 8-10 minutes until the dough is smooth and elastic. It’s a great arm workout!
Q2: How do I prevent the mochi from sticking to my hands and surfaces?
The key is to generously dust your work surface and hands with potato starch (or cornstarch). Keep extra starch on hand to reapply as needed while you’re shaping and filling the mochi. This will make the process much less sticky and more enjoyable.
Q3: Can I store homemade Mochi Ice Cream for later?
Yes, you can! Once your Mochi Ice Cream is assembled, wrap each piece individually in plastic wrap and then place them in an airtight container or freezer bag. They are best enjoyed within 1-2 weeks for optimal texture and flavor.
Easy Mochi Ice Cream Recipe- Sweet Treat
A simple and delightful recipe for homemade mochi ice cream, featuring a chewy mochi shell encasing your favorite ice cream flavors.
Ingredients
-
1 cup glutinous rice flour (sweet rice flour)
-
1/4 cup granulated sugar
-
2 tablespoons powdered sugar
-
1 cup water
-
Cornstarch, for dusting
-
Your favorite ice cream, pre-portioned into small balls
Instructions
-
Step 1
In a medium-sized, microwave-safe bowl, whisk together the glutinous rice flour and granulated sugar. Ensure thorough mixing for even distribution. -
Step 2
Gradually pour in water while whisking continuously to create a smooth, lump-free batter. Cover the bowl with plastic wrap, poking a few small holes for steam escape, and microwave on high power for 1 minute. -
Step 3
Carefully remove the hot bowl, uncover, and stir the dough vigorously with a damp spatula. Cover again with perforated plastic wrap and microwave for another minute. -
Step 4
Repeat the stirring process. Cover and microwave for an additional 30 seconds to 1 minute until the dough is fully cooked, uniform, sticky, and slightly translucent. Allow to cool slightly if too hot to handle. -
Step 5
Generously dust a clean work surface with cornstarch. Turn the warm mochi dough onto the surface, dust the top, and gently roll or pat out to about 1/4 inch thickness. -
Step 6
Cut out circles from the dough using a cookie cutter or glass rim. Place an ice cream ball in the center of a mochi circle, bring the edges up to enclose the ice cream, and pinch to seal. -
Step 7
Place the assembled mochi ice cream balls on a parchment-lined baking sheet. Freeze for at least 2-4 hours, or until firm, then serve directly from the freezer.
Important Information
Nutrition Facts (Per Serving)
It is important to consider this information as approximate and not to use it as definitive health advice.
Allergy Information
Please check ingredients for potential allergens and consult a health professional if in doubt.